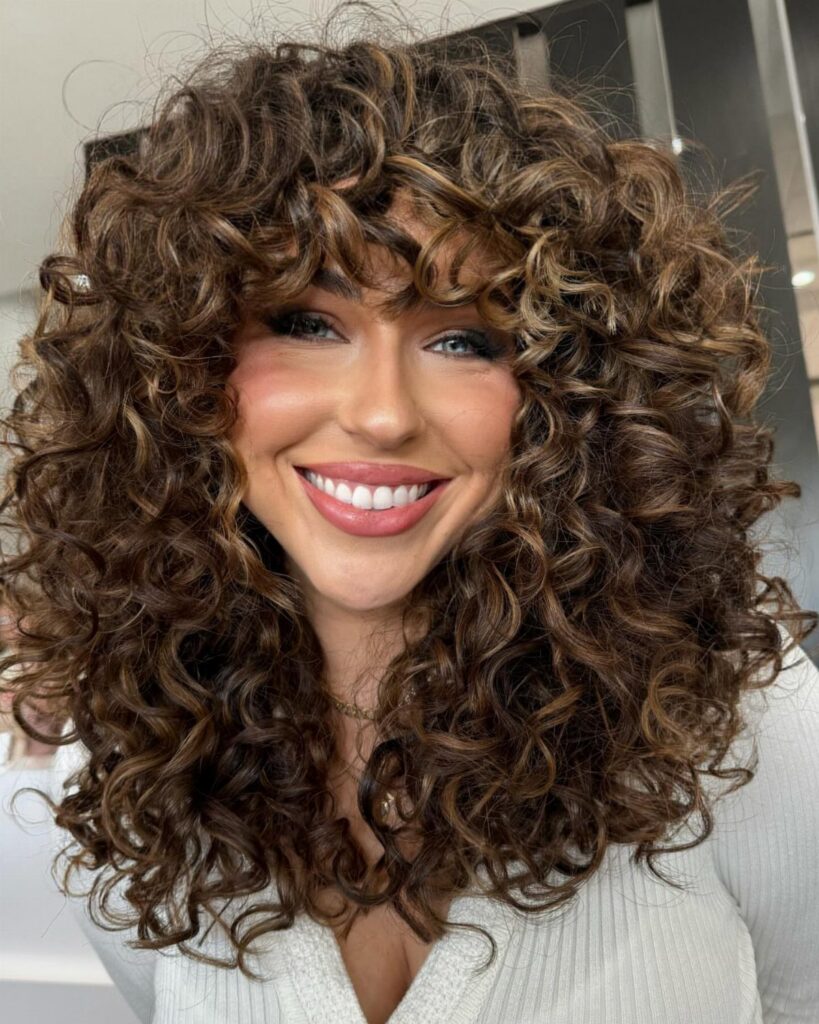
Layers can start anywhere from chin level to a few inches above the ends, and the shortest ones decide whether the cut frames your face, adds volume at the crown or simply removes weight from the bottom.
Face shape matters less than texture and density: thick hair needs aggressive layering to make a difference, fine hair loses volume at the ends if the layers are too choppy, and wavy hair puffs out when layers start too high.
U-shaped cuts keep length at the back while tapering up toward the sides, butterfly layers concentrate volume through the crown, and long shags run choppy texture from the roots down.
1. Face-framing Layers
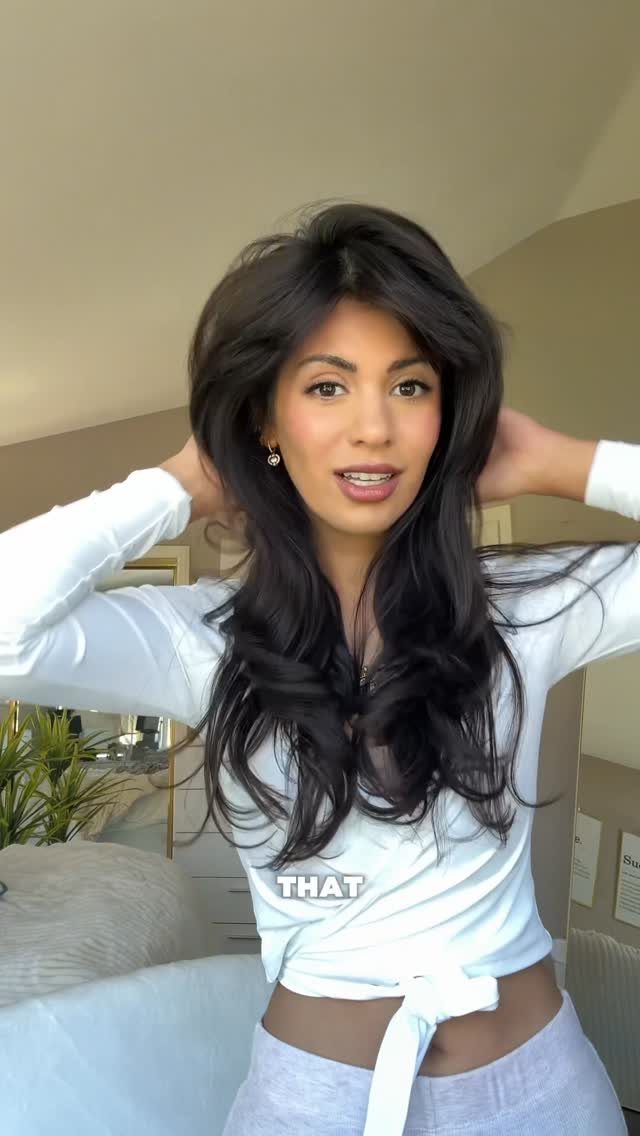
The shortest pieces frame your face at the cheekbone or jawline, then blend down into longer lengths. The difference in length is what frames your face and draws attention upward.
Ask for face-framing layers to begin wherever you want emphasis, then let them blend into the rest of your hair. If you want more volume around your face, the shortest pieces can start higher, around eyebrow or cheekbone level.
These layers work on most textures.
Straight hair shows the contrast clearly, while wavy or curly hair softens the transition. You can style them with a round brush or let them air-dry.
Keep the front trimmed regularly so the frame stays clean.
2. Long Layers
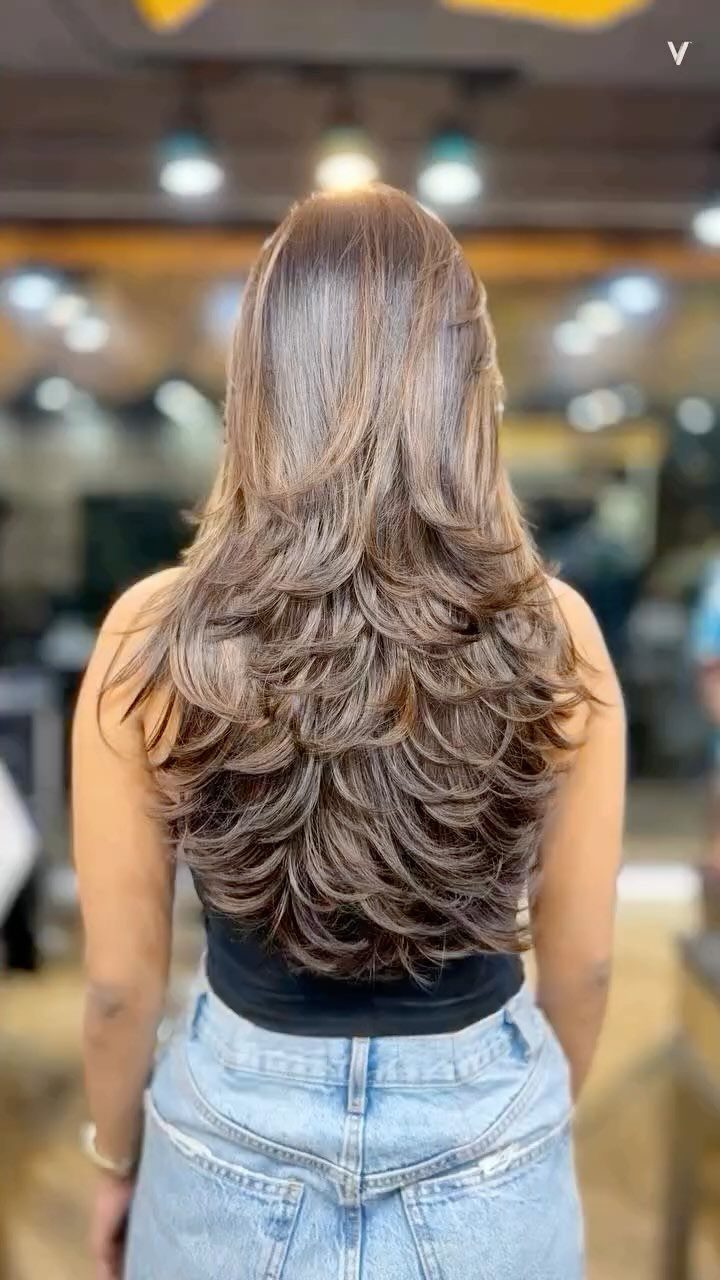
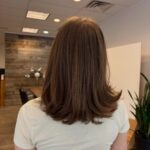
Layers are cut starting a few inches below your shoulders and blended down to the ends. You keep almost all the length and lose weight from the bottom without a blunt line.
This cut suits thick or heavy hair that feels flat or weighs itself down. The layering removes enough weight that your hair moves more easily and holds a curl or wave longer.
If you want to protect length, tell your stylist the shortest layer should sit below the collarbone. On finer hair, long layers can add the illusion of fullness without thinning out the ends too much.
3. Softly Layered Curls
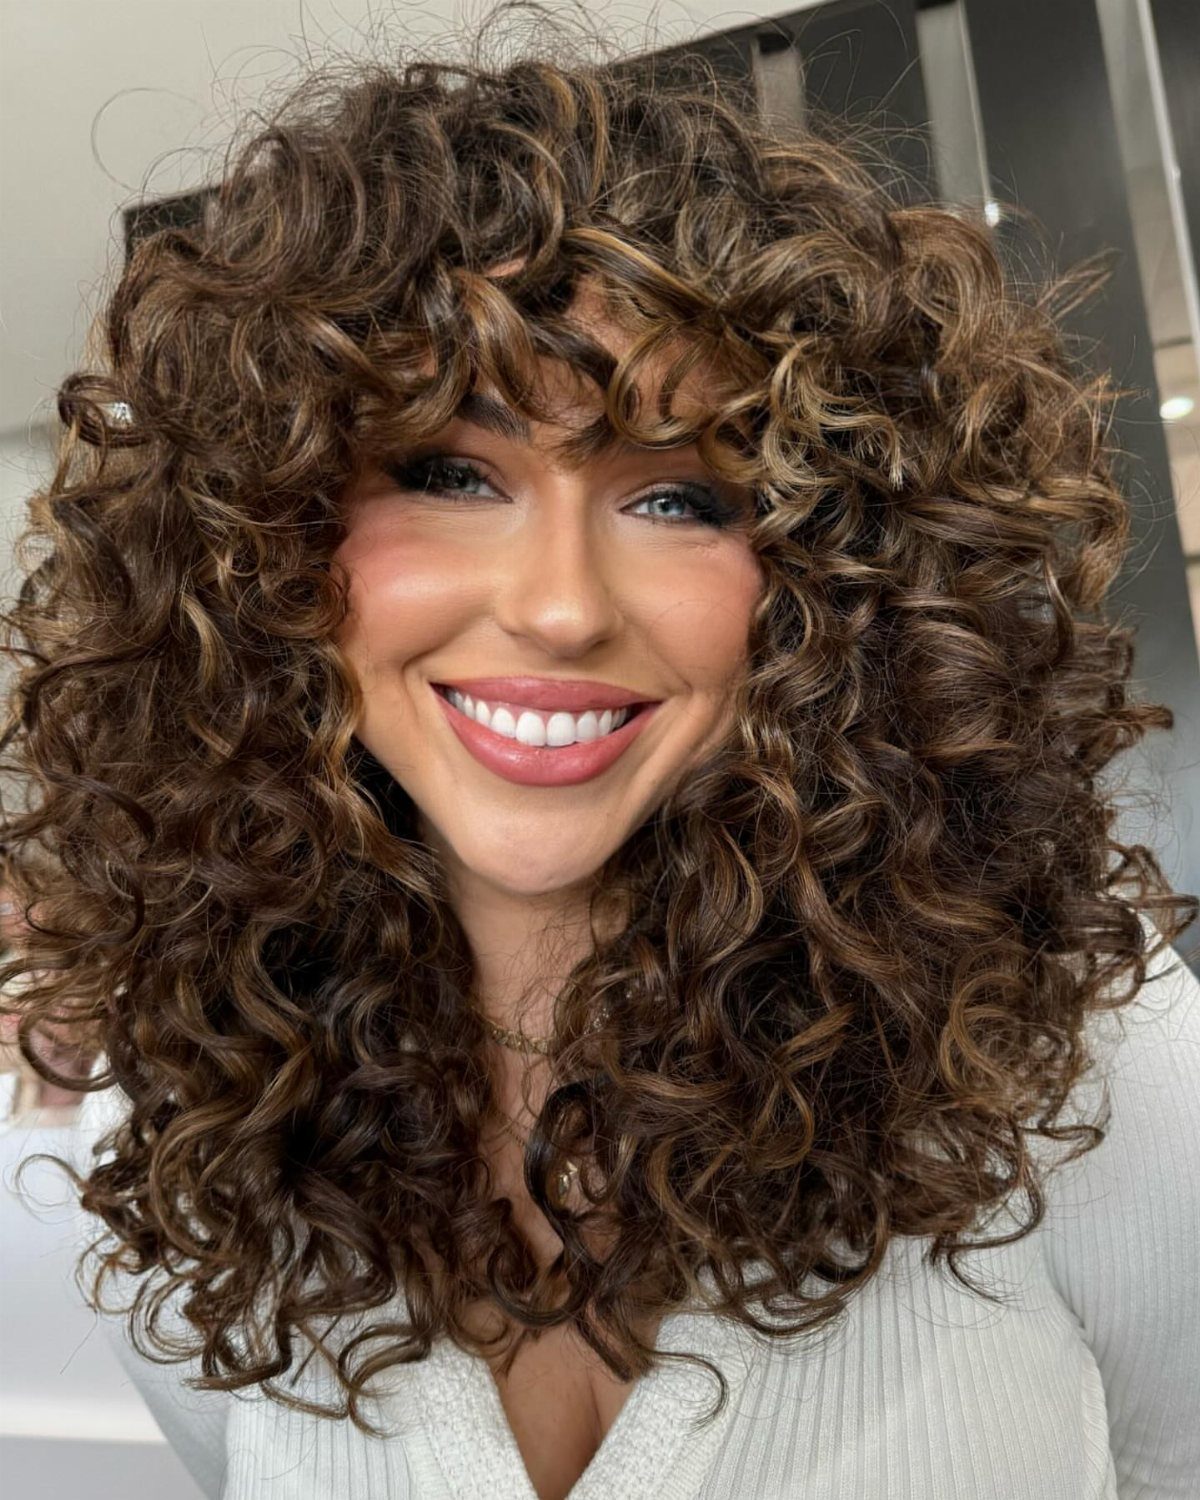
Light layering removes bulk from the interior without shortening the perimeter much. Curls sit differently when some hair is lighter than the rest, so each curl can coil without getting dragged down by the weight of the whole head.
Layered curls show more definition because they are not all stacked on top of each other. The top layers spring up and the longest ones hang lower, which gives you width and length at the same time.
Ask for long layers if you want to keep most of your length, or shorter layers if you need more volume at the crown.
4. Layered Loose Waves
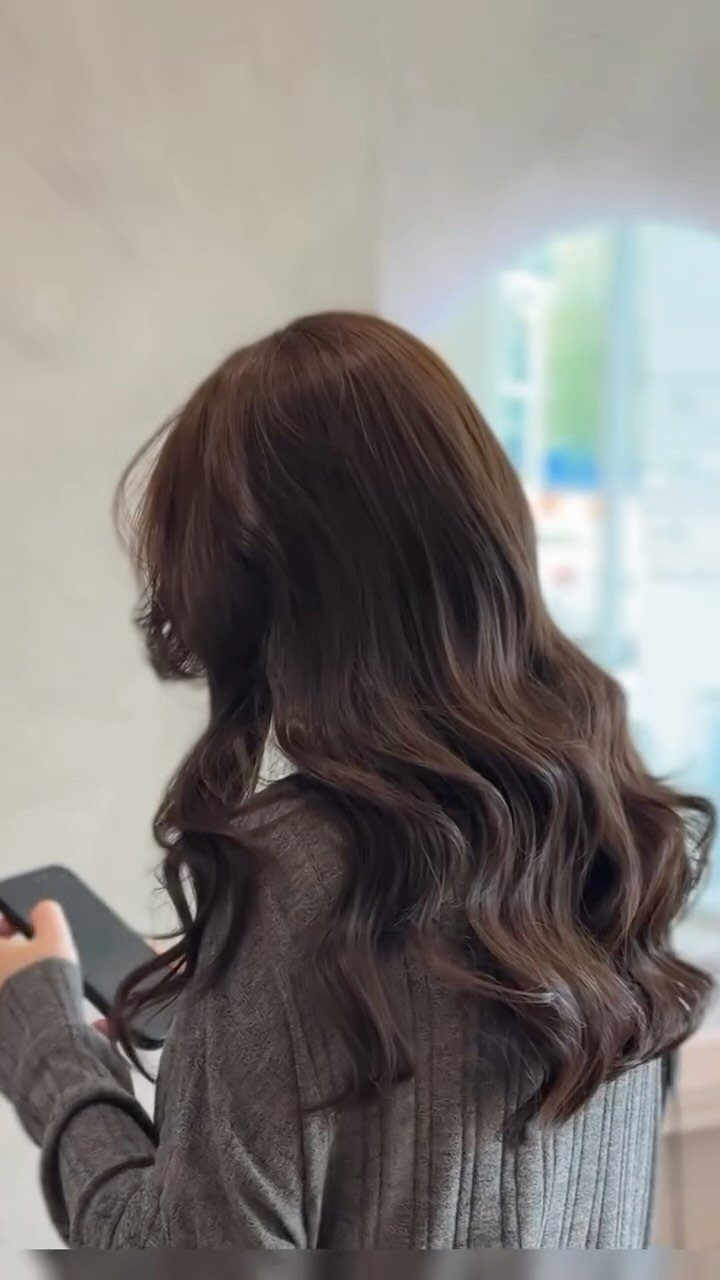
Layers cut through long hair give waves somewhere to break and move instead of hanging straight down. The shortest layers begin a few inches from the ends or higher, depending on how much movement you want.
Wavy hair shows off layering more than straight hair does because the waves catch light and shift as you move.
If your hair is naturally straight, you can add waves with a curling iron or overnight braids, and the layers will hold the shape longer.
This works on most hair types. Thick hair benefits from the weight removal, and fine hair gains the appearance of more body.
5. Straight Layered Hair
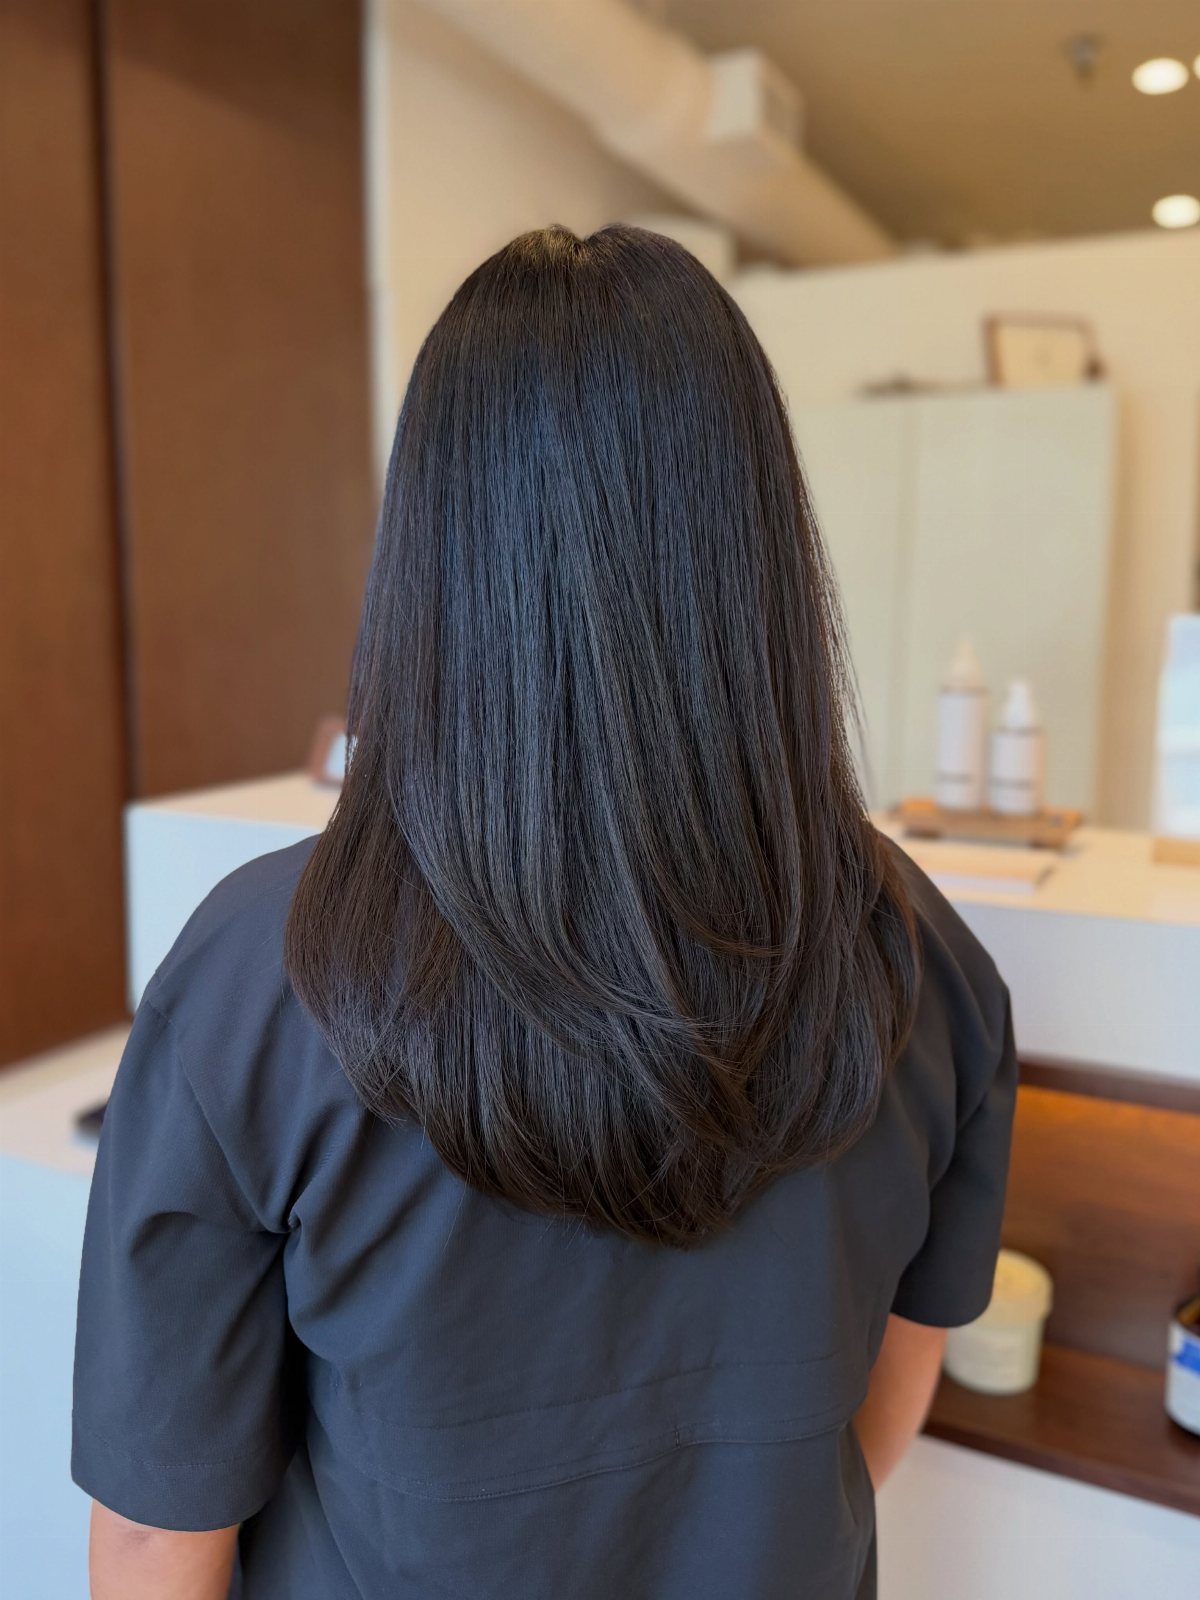
Long straight hair with layers cut through it has visible separation at the ends and more lift at the roots. Layers break up the solid line that one-length hair creates, so the cut does not look as heavy or severe.
Removing interior weight lets the top layers lift away from your head, and the ends move more freely.
Ask for blended layers if you want subtle movement, or more distinct layers if you need to remove significant weight.
Straight hair shows every cut, so precision matters. A trim every 8 to 10 weeks keeps the ends even.
6. Butterfly Layers
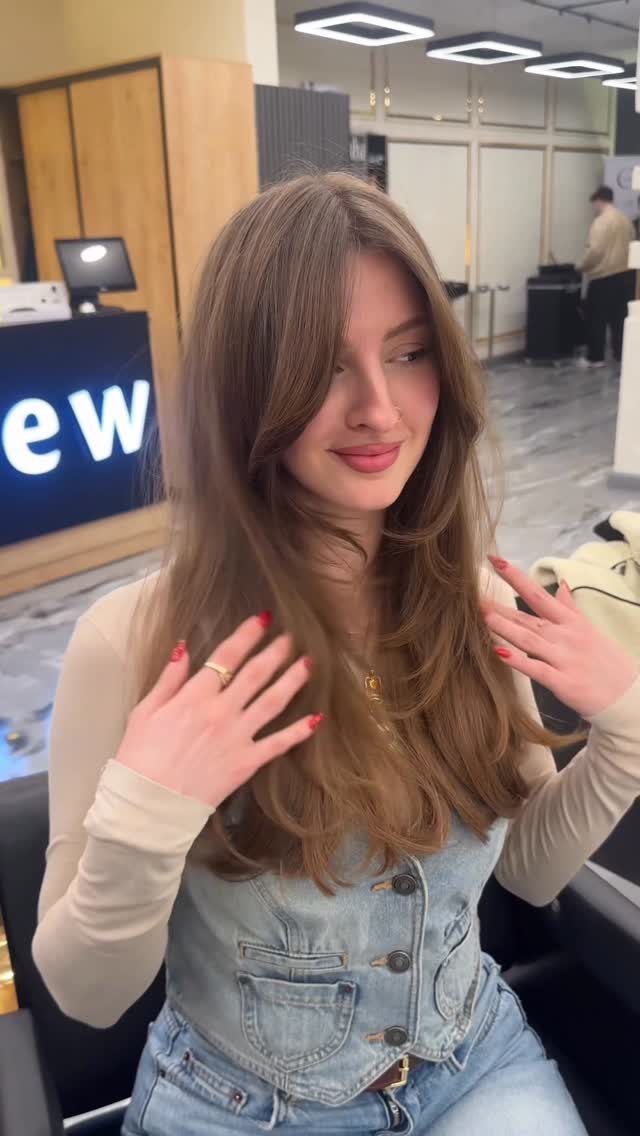
Layers are cut shorter through the crown and mid-lengths, then taper out to longer ends. The volume sits higher on your head, and the longest pieces still reach your waist or lower.
This cut suits fine or flat hair that needs lift without losing length. The shorter upper layers create fullness at the top, and the longer lower layers keep the overall silhouette long.
Ask for butterfly layers if you want dramatic volume. The contrast between short and long layers is more pronounced than in a standard long-layered cut.
7. Wispy Layers
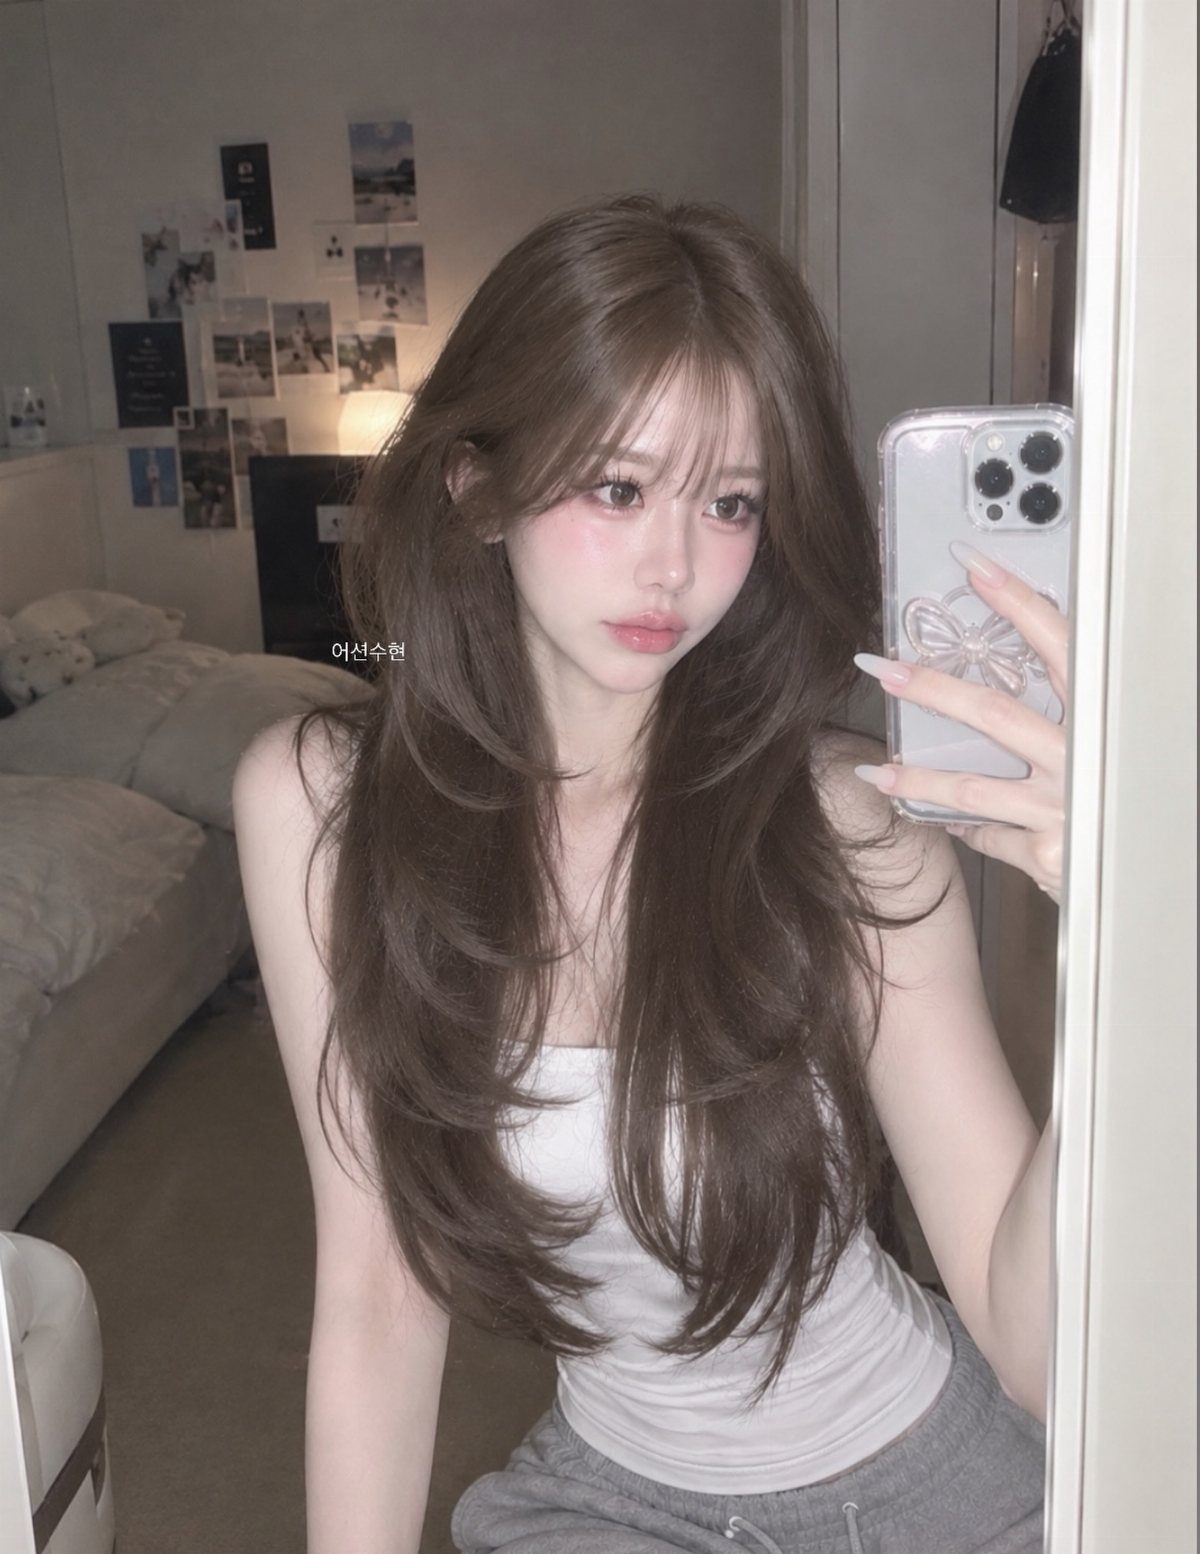
Ends are thinned and textured so they taper instead of sitting blunt. The result is soft, airy movement that reads lighter than a standard layered cut.
Point-cutting or razor work at the ends creates the feathered effect. The layers themselves can be long and subtle or start higher for more separation.
Fine hair takes to this cut well because the texture adds visual fullness without requiring actual density. Thick hair works too, but you will need regular trims to keep the ends from looking ragged as they grow out.
8. U-shaped Layers
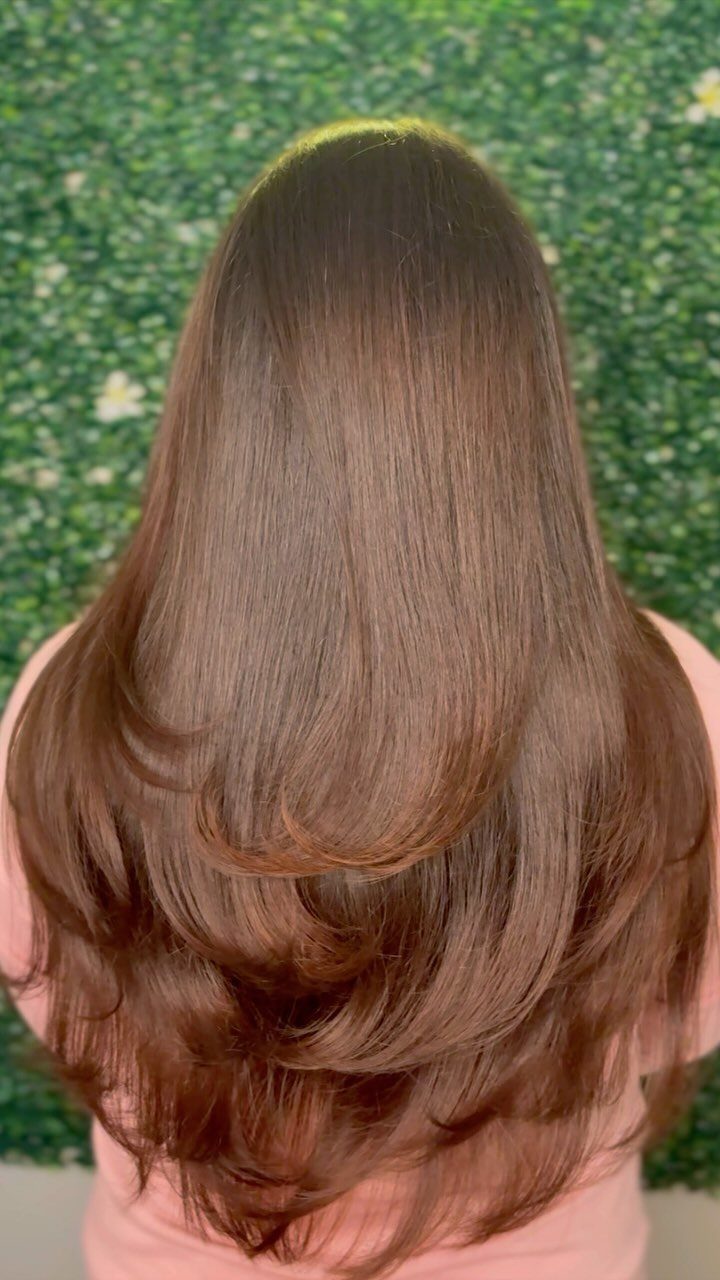
The perimeter curves gently at the back instead of cutting straight across. Layers blend through the curve so the longest hair sits in the center and tapers up toward the sides.
This shape keeps length at the back while removing weight from the sides, so thick hair does not feel as heavy. The curve also shows off long hair worn down better than a straight-across cut does.
Ask for a soft U-shape if you want the curve to be subtle, or a deeper U if you need more length contrast between the center back and the sides.
9. Choppy Layers

Layers are cut with a razor or point-cut with shears so the ends separate into distinct pieces instead of blending smoothly. The texture is visible and deliberate.
This cut removes weight and adds movement at the same time. Thick hair benefits from the thinning, and the piecey finish gives straight or wavy hair more definition.
Choppy layers need more upkeep than blended ones because the textured ends are more prone to split. You will need regular trims if you want to keep the effect looking intentional.
10. Swoopy Layers
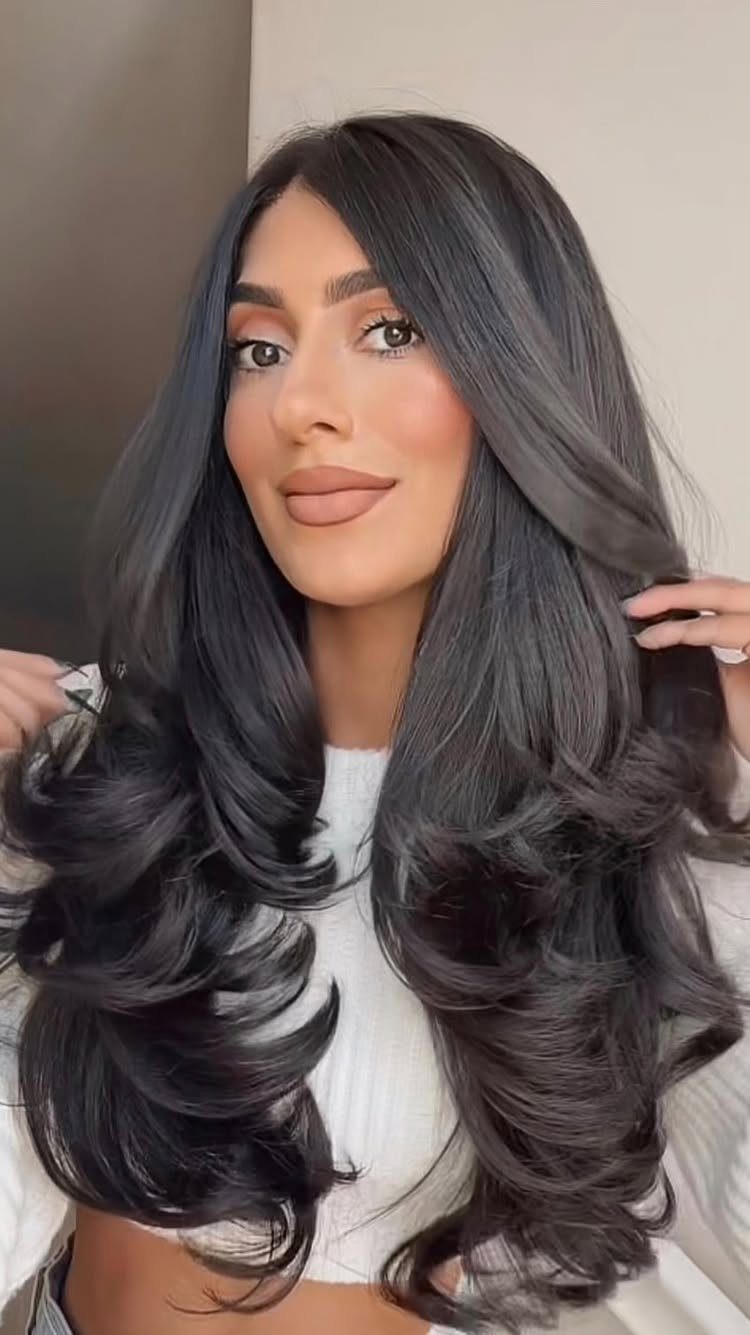
Layers are cut in long, curved sections that arc around your face and through the lengths. The movement is smooth and deliberate, not choppy.
This cut works best when you style it with a round brush or curling iron to emphasize the curves.
The layers themselves create the path for the hair to follow, so you are working with the cut rather than forcing the shape.
Thick or medium-density hair holds the swoops best. Fine hair can look limp unless you add volume at the roots while blow-drying.
11. Volume-boosting Layers
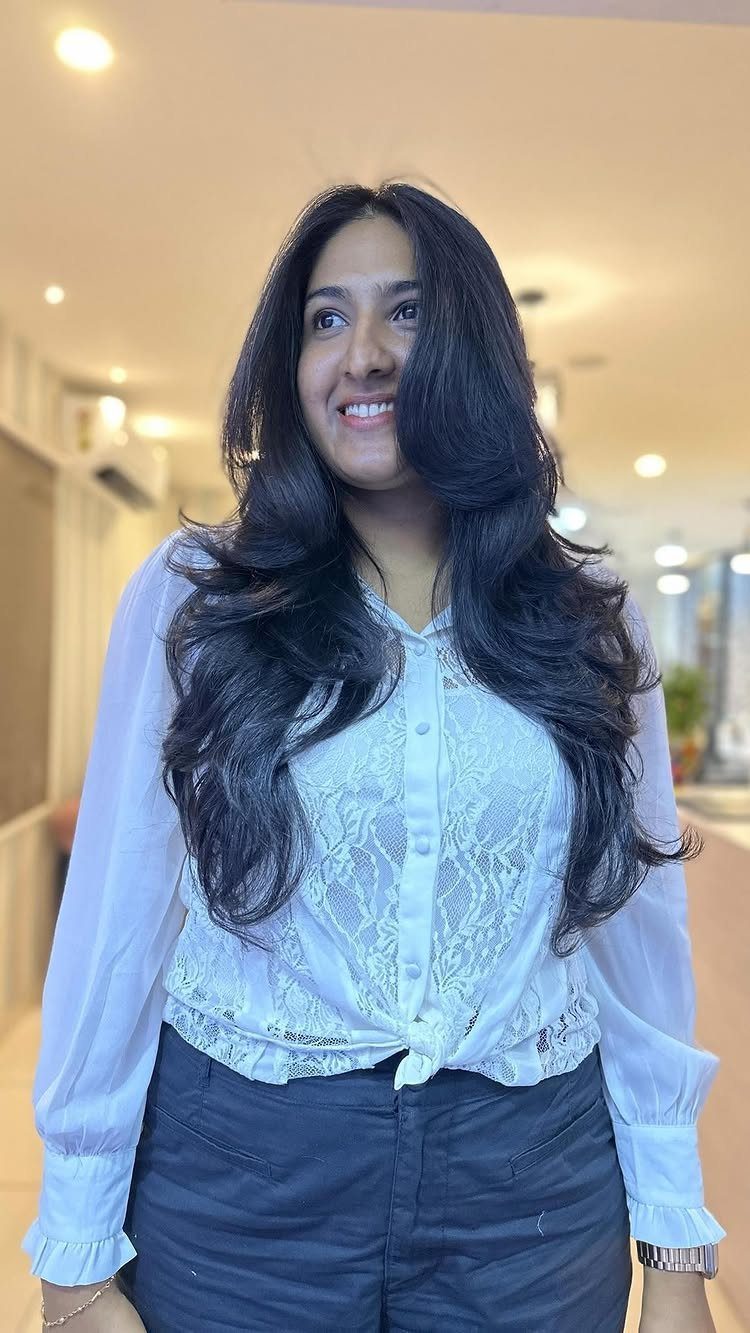
Shorter layers are concentrated where you need lift, usually through the crown and around the face, while the lengths stay long. The contrast between the 2 creates height without sacrificing overall length.
Ask for layering to start at the cheekbone or higher if you want volume around your face, or through the crown if your hair sits flat at the top. The back can stay longer and more blended.
Fine or flat hair gets the most benefit. Thick hair can end up looking bulky if too much layering is added through the top.
You can add just a few layers to the bottom of your hair for subtle dimension or, for a more dramatic look, extend the layers up the entire length of your hair.
12. Long Shag
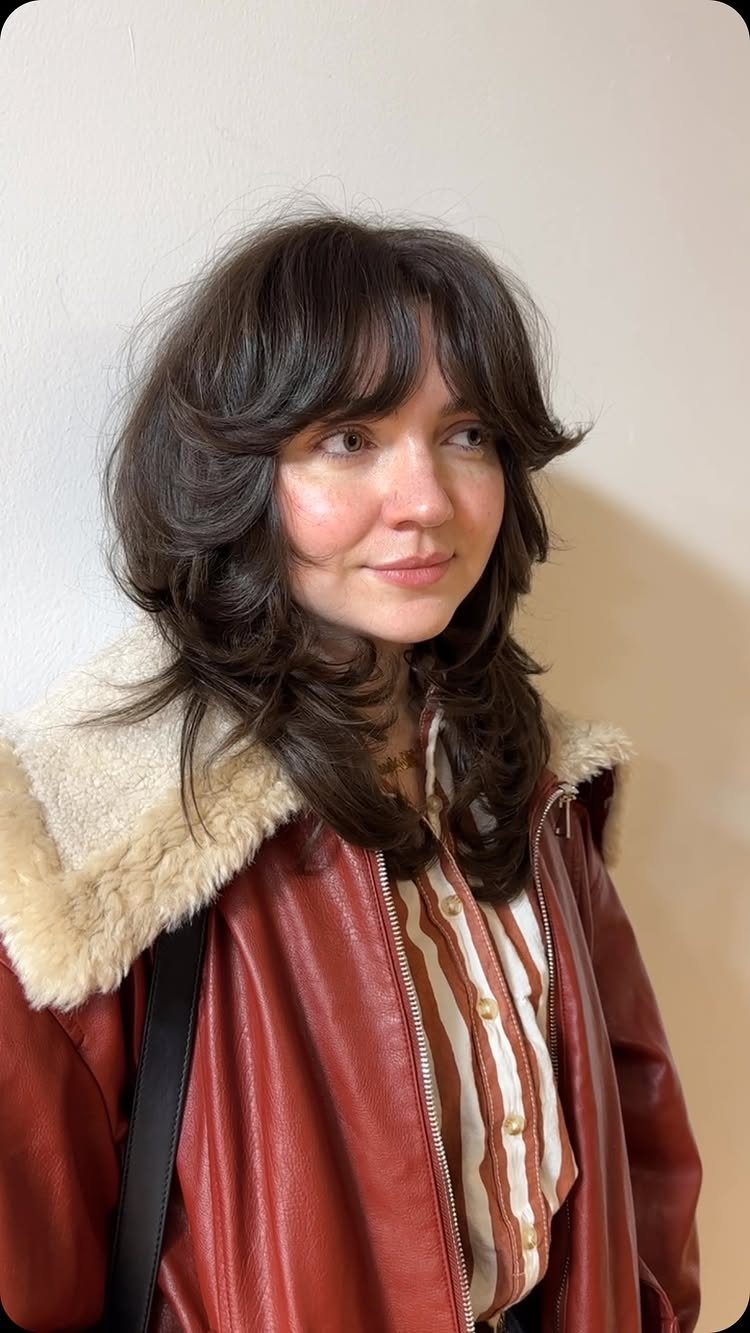
Choppy, disconnected layers run through the entire length, from the crown down to the ends. The texture is rougher and more broken up than a standard layered cut, and the overall effect reads edgy rather than polished.
A razor is often used to create the shaggy, piecey finish. You can wear it straight for maximum texture or add waves for a softer look.
This cut suits hair with enough density to handle aggressive layering.
Fine hair can lose volume at the bottom and look wispy rather than full. Plan on styling time if you want the shag to look deliberate rather than messy.
13. Layered Fringe
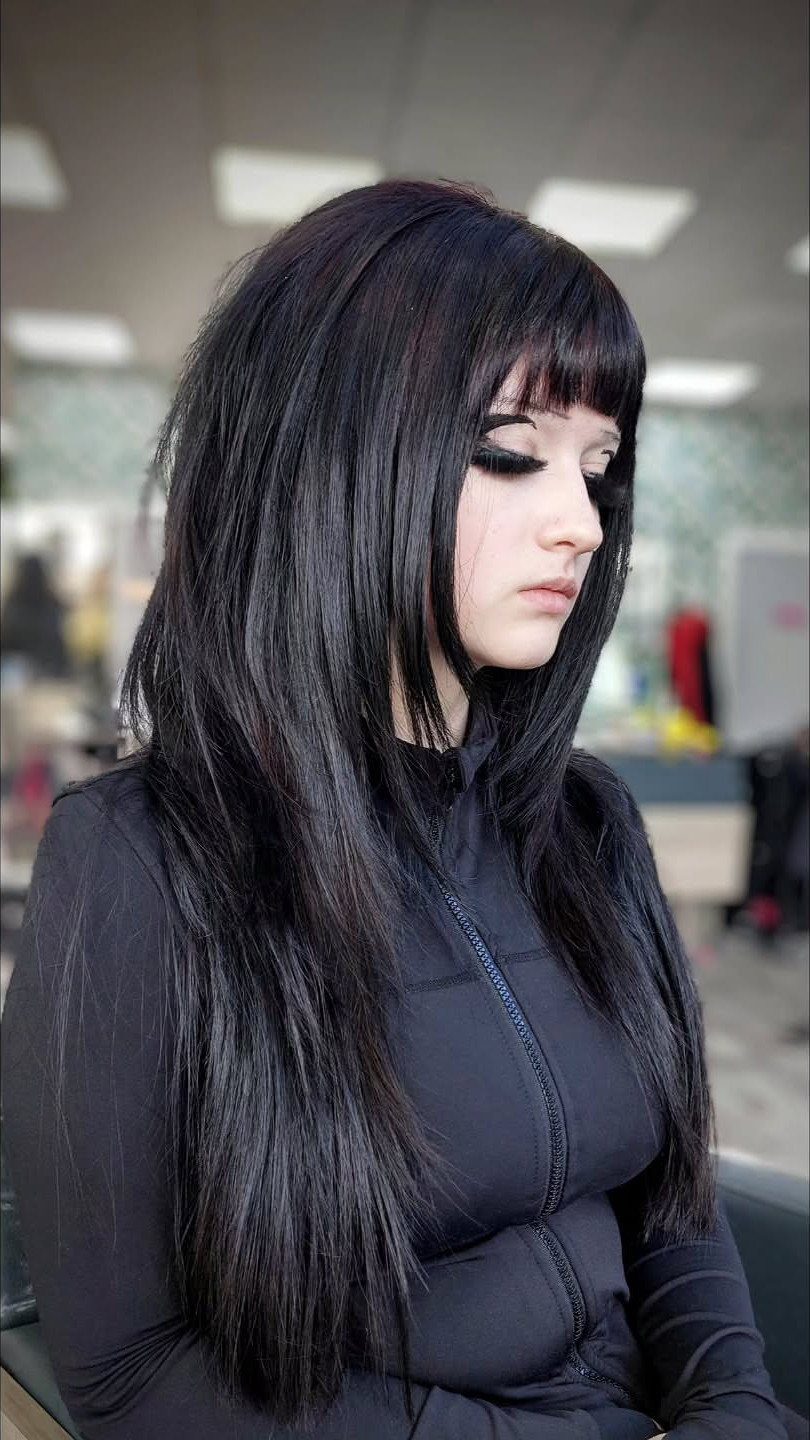
Bangs sit just above your eyebrows and run straight across, while the rest of your hair is layered through the lengths.
The fringe adds structure to your face, and the layers behind it keep the overall shape from looking too heavy.
If your hair is thick, the layers will remove weight from the lengths without thinning out the fringe itself. Fine hair can carry this look if you keep the bangs dense enough to sit flat.
14. Thick-hair Layers
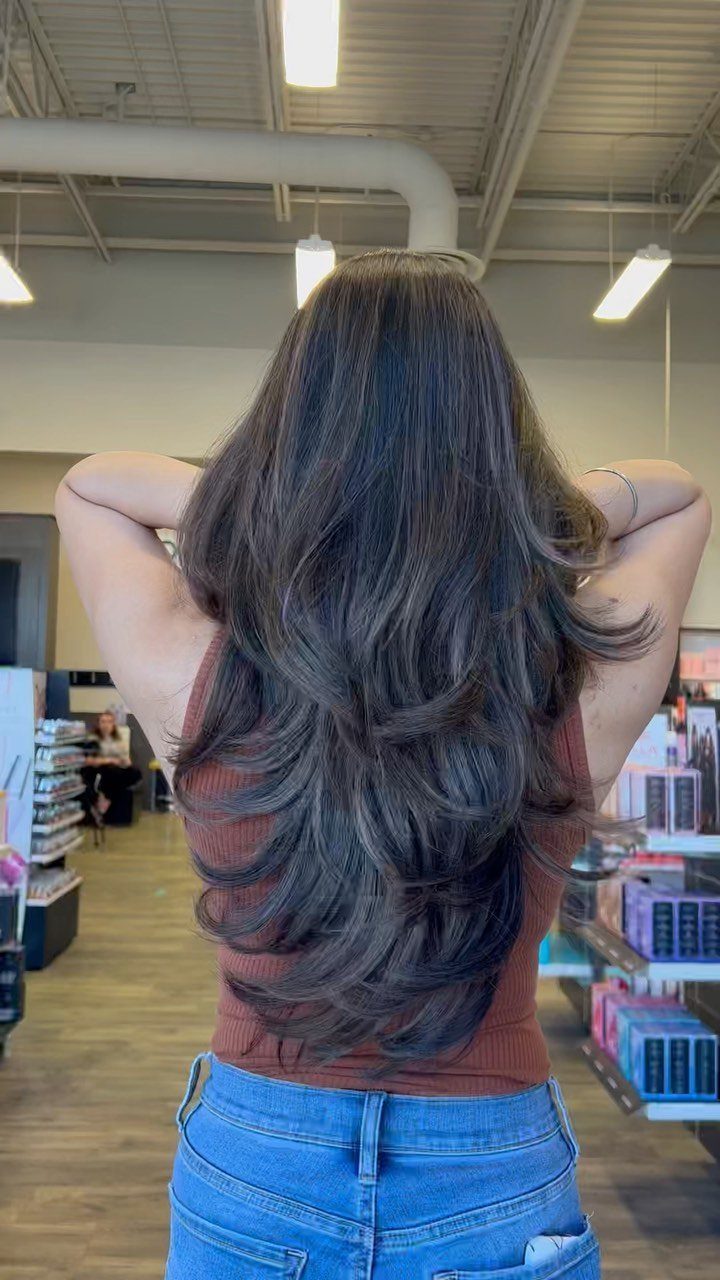
Thick hair holds more weight than fine hair does, so the layering needs to be aggressive enough to make a difference.
You keep weight at the shoulders and let the ends swing. If you want your hair to feel lighter but still look dense, ask for long layers that start low and blend gradually.
A smoothing cream and nourishing oil help control the weight during a blowout.
15. Side-swept Layers
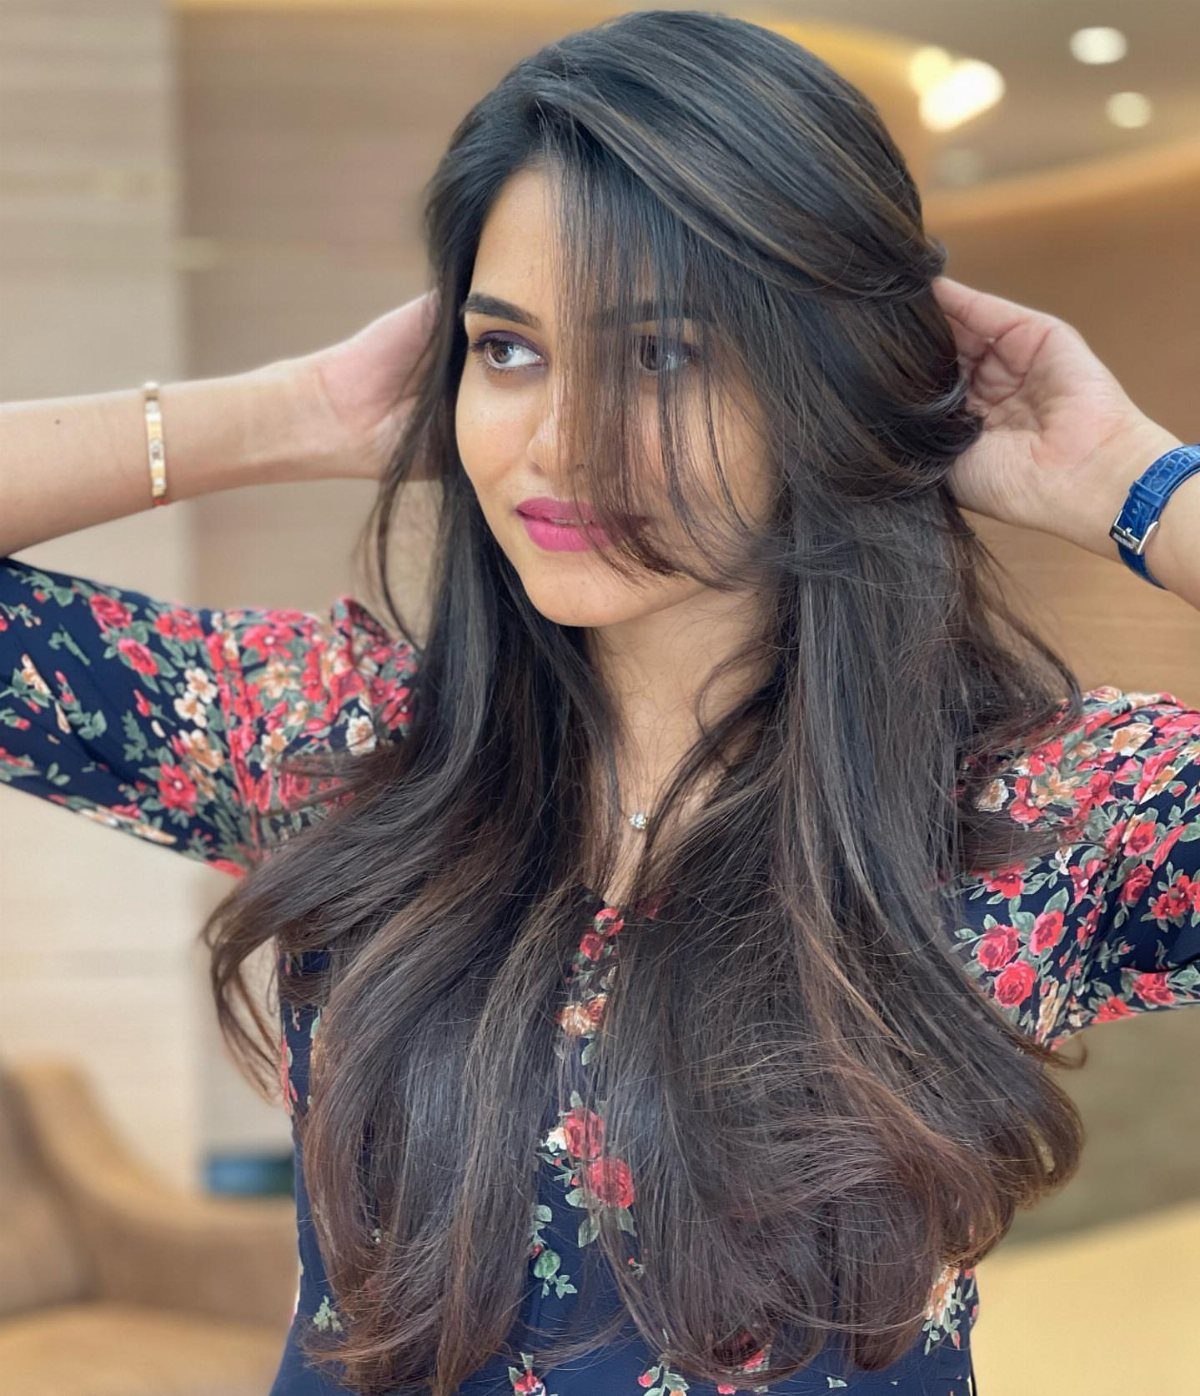
Layers fall past your shoulders and sweep to one side for an asymmetric shape. The part sits off-center, and the longer side drapes across your face or over one shoulder.
This works on wavy or straight hair.
The side-swept look holds better on medium to thick hair. Fine hair may need volumizing spray at the roots to keep the sweep from falling flat.
16. Middle-part Layers
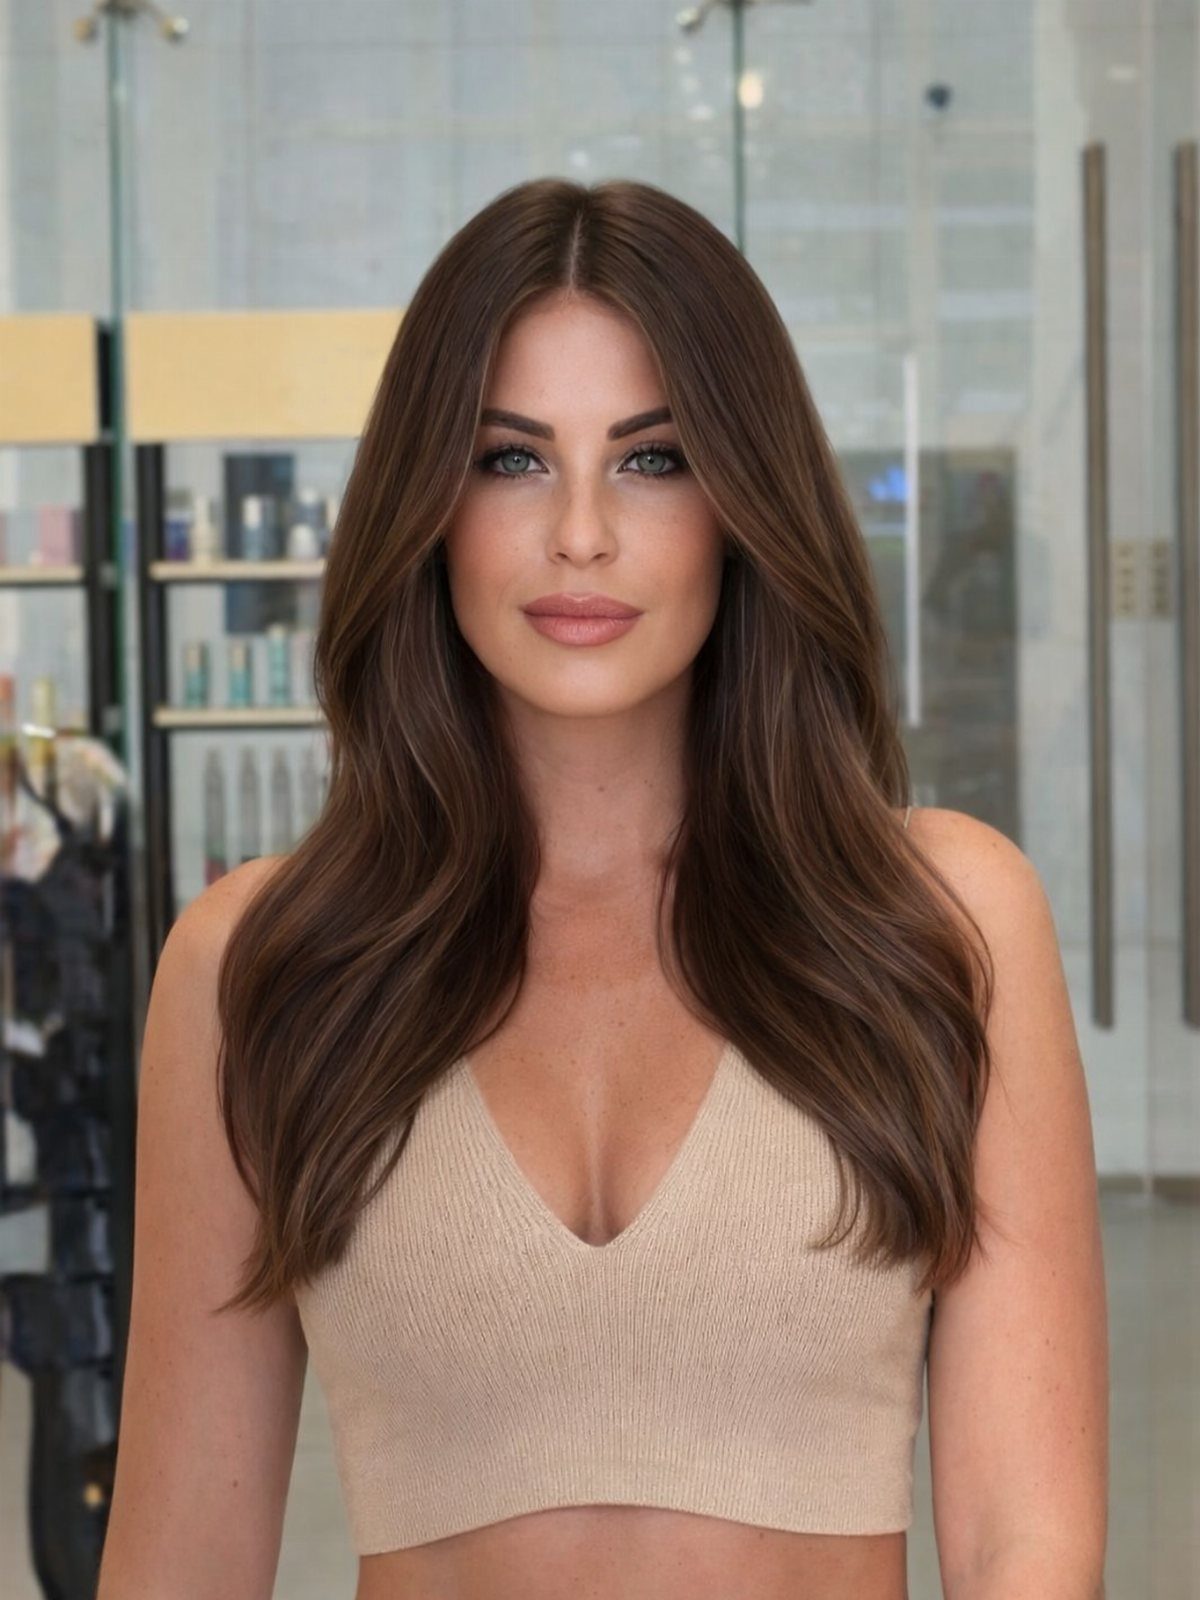
A center part divides your hair evenly, and layers begin around collarbone level or lower. The symmetry draws attention to the center of your face, so this cut suits balanced or oval face shapes best.
Layers on either side of the part fall at the same length, which gives the cut a clean, deliberate look. If you want more volume, ask for shorter layers through the crown.
Middle-parted hair shows root growth more obviously than a side part does, so touch-ups matter if you color your hair.
17. Flippy Layers
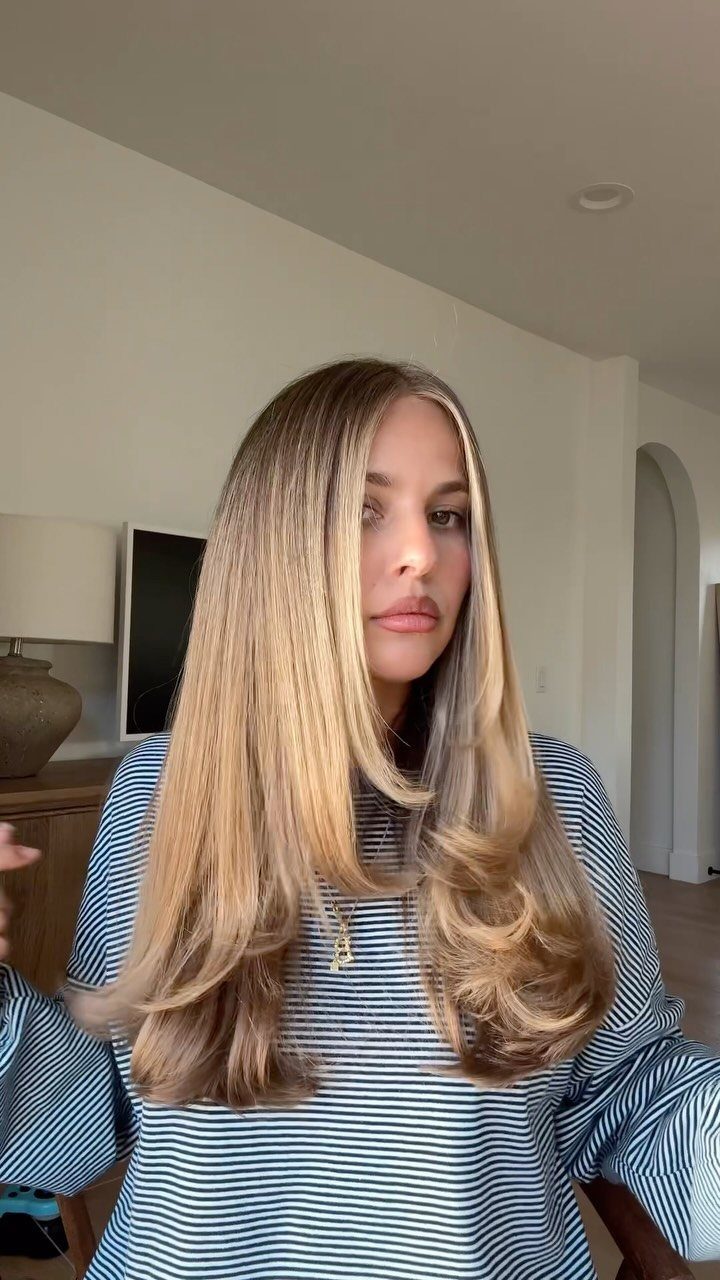
Layers are styled to turn outward at the ends instead of curling under. Tension from a round brush lifts the hair at the root while you direct heat down the shaft, and the ends flip out as they dry.
The movement adds volume without requiring much length contrast. You can flip just the bottom few inches or style the layers higher up for more bounce.
This look needs restyling after you wash your hair. If you let it air-dry, the ends will fall straight or curl under, and the flippy shape disappears.
18. Highlighted Layers
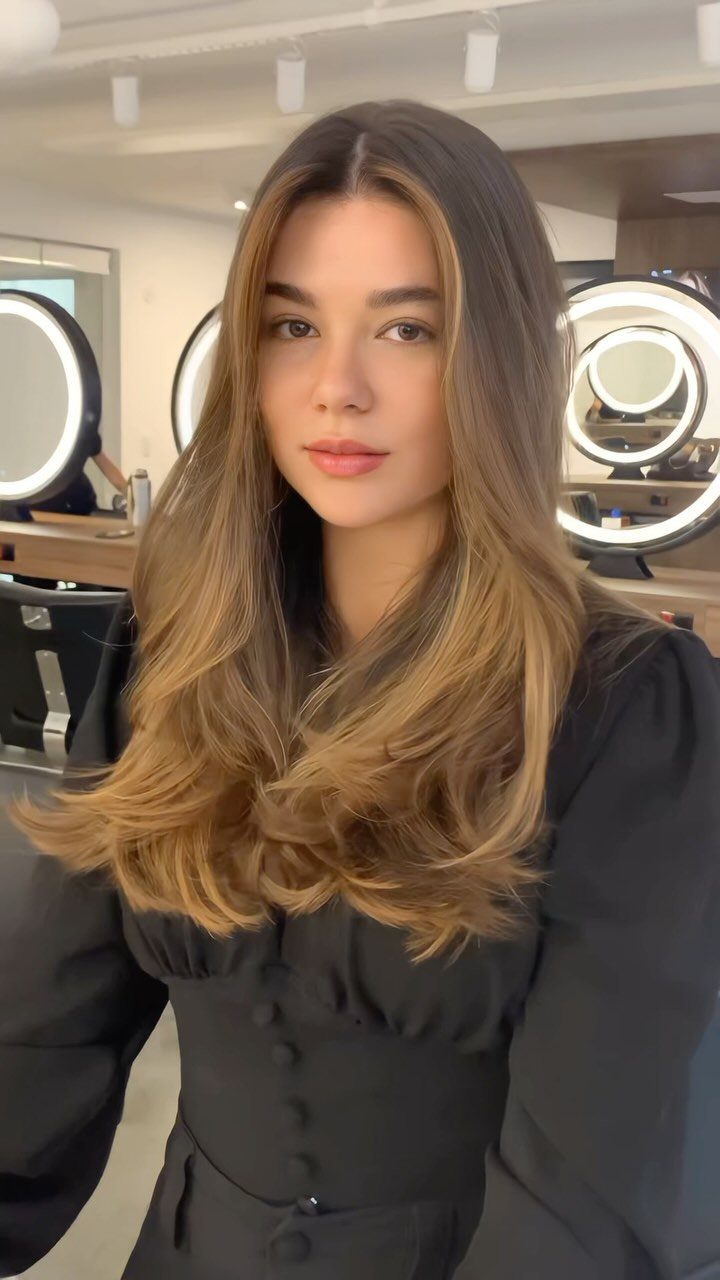
Color placed through the layers picks up light each time the hair shifts. The color contrast makes the layers more visible, so even subtle layering reads as dimensional.
Face-framing highlights placed near the shortest layers draw attention upward, while balayage through the lengths emphasizes the movement of the cut itself.
Refresh the color when you see the contrast fade or roots show through. If you are growing out highlights, the layered cut helps blend the transition because the varying lengths break up the line between old and new growth.
19. Balayage Layers
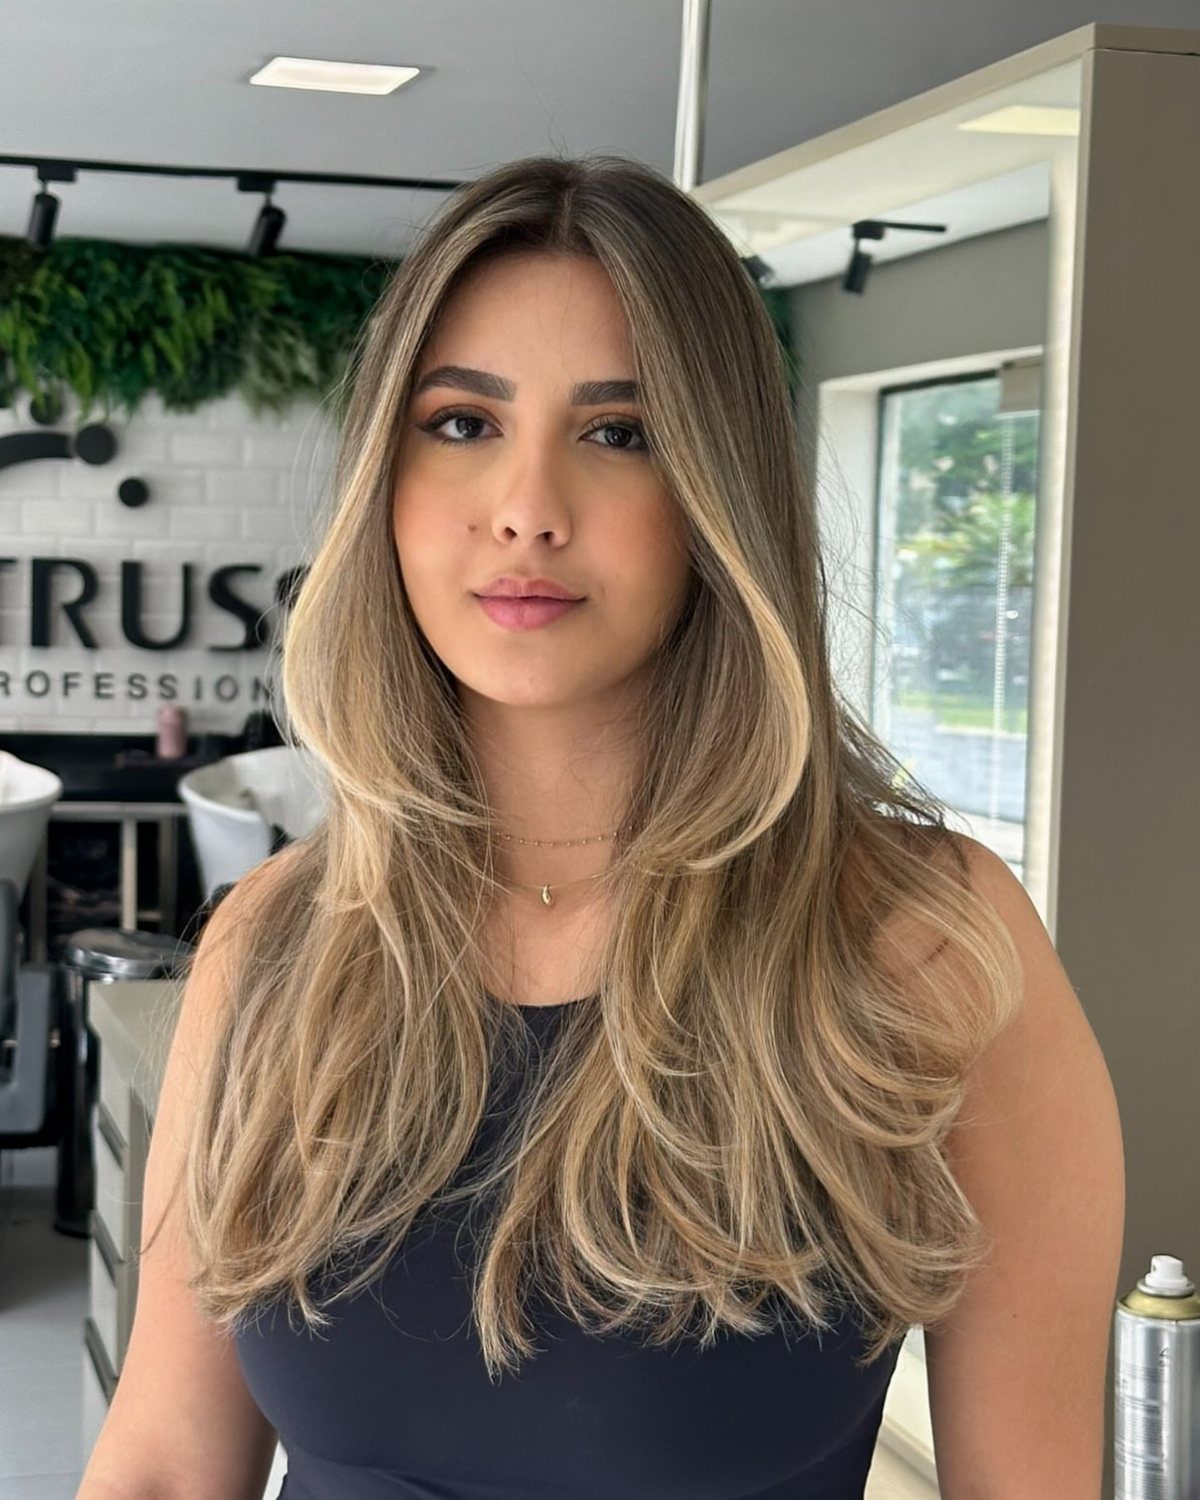
Balayage places lighter color where each layer catches the light, darker close to the scalp. The gradual shift makes the movement of the cut more obvious because each layer catches a different tone.
Balayage suits layered hair better than all-over color does. The layers separate as you move, and the color shifts with them.
Ask for the lightest pieces near your face if you want the layering to frame your features. If the color fades or the contrast dulls, a toner refresh between full appointments keeps the dimension looking intentional.
20. Soft Long Layers
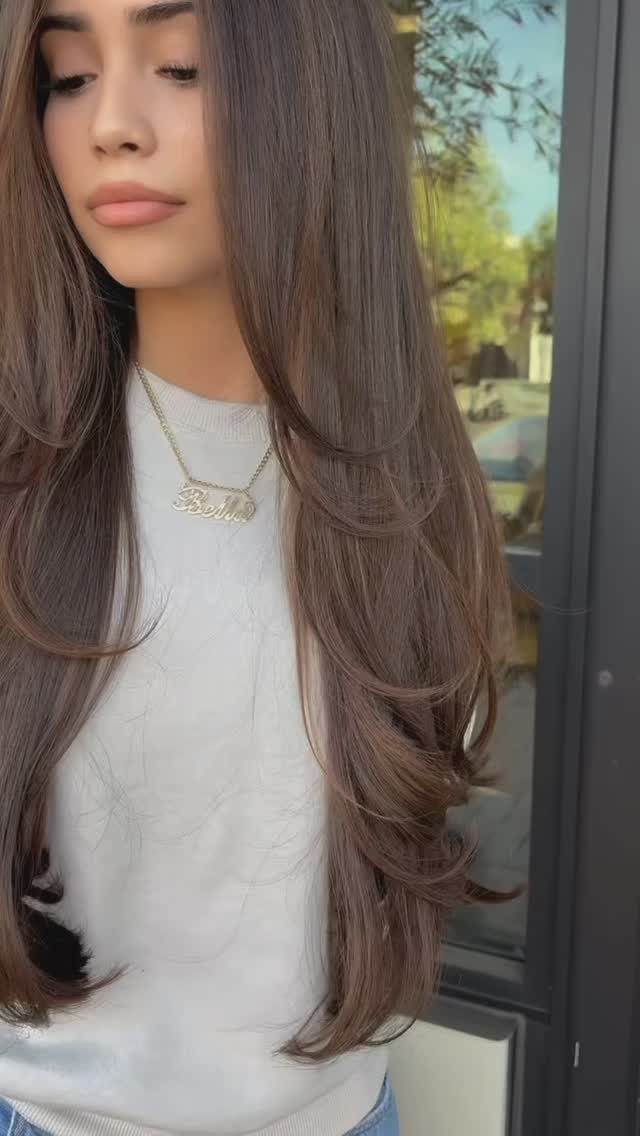
The layering here removes just enough weight to let the hair move without creating visible separation at the ends. The shortest pieces sit only a few inches above the longest ones, so the cut reads as one continuous shape.
Most of the weight stays on, length barely changes.
If your hair is thick, soft layers take out interior bulk without thinning the perimeter. Fine hair stays dense at the bottom while gaining a little lift at the crown.
Ask for blended long layers if you want the cut to feel lighter but still look full.
21. Chin-grazing Layers
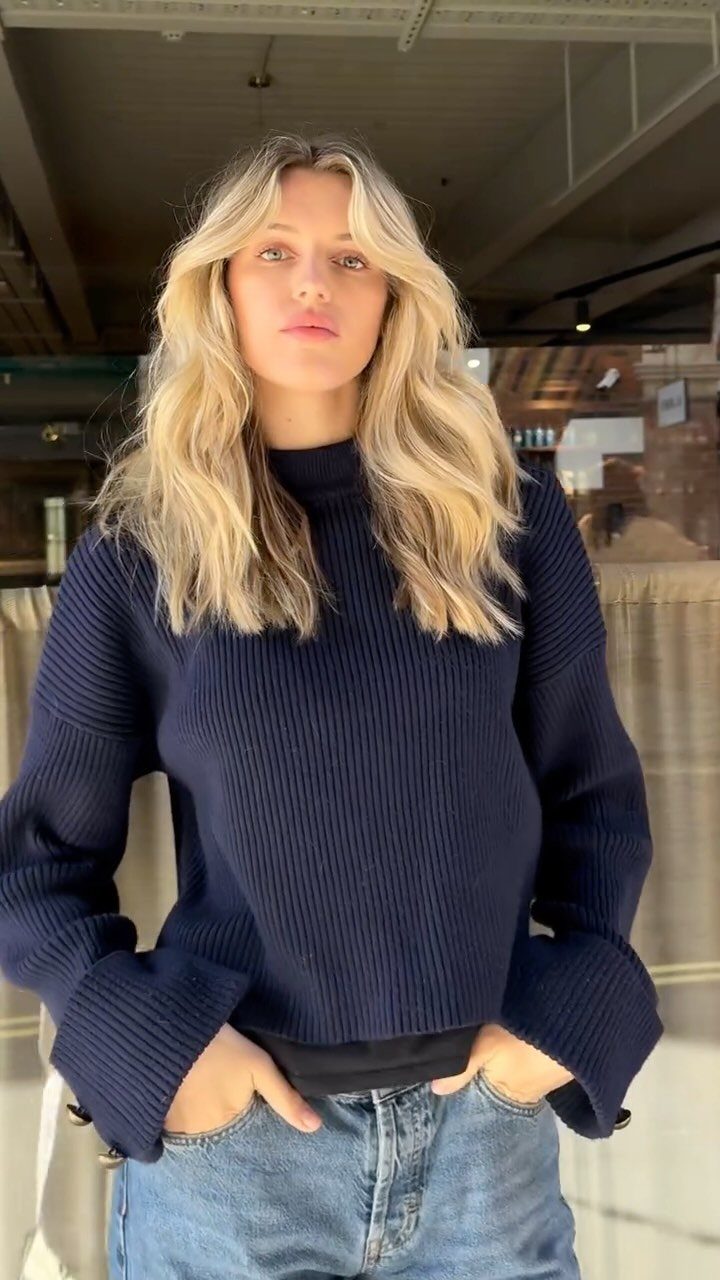
Layers start at chin level and grow longer as they move back, so the shortest pieces sit near your face and the rest falls past your shoulders. The contrast between the 2 lengths draws attention to your jawline and cheekbones.
This cut works on straight or wavy hair. If your hair has natural wave, the shorter pieces will curve around your face and move more freely than the longer sections.
If you skip too long, the face-framing effect fades and the cut starts to look like one length again.
22. Bouncy Layers
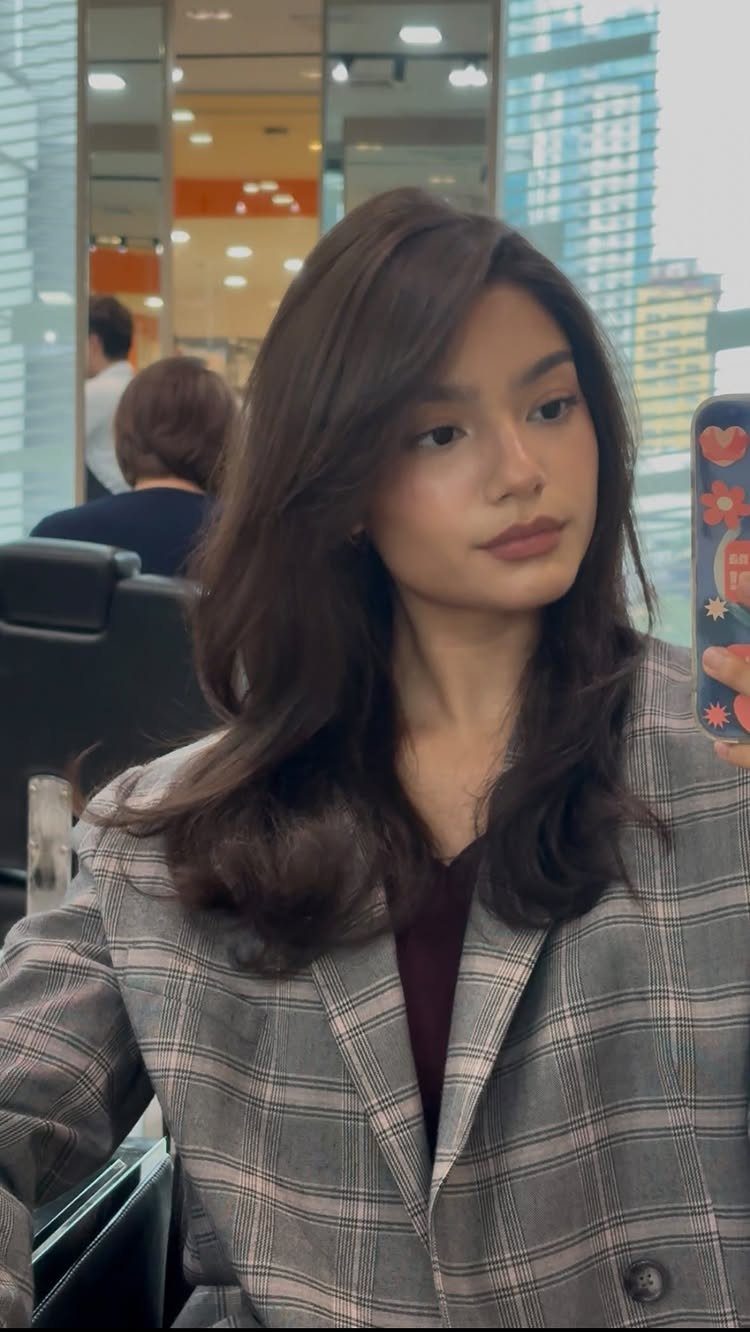
Layers cut through the mid-lengths and ends create separation, and styling with a round brush adds lift at the roots. You get movement that doesn’t collapse an hour later.
The layers remove enough weight to let the hair bounce, and the density keeps the volume from collapsing.
If your hair is fine, focus the blow-dry on the roots and use a light mousse before you start. Too much product will weigh down the bounce you just built.
23. 90s Supermodel Layers
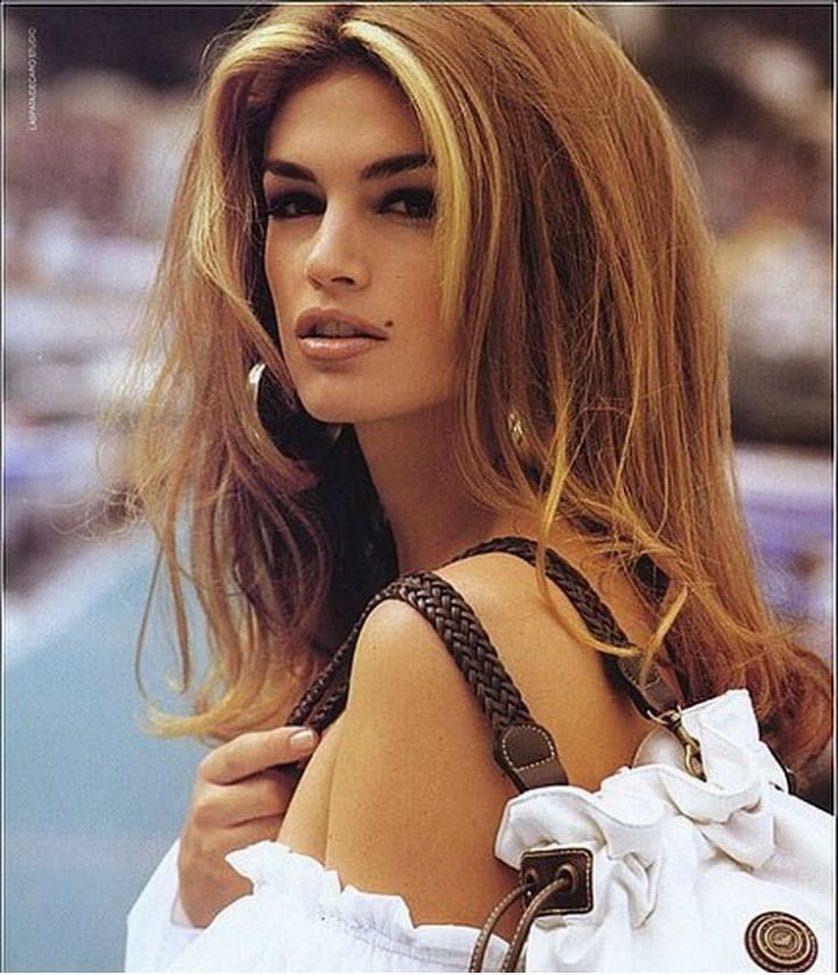
Layers begin at the collarbone or higher and taper down to long ends, so the volume sits through the mid-lengths and the longest pieces still reach past your shoulders.
The shape is full and polished, with enough contrast between the layers to create movement without looking choppy.
Fine hair may need hot tools and volumizing spray to get the same lift.
The length at the back keeps the overall silhouette long.
24. Waterfall Layers
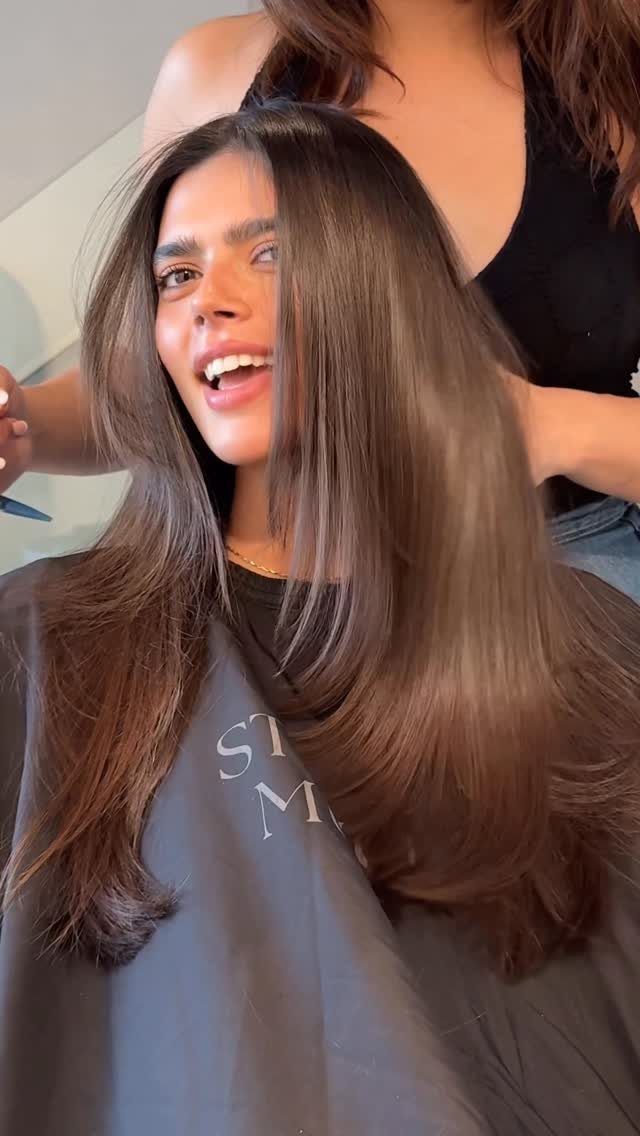
Layers are cut in long, graduated sections so each one falls slightly shorter than the one beneath it. The effect is smooth and continuous, with no abrupt jumps in length.
Weight comes off without making thick hair look thin. The layers stack in a way that lets each section sit on top of the next, so the hair moves as one shape instead of breaking into separate pieces.
Thick hair gets the most benefit from the weight removal.
25. Long Wolf Haircut
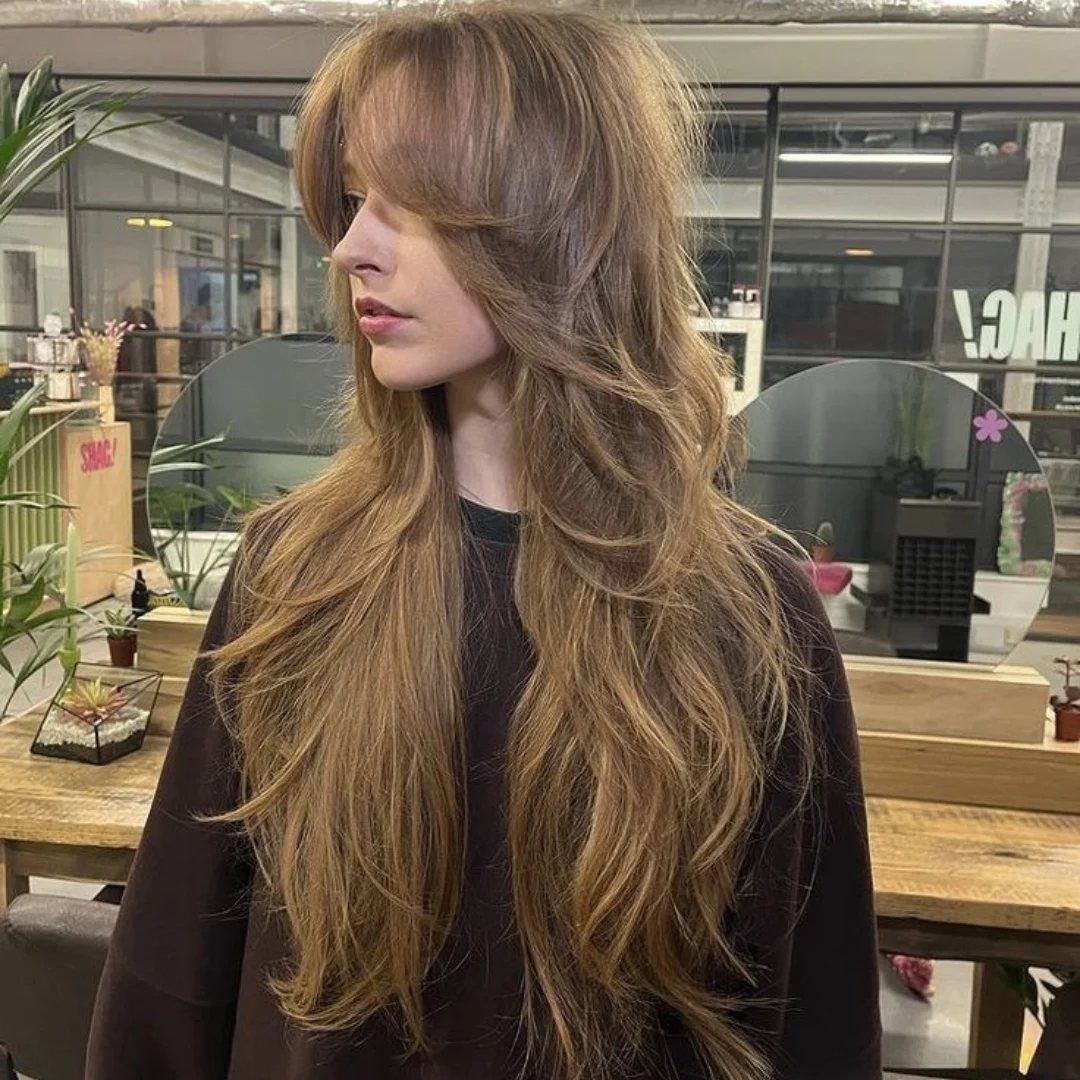
Choppy, textured layers run from the crown down through the lengths, but the bottom half stays heavier than a standard shag.
The disconnected layering removes weight through the top and mid-lengths while the ends keep enough density to avoid looking wispy.
The bangs frame your face, and the layers behind them add volume without thinning out the perimeter too much.
Fine hair can look thin at the ends if the layering is too aggressive. Thick hair handles the texture better and still looks full at the bottom.
26. All-over Layers
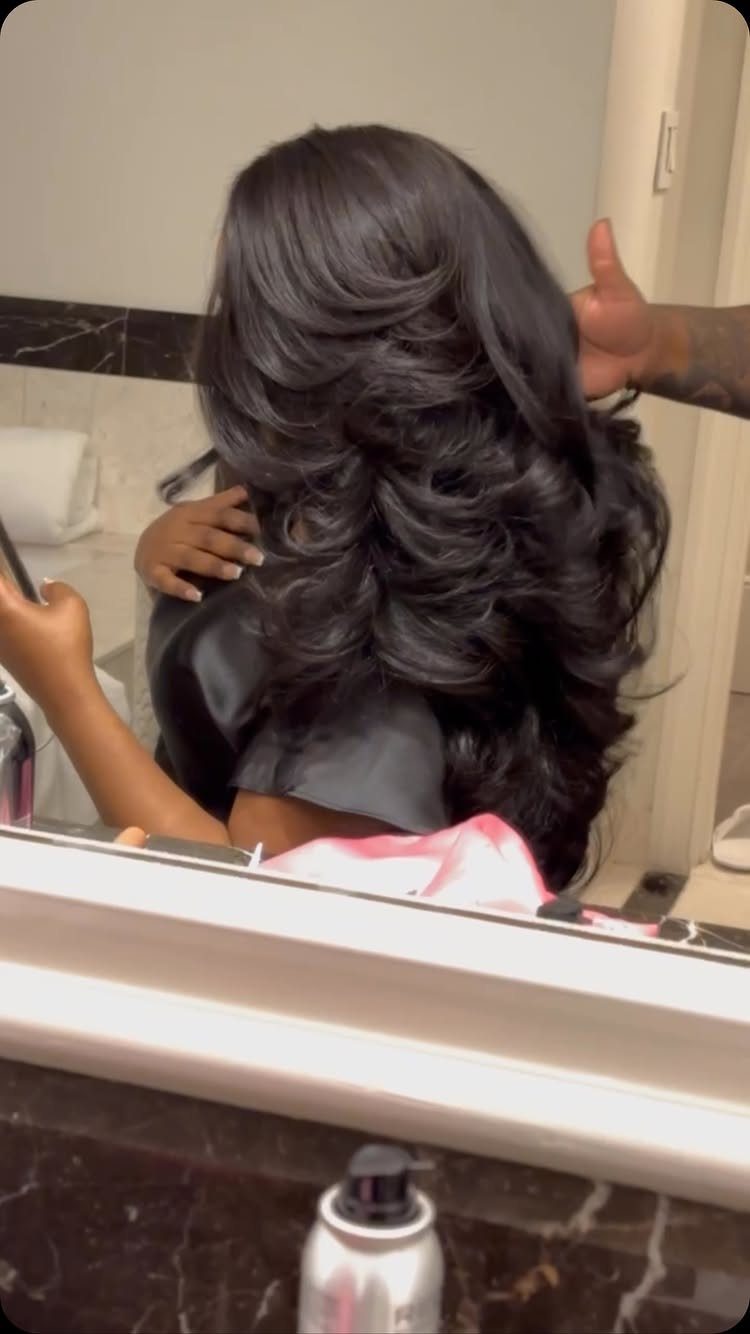
Layers start near the crown and continue through the entire length, so the volume and movement distribute evenly instead of concentrating near your face. No single section dominates the shape.
This cut suits thick hair that needs weight removed throughout rather than just at the front.
The back gets as much layering as the sides, so the hair moves the same way no matter how you part it or which direction you turn.
Fine hair needs softer, more gradual layers or the ends thin out and lose volume.
Choosing Layers by Texture
Wavy hair can puff out if layers start too high. Curtain bangs blended into the rest of the cut work better than short, disconnected pieces.
Keep most of the weight at the ends and add only light layering higher up. Strong, full ends help the cut look intentional rather than thin.
Stylist Consultation Details
If you want shorter pieces framing your face, point to where they should begin. The information you share about your hair goals and lifestyle during a stylist consultation changes where the stylist places the layers and how much they cut.
If you air-dry most days, you need a cut that works without heat. If you blow-dry regularly, the stylist can cut with more texture.
Bring reference photos.
Photos show the movement and shape better than any description can. Mention your natural texture, too, since layers on straight, wavy, and thick hair all need different techniques.
At-home Styling Methods
Use medium heat and lift sections at the root with a brush or your fingers as you dry.
Smooth the rest of the length and run a small amount of pomade over any stray ends. Straight styling takes about 15 minutes.
For waves, use a large-barrel curling iron on the mid-lengths and pieces near your face. Curl away from your face for a softer finish.
This takes around 20 minutes. For curls, plan on 30 minutes.
Mousse gives lift without the weight that flattens layered hair.
Frequently Asked Questions
Do you have to style long layered hair?
No.
Layers create shape and movement on their own, so air-dried hair still looks deliberate rather than flat. The layers show up more with a round brush or iron, but air-dried hair still moves differently than a blunt cut.
What is the best layered haircut for long hair?
Your hair texture and how much daily effort you want to spend decide which version works best.
Face-framing layers suit most textures and add shape around your face without touching the rest of your hair, while soft long layers remove weight from thick hair and butterfly layers add volume to fine or flat hair without losing length.
Are layered haircuts high maintenance?
Most long layered cuts are low maintenance as long as the layers blend smoothly.
A trim every 8 to 12 weeks keeps the shape fresh, and you can skip most of the styling if you let the cut do the work. Face-framing pieces may need more frequent trims if you want that part to stay sharp.
Are layers good for long hair?
Yes.
Layers remove weight so thick hair moves more easily, add lift where flat hair sits limp, and create shape that one-length hair lacks. Layers give you shape and swing while keeping most of your length.
Do layers make long hair look thinner?
Too much layering or razor-textured ends can thin out the look more than you want. Soft, gradual layers that start low preserve fullness better than choppy or high-starting layers, and keeping the perimeter dense prevents the bottom from looking wispy.
Are face-framing layers flattering on long hair?
Yes.
Those short front pieces pull focus to your cheekbones and jaw, and the length difference opens your face in a way solid hair doesn’t. You get the shaping effect without layering the entire head.
How often should long layered hair be trimmed?
An 8 to 10 week trim schedule keeps the cut recognizable and stops splits before they travel. Heavier texturizing or choppy ends break down faster, so those cuts ask for more salon time.