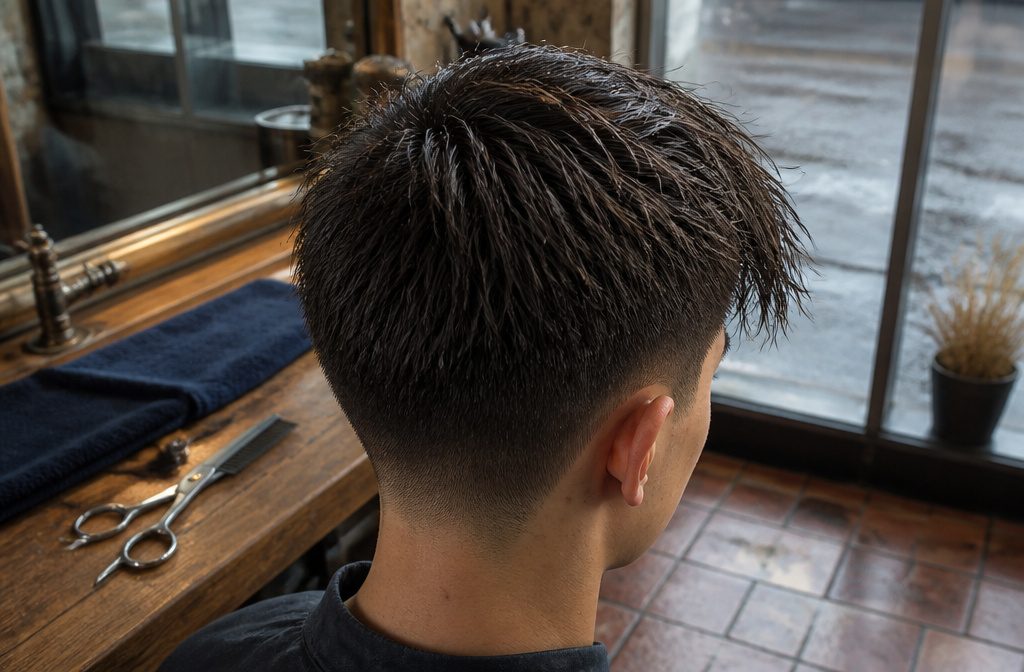
A blowout textured fringe combines three elements: sides that taper gradually shorter, a crown blow-dried upward for lift, and a front section point-cut into uneven lengths and styled forward.
Without all three the cut reads as something else entirely. The taper height changes how often you need a trim, with high tapers losing their sharpness faster as hair grows in along the sides.
What Makes a Blowout Textured Fringe
Three parts have to be present, and if one is missing the cut lands somewhere else entirely.
The sides and neckline taper gradually shorter at the sideburns, ears, and around the back, usually kept low or mid so the front section stays the focus.
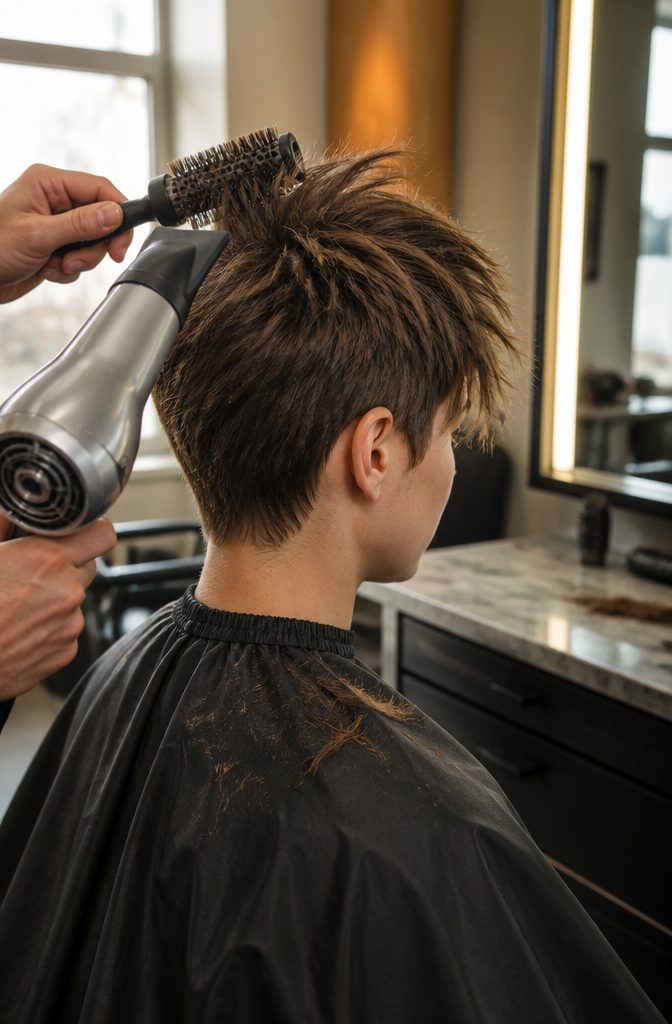
The crown is left long enough to be blow-dried upward for height, giving the top visible lift instead of sitting flat.
The front section is point-cut into uneven, piecey lengths and styled forward across the forehead, creating a fringe with movement rather than a heavy curtain.
Each element depends on the others.
Without the taper the sides look unfinished and the contrast disappears. Without the blowout the crown flattens and the whole thing reads as a basic mop-top.
Without proper point cutting the fringe falls as one solid line instead of broken texture, and that single change wrecks the modern, effortless feel the cut is known for.
Low, Mid, and High Taper Versions
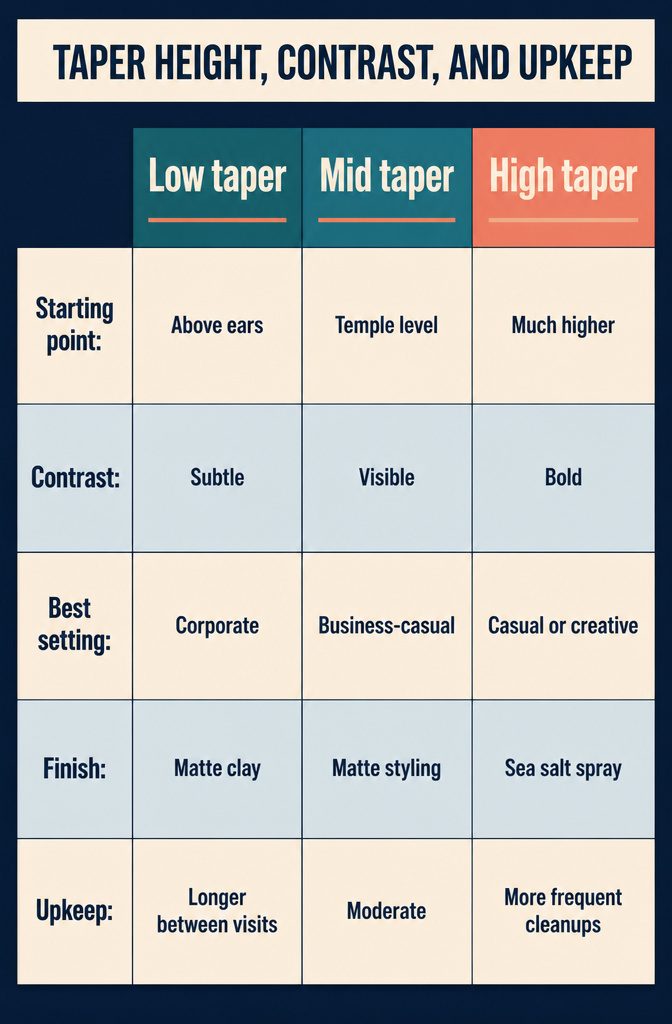
The low taper starts just above the ears and blends softly into the volume on top.
It reads as the most conservative option because the contrast stays subtle, and that makes it appropriate for traditional corporate settings when you pair it with a mid-forehead fringe and matte clay.
The mid taper begins around temple level and offers more visible contrast without crossing into dramatic territory.
Most barbers consider it the most balanced choice, and it photographs well while still passing in business-casual environments. The high taper starts much higher on the head and creates bold, visible contrast that shows off face shape.
It feels modern and a bit daring, best suited to casual settings or creative industries, especially when you finish it with sea salt spray instead of matte product.
Upkeep frequency shifts with taper height.
The low version grows out slower and stays clean longer between appointments. The high taper loses its sharpness faster as hair grows in along the sides, so expect to book more frequent cleanups if you want the contrast to hold.
Point Cutting the Fringe
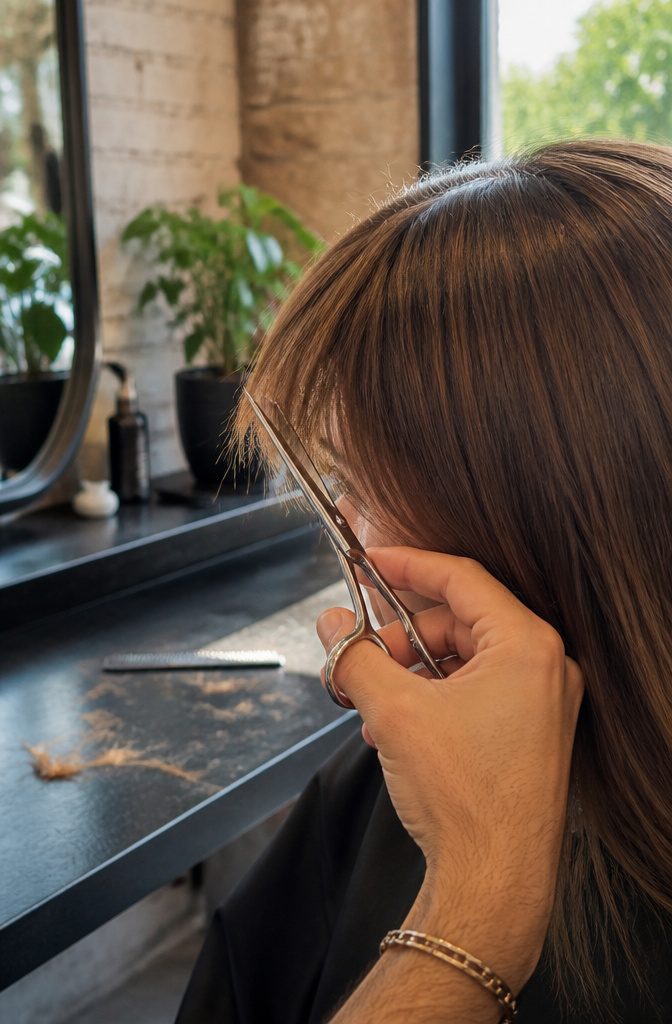
Point cutting is the technique that separates this fringe from a solid curtain.
Instead of cutting straight across, the barber angles the scissor tips into the ends of the hair, creating uneven, jagged lengths within each section. That irregular finish is what lets the fringe break into pieces when you style it.
You can check the work before you leave the chair. Look at the fringe ends up close.
If every strand appears to end at exactly the same length, it was blunt cut, and the fringe will fall heavy rather than textured. A properly point cut fringe shows visible variation in length even before the blow-dry begins.
Watch for the barber holding scissors at an angle into the ends, not cutting straight across in one motion.
If the barber finishes with a single straight cut and doesn’t go back in with an angled blade, ask for point cutting to be added before styling starts.
Fixing a blunt fringe after you’ve left is harder than catching it in the moment.
How This Cut Differs From a Textured Crop
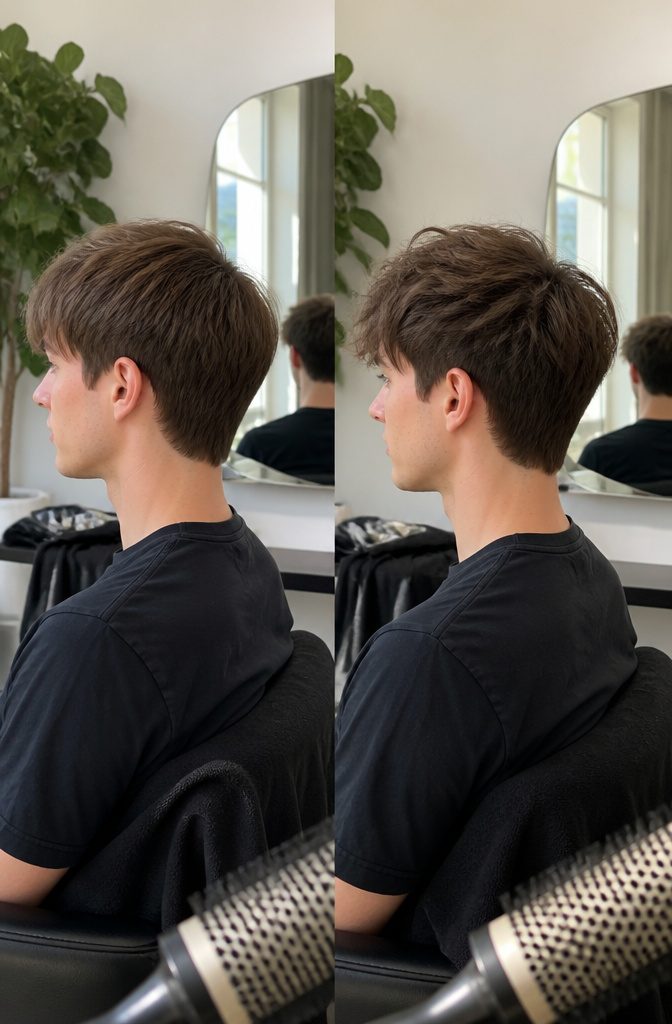
A crop has almost no height at the crown and keeps the fringe blunt and close to the brow, while a blowout textured fringe builds volume above the forehead with a lifted, blow-dried top and a piecey fringe.
Both styles direct hair forward, so from the front they can look similar in photos.
The real difference shows up in profile. The crop sits flat, the blowout taper lifts.
Fringe length changes too. A crop cuts the fringe short and straight across, often landing just above the brow.
The blowout version keeps the fringe longer, between mid-forehead and eyebrow at its longest points, and point-cuts it for separation rather than leaving it blunt. That extra length and texture give the swept, effortless look the crop does not have.
Choosing Taper Height and Fringe Length for Your Face Shape
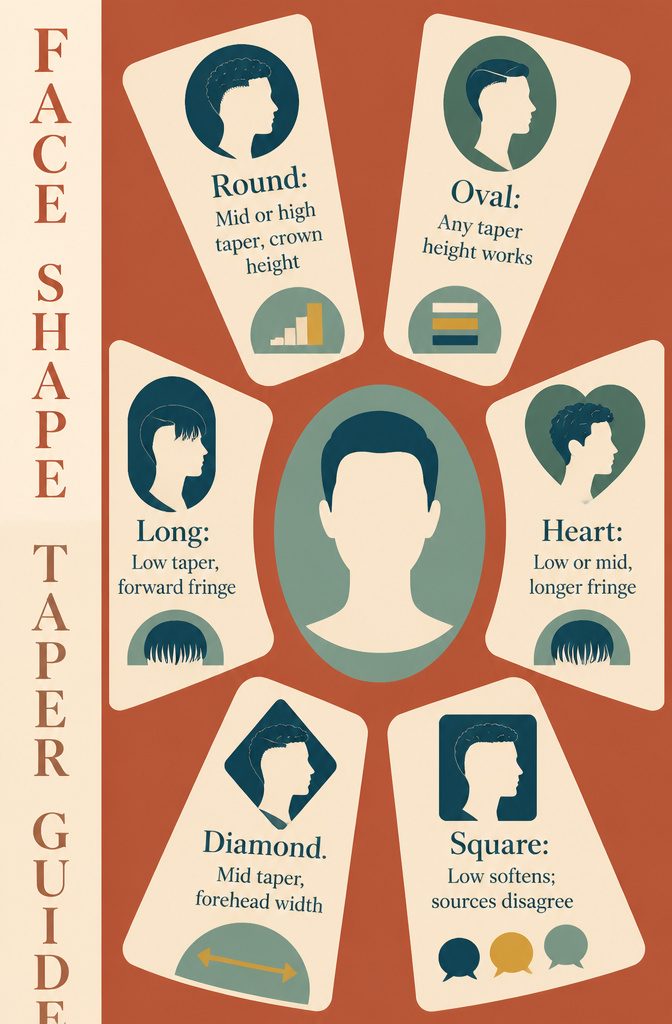
Face shape changes which taper height and fringe length look most balanced, but the recommendations vary depending on who you ask.
Round faces are typically steered toward a mid or high taper to add crown height and create the illusion of length, though one source argues that square faces handle a low taper better when you want to soften a strong jawline with a fuller fringe.
Oval faces get the easiest advice: any taper height works, since the proportions are already balanced.
Long or oblong faces benefit from a low taper and forward fringe that visually shortens the face rather than adding more vertical bulk.
Heart-shaped faces with a wider forehead and narrower jaw suit a low or mid taper paired with longer fringe to soften the forehead width, while diamond faces tend to work well with a mid taper that adds width near the forehead and keeps the jaw sharp.
The disagreement shows up most clearly with square faces. One source lists low, mid, or high as equally viable, another specifically calls out the low taper as the best choice for softening angular features.
I find the reasoning behind each recommendation more useful than memorizing a chart: the added height from a mid or high taper widens and elongates, while a low taper keeps more length on the sides and lets the fringe do the balancing work.
Adapting the Cut for Straight, Wavy, Curly, and Fine Hair
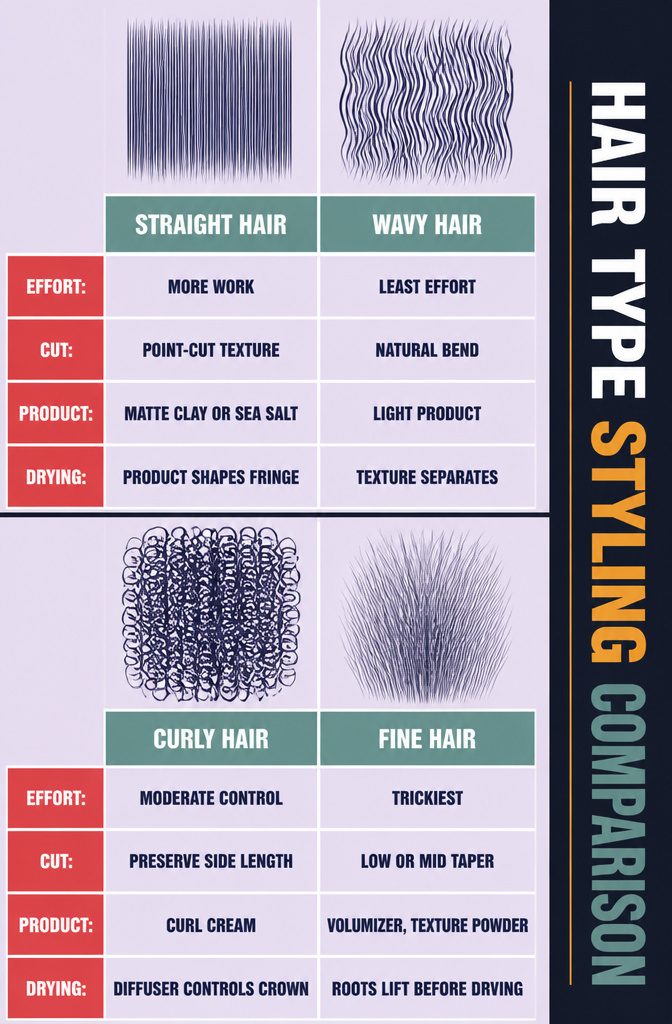
Wavy hair needs the least effort here. The natural bend breaks up the fringe on its own, so you can skip heavy product and still get that separated, piecey finish.
Straight hair takes more work: point-cut texture in the cut itself plus a matte product like sea salt spray or matte clay keeps the fringe from falling as a flat curtain. Without both, the shape reads completely different.
Curly hair does best with a low taper that preserves length on the sides and lets curls form their natural spiral without harsh contrast.
Use curl cream and a diffuser to control the crown volume, then let the texture do the rest.
Fine hair is the trickiest: it lacks natural volume density, so the crown lift depends on a lightweight volumizing product applied at the roots before blow-drying.
Finish with texture powder instead of paste to keep the crown from collapsing under product weight, and stick with a low or mid taper so the top looks fuller by comparison.
What to Tell the Barber
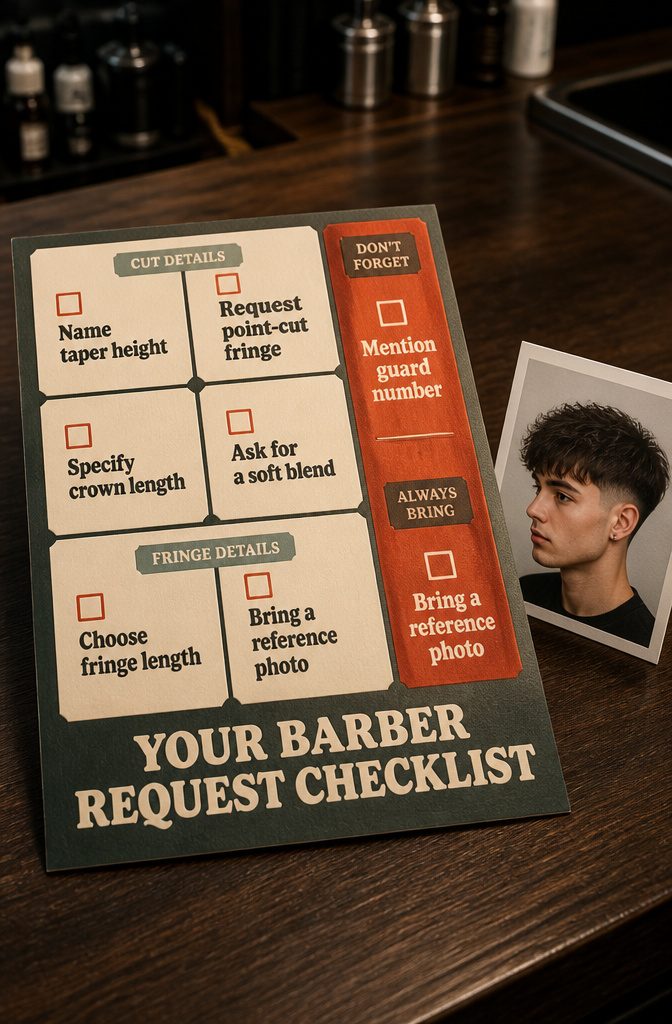
Name taper height, point-cut fringe, crown length, blend, and fringe length when you sit down.
A complete request sounds like this: low blowout taper textured fringe, point-cut the front so it’s piecey rather than blunt, keep the crown long enough to blow out for lift, and blend the fringe into the sides so there’s no hard line.
That covers the four details a barber needs to work from.
Bring a reference photo.
Vague requests like "blowout taper with a fringe" invite inconsistent results because shops interpret the same words differently. A picture removes almost all naming confusion.
If you know the guard number you want at the shortest point, such as a number 2 or 3, mention it. Specify whether you want the fringe to sit mid forehead or closer to the eyebrows rather than leaving length open ended.
Styling the Forward Fringe and Lifted Crown at Home
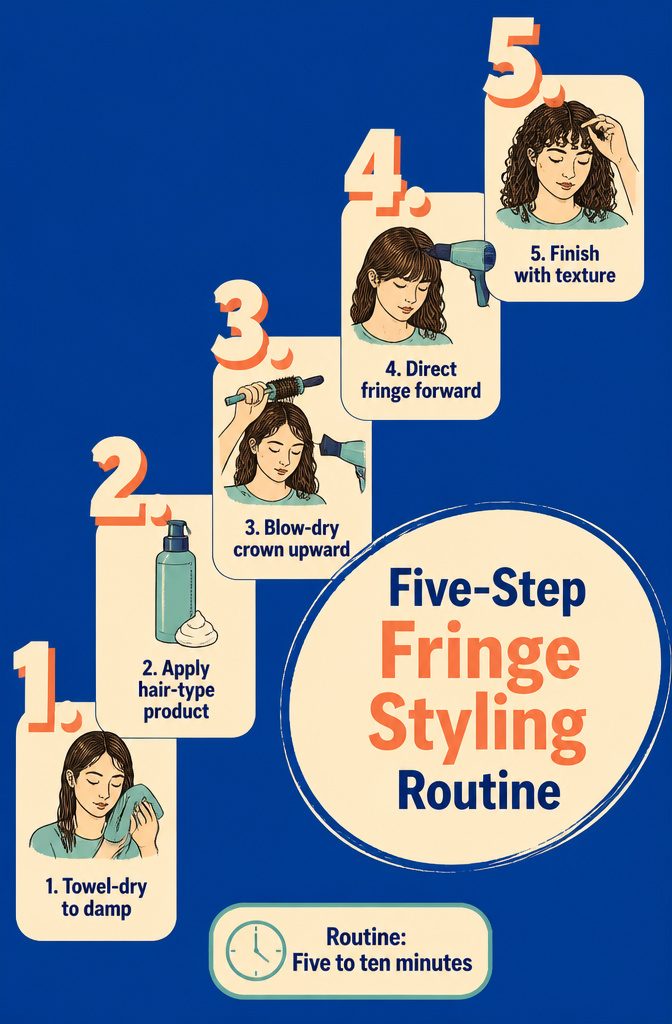
Styling the Forward Fringe and Lifted Crown at Home
- Towel-dry to partial dryness. You want the hair damp, not soaking, before you add product.
- Apply styling product based on hair type. For straight hair, use a small amount of volumizing mousse or lightweight styling cream. Wavy hair follows the same approach. For curly hair, apply curl cream to damp hair, focusing on the fringe area.
- Blow-dry the crown upward. For straight and wavy hair, use a round brush and lift at the root. For curly hair, diffuse the crown on low heat while scrunching upward to build volume.
- Direct the fringe forward. Aim the dryer from behind, pushing the fringe forward and slightly to one side. Move your fingers side to side as you dry so the pieces separate instead of clumping. For curly hair, diffuse the fringe forward without touching it while wet, since disturbing wet curls creates frizz.
- Finish with texture. Once fully dry, pinch and separate pieces with your fingers for that lived-in texture. Straight hair benefits from a pea-sized amount of matte paste to define the fringe pieces without adding shine. For curly hair, separate the curls at the fringe using only your fingertips.
Most people spend five to ten minutes on this routine once they’ve learned it.
Trim Timing for Fringe and Taper
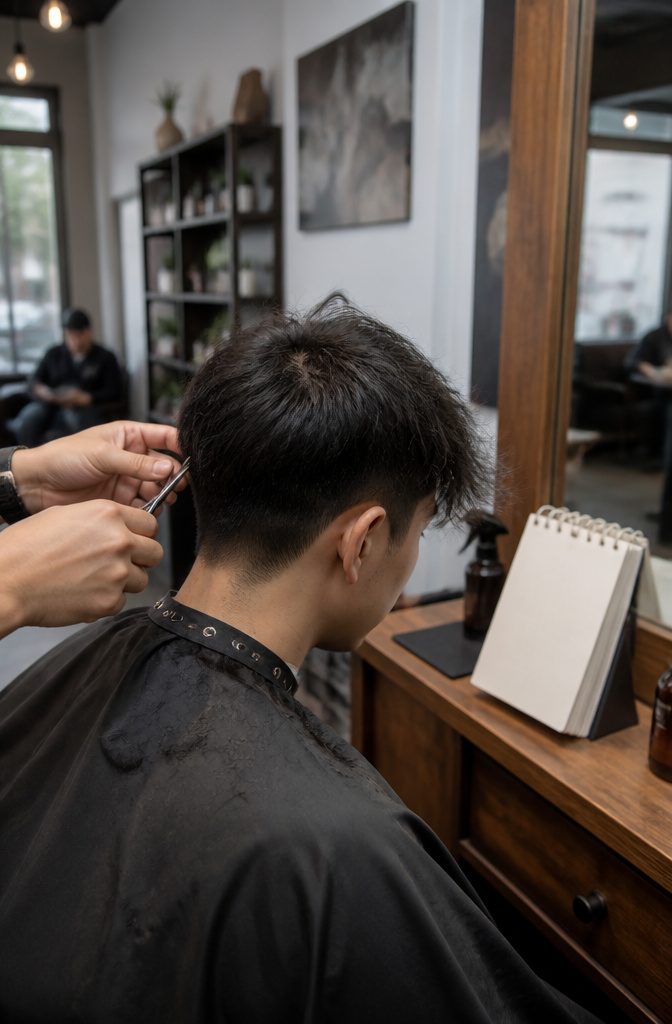
Most barbers put a full blowout textured fringe refresh at every three to four weeks to keep the taper clean and the fringe out of your eyes.
The taper sides show growth faster than the top, especially if you went with a high taper, so you’ll notice the shape softening closer to the three-week mark.
The fringe itself depends on where you started: a shorter fringe sitting higher on the forehead grows into your eyes within about three weeks, while a longer fringe styled closer to the eyebrows buys you an extra week or two before it becomes a problem.
Hair grows roughly half an inch per month, so a fringe cut at mid-forehead length gives you the longest runway before it needs attention.
Many shops will do a quick fringe trim between full cuts for cheap or free if you’re a regular, which helps when the fringe outpaces the rest of the cut.
Product and Styling Mistakes That Flatten the Cut
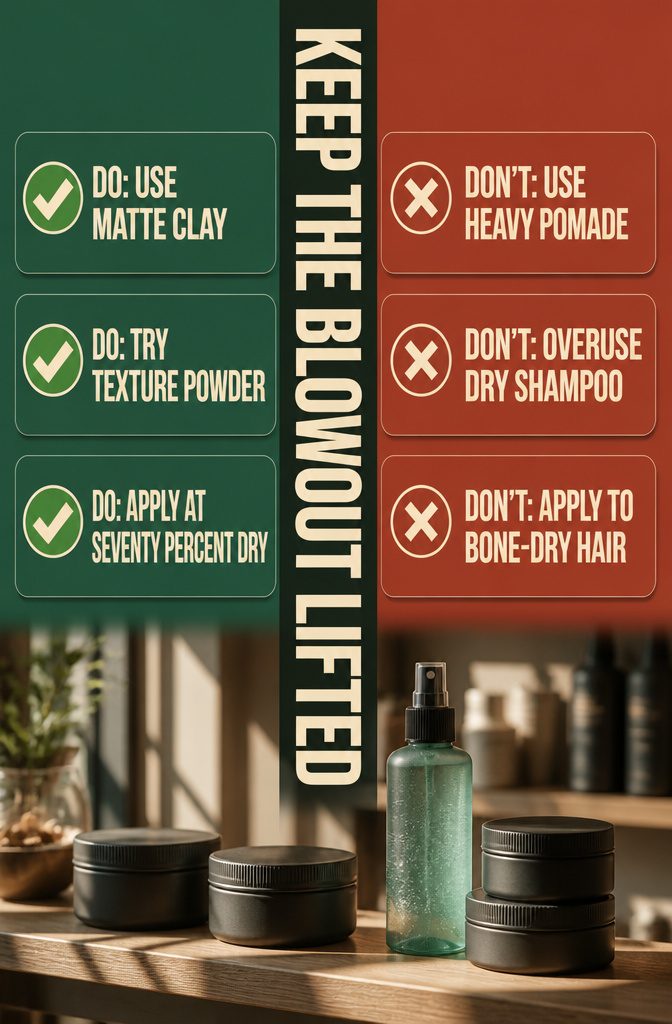
Heavy pomade or gel collapses the lift this cut is built around. Pomade weighs the fringe into a flat curtain within a few hours.
Gel stiffens it into a rigid block that kills the piecey movement the style depends on. Matte clay or texture powder delivers hold without the weight, and sea salt spray adds texture without stiffness.
Overusing dry shampoo leaves a chalky residue that flattens texture instead of enhancing it. If the fringe looks dull by midday, you are using too much.
Applying product to fully dry hair spreads unevenly and reads greasy by afternoon.
The fringe needs to be about seventy percent dry when product goes in, not soaking wet and not bone dry. Product dilutes on wet hair and the shape won’t hold once it dries.
Taper Versus Fade
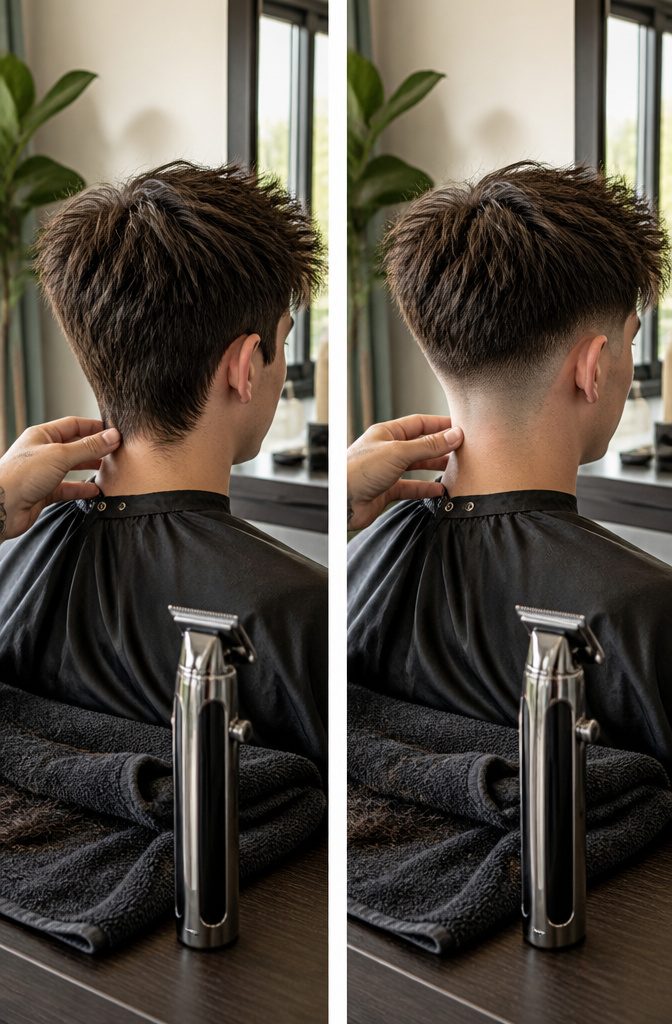
A taper gradually shortens the hair without ever reaching bare skin. The sides keep graduated length all the way down, creating a soft, blended finish.
A fade, by contrast, drops the hair down to skin level or very short length at some point, producing a sharper, more dramatic contrast between the top and the sides.
This distinction matters more than it sounds. If you ask for a blowout taper textured fringe and your barber hears "fade," you end up with a much edgier, higher-contrast cut than the softer look this style is known for.
Tapers are generally more versatile for professional environments and grow out more forgivingly between cuts. Fades deliver a bolder, more contemporary edge but require maintenance every two to three weeks to keep the skin line clean.
I recommend being specific about the word "taper" when you book the appointment and confirming that no skin should show. The confusion between the two terms is common enough that clarifying up front protects the result you came for.
Frequently Asked Questions
What is the difference between a taper and a fade?
A taper gradually shortens hair without reaching bare skin, keeping graduated length all the way down for a softer finish.
A fade cuts down to skin level or very short length at some point, creating sharper, more dramatic contrast between the top and sides.
Tapers grow out more forgivingly and suit professional environments better, while fades require maintenance every 2 to 3 weeks to keep the skin line clean.
What’s the difference between this cut and a textured crop?
A crop keeps the top short and flat with a blunt fringe, while a blowout textured fringe builds volume at the crown with a lifted, blow-dried top and a longer, piecey fringe.
Both direct hair forward, but the real difference shows in profile: the crop sits flat, the blowout lifts.
The crop also cuts the fringe short and straight across just above the brow, while this style keeps it between mid-forehead and eyebrow with point-cut texture.
How often should you get it trimmed?
Most barbers recommend a full refresh every 3 to 4 weeks to keep the taper clean and the fringe out of your eyes.
The taper sides show growth faster than the top, especially with a high taper, so you’ll notice the shape softening closer to the 3-week mark.
A shorter fringe sitting higher on the forehead needs attention within 3 weeks, while a longer fringe styled closer to the eyebrows buys an extra week or two before it becomes a problem.
Can you get this cut with curly hair?
Yes, with adaptation. The barber should use a low taper that preserves length on the sides and lets curls form their natural spiral without harsh contrast.
Style with curl cream and a diffuser to control crown volume, then let the texture do the rest. Point-cut the fringe to work with the curl pattern rather than fighting it.
Will this style work on straight hair?
Yes, but straight hair needs point-cut texture in the cut itself plus a matte or lightweight product to keep the fringe from lying flat.
Without both, the fringe falls as a flat curtain and the shape reads completely different. Apply matte clay or sea salt spray to damp hair and work it through with your fingers to separate the pieces.
How long does it take to style each morning?
Most people spend 5 to 10 minutes once they’ve learned the routine.
You towel-dry to partial dryness, apply product based on hair type, blow-dry the crown upward with a round brush, direct the fringe forward, and finish by pinching and separating pieces with your fingers.
The process becomes quicker as you get used to it.
Is it appropriate for work?
A low or mid taper with a mid-forehead fringe and matte clay reads as the most conservative option and passes in traditional corporate settings.
The low taper stays subtle because the contrast is softer, while the mid taper offers more visible contrast without crossing into dramatic territory.
A high taper with longer fringe feels modern and a bit daring, best suited to casual settings or creative industries.
Why does my fringe go flat after a few hours?
Flat fringe usually means too much product, the wrong product type, or styling on hair that was too wet.
Heavy pomade or gel collapses the lift within a few hours, and applying product to fully dry hair spreads unevenly and reads greasy by afternoon.
Switch to a lighter matte clay or texture powder, apply it at about 70% dry, and use less than you think you need.
What should I tell my barber if I want a textured fringe?
Name taper height, point-cut fringe, crown length, blend, and fringe length when you sit down.
A complete request sounds like this: low blowout taper textured fringe, point-cut the front so it’s piecey rather than blunt, keep the crown long enough to blow out for lift, and blend the fringe into the sides so there’s no hard line.
Bring a reference photo to remove naming confusion, and specify whether you want the fringe to sit mid-forehead or closer to the eyebrows.
Do I need a blow dryer at home to maintain this cut?
A blow dryer with a round brush gives the best results for lifting the crown and directing the fringe forward.
For curly or wavy hair, a diffuser attachment works well to build volume without disrupting the natural texture. Without a blow dryer, the crown flattens and the whole thing reads as a basic mop-top instead of a blowout.