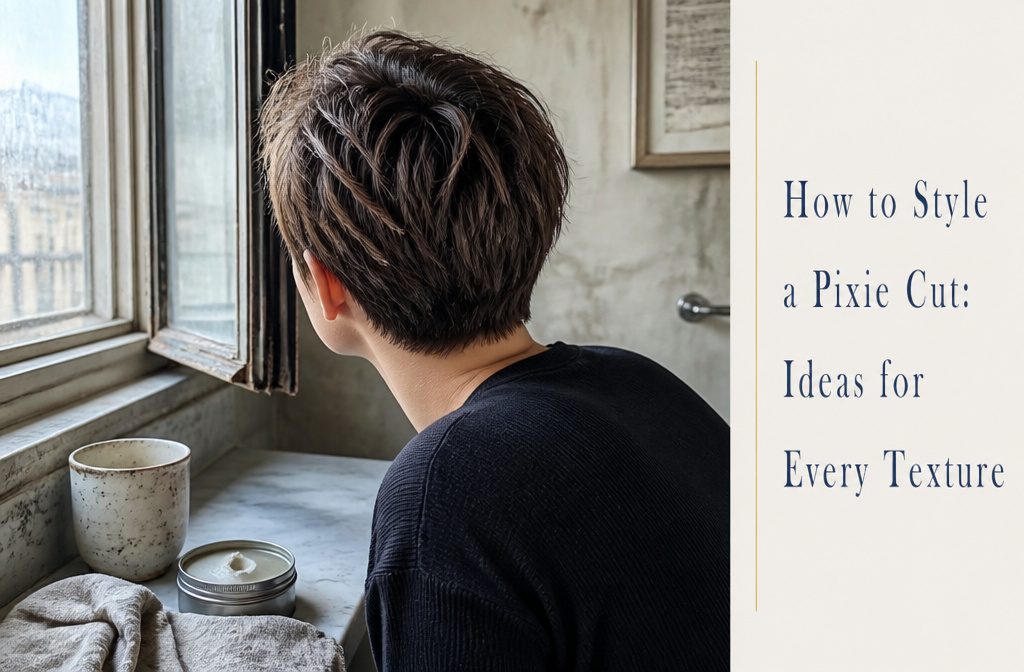
A sleek pixie takes 2 minutes once the hair is dry, and a tousled version needs only a pea-sized amount of paste worked through with your fingers.
The stage people get wrong is the product: too much wax turns fine hair gummy and clumped, and heavy creams flatten the crown by lunchtime.
1. Sleek, Smooth Pixie
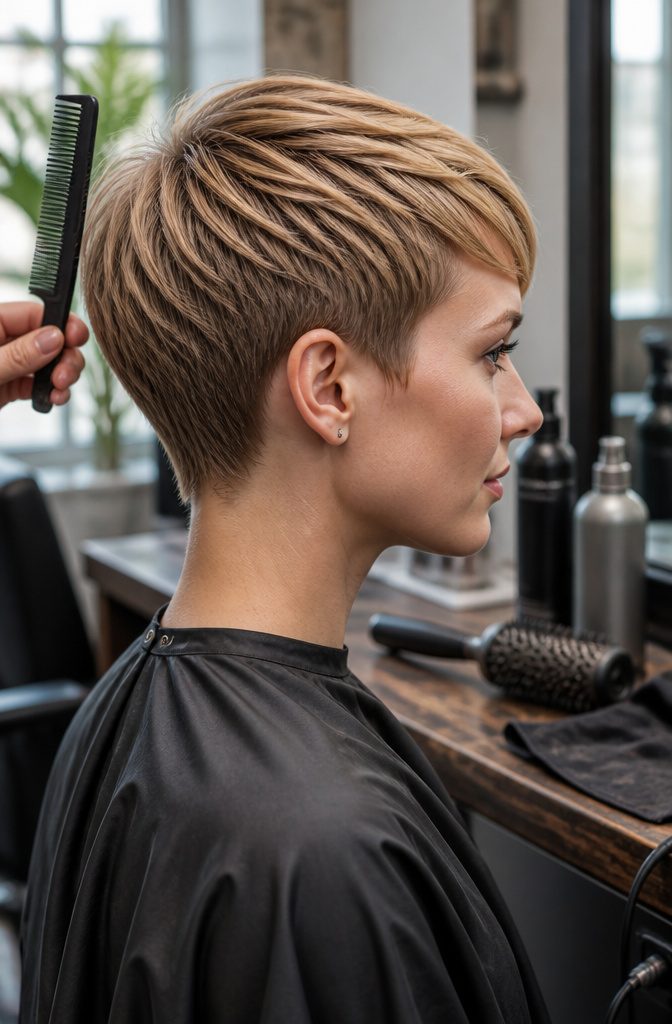
A sleek pixie lives or dies on the longer top layers, so that is where the heat and the smoothing product go.
Mist them with a heat protectant such as Style Masters Double or Nothing Lissaver before any tool touches the hair; it also guards against split ends and helps hold color.
Comb the top in one direction, then blow-dry it smooth following the comb.
Pantene’s Anti-Frizz Serum works on damp hair or as a finisher, and I’d save it for the finish if your hair is fine, since a heavy hand flattens the crown.
The Classic Sleek Pixie takes about 2 minutes once the hair is dry, which makes it one of the quicker mornings in this whole list.
2. Tousled, Textured Pixie
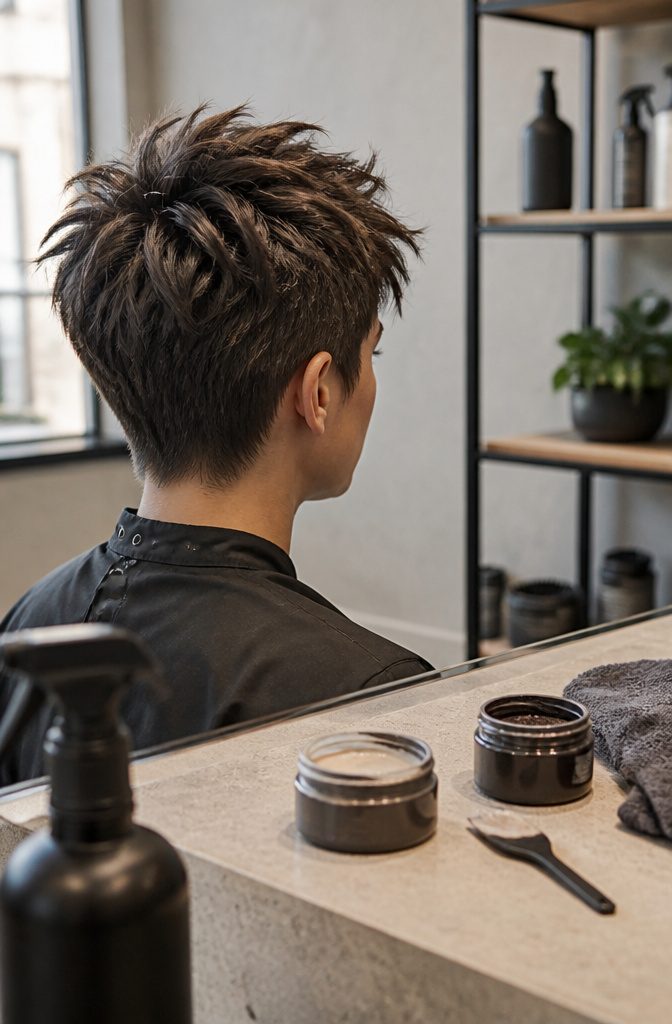
Fingers do most of the work in a tousled pixie, and product does the rest.
Work a paste through the hair and rake it upward and in different directions so the layers separate into pieces. SachaJuan paste shapes and defines layers without weighing them down, which is why stylists keep reaching for it.
For hold without crunch, Living Proof Molding Clay is my pick.
Kristin Ess Texturizing Paste is water-based, so it suits fine hair. Style Masters Creator Fiber Wax gives a fringe more definition.
Use a pea-sized amount at first, because too much wax turns hair gummy and clumped. Add more only after the first pass.
3. Voluminous Crown
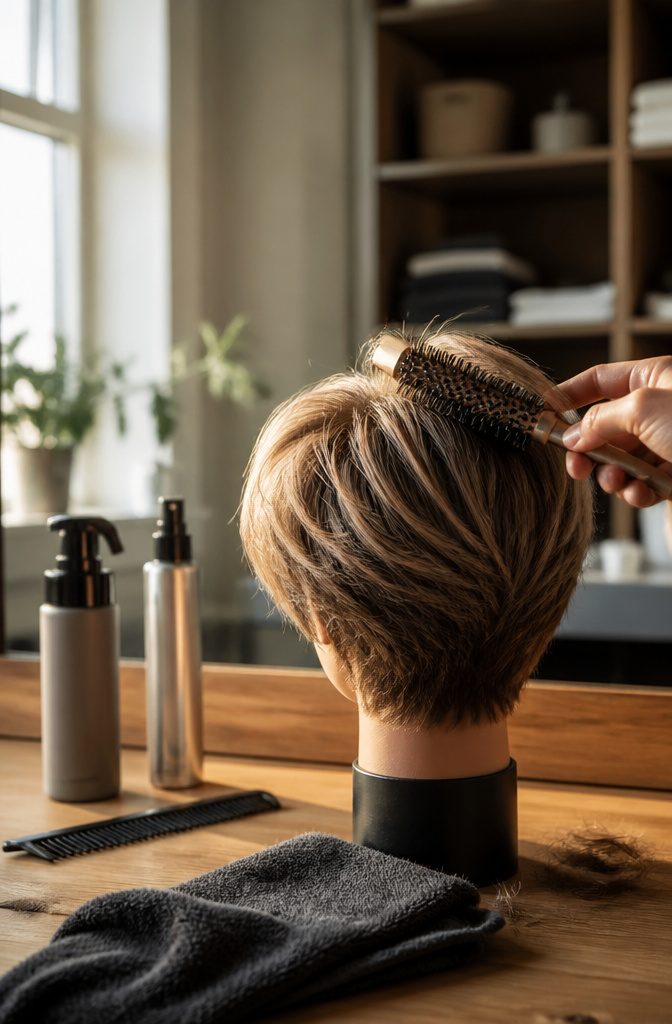
Fine hair gets its lift at the roots, and a small round brush does most of the work. Rub mousse into damp roots, then dry the crown while pulling the hair up and away from the scalp with the brush.
Aussie Instant Volume Mousse is the one I’d start with, and Style Masters Volume Amplifier Mousse does the same job. TRESemmé Root Boost ($4) is the cheapest way in.
For extra height, tease the crown gently with a comb, smooth the top layer back over it with your fingers, and finish with Pantene Volume and Texture spray. Skip heavy creams and oils, since they flatten fine strands by lunchtime.
4. Spiky Pixie
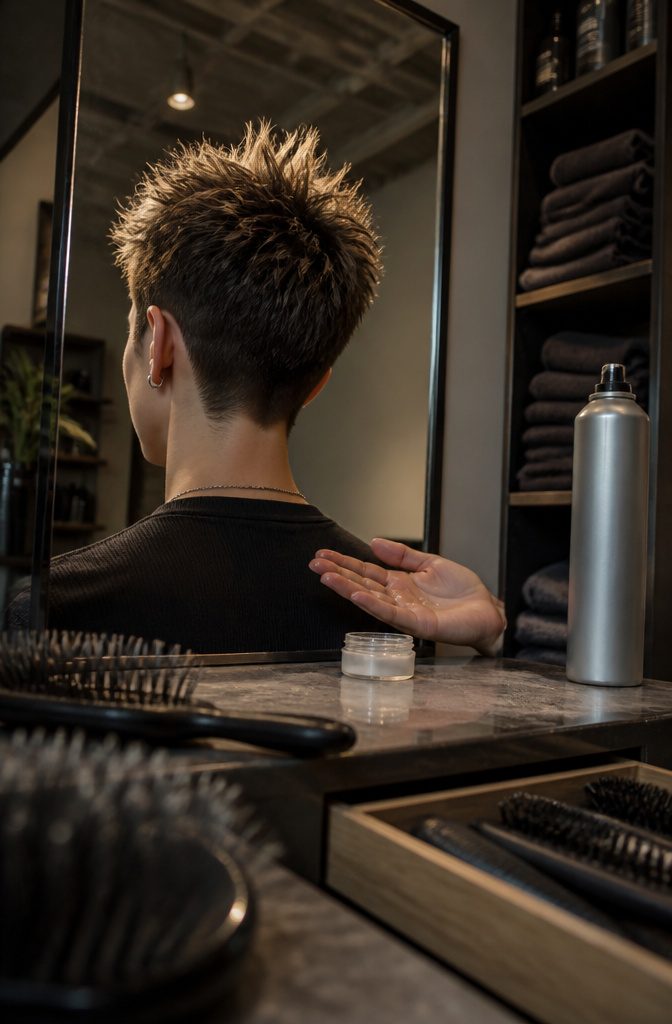
Spikes hold best on dry hair, so finish your blow-dry first and then reach for a strong-hold gel or wax.
Work a pea-sized amount between your palms, then use your fingertips to pinch and lift the top layers straight up, one small section at a time.
A light hand with the product matters more than the brand.
Too much turns spikes into a stiff helmet, and fine hair collapses under the weight. I’d rather add a second dab later than scrub out the first.
To set the look, a finishing spray does the locking.
Herbal Essences Lightweight Hair Volumizing Hairspray for Strong Hold and Bumble and Bumble Strong Finish both keep spikes standing without a heavy feel. Hold the can at arm’s length and use one quick pass.
5. Curtain-Style Crop
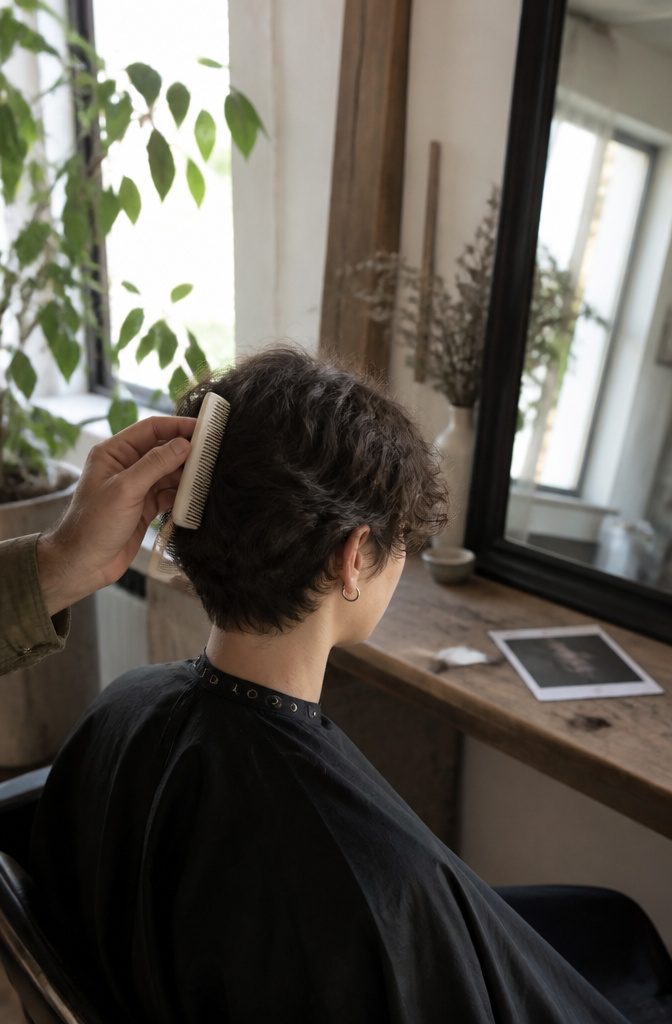
A curtain crop stays long in front and shorter at the back, and the shape is the whole cut.
Without enough fringe left in front, it reads as a plain pixie. Tell your stylist before the scissors come out, and bring the photo.
Vogue puts the useful point well:
If you want this sort of curtain crop (long in the front, shorter out back), it’s worth letting your hairdresser know before they pull out the scissors, as the key to this style is in the actual shape.
— Vogue
I’d add that this is the pixie to pick if your hair curls. It works on curlier types, and the extra length in front gives the curl room to fall.
6. Slicked to the Side
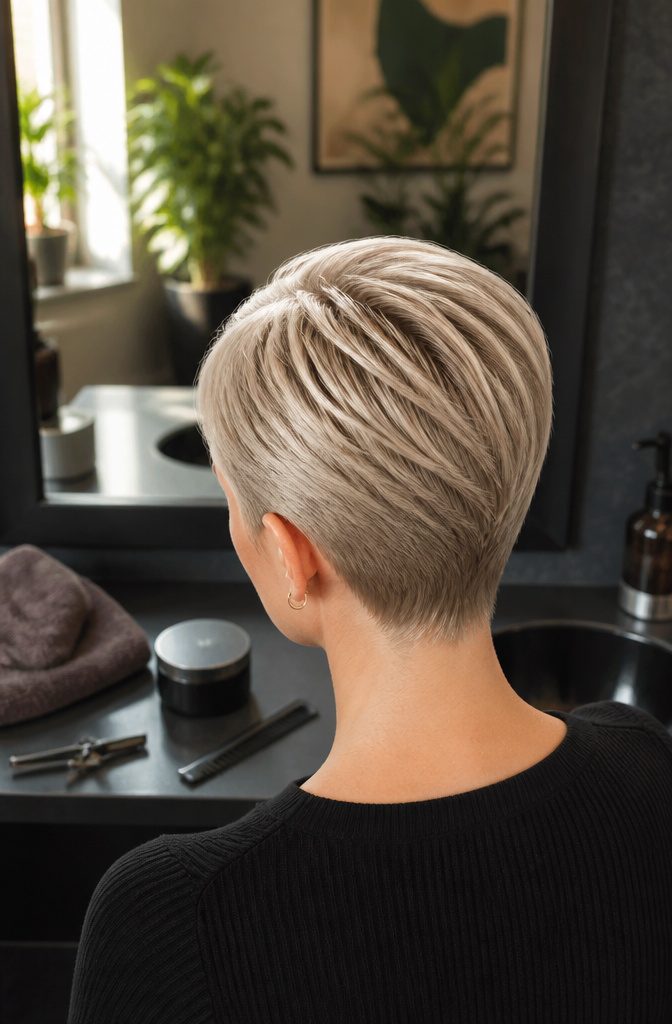
Sweeping the top layers to one side takes about the same effort as any pixie style, and it works on longer pixies best because there is enough length to travel across the forehead.
A side part gives the slicked version a cool-girl edge. Slicking it fully back is the bolder move, but that belongs to a different look.
Pomade does the holding. Old Spice Classic Pomade defines piecey texture, calms flyaways, and keeps hair hydrated.
Work it through damp hair, then comb it across. Pair the sweep with a side part and a longer side-swept bang if you have an angular jawline, since the diagonal line softens the corners.
7. Slicked Back
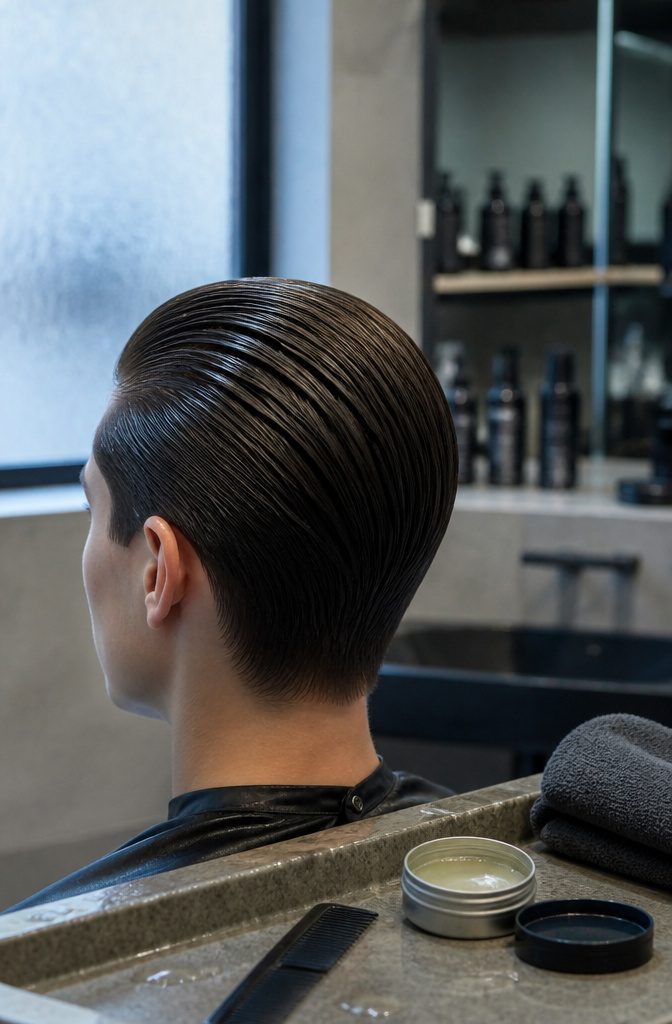
Work the product through damp hair, then drag a fine-tooth comb from the hairline straight back.
A comb beats a big brush here because it lays each strand in line and leaves visible tracks, which is what makes the finish look sculpted instead of fluffy.
Bumble and Bumble Sumo Tech ($28) or a pomade both work; I lean toward Sumo Tech when I want hold without a greasy shine.
Air-dry for the wet look, or blow-dry for a polished finish. Dense, straight hair that puffs up as it dries, a common complaint from Reddit owners with faded backs, needs the comb pass repeated once the hair is nearly dry.
8. Curly Pixie
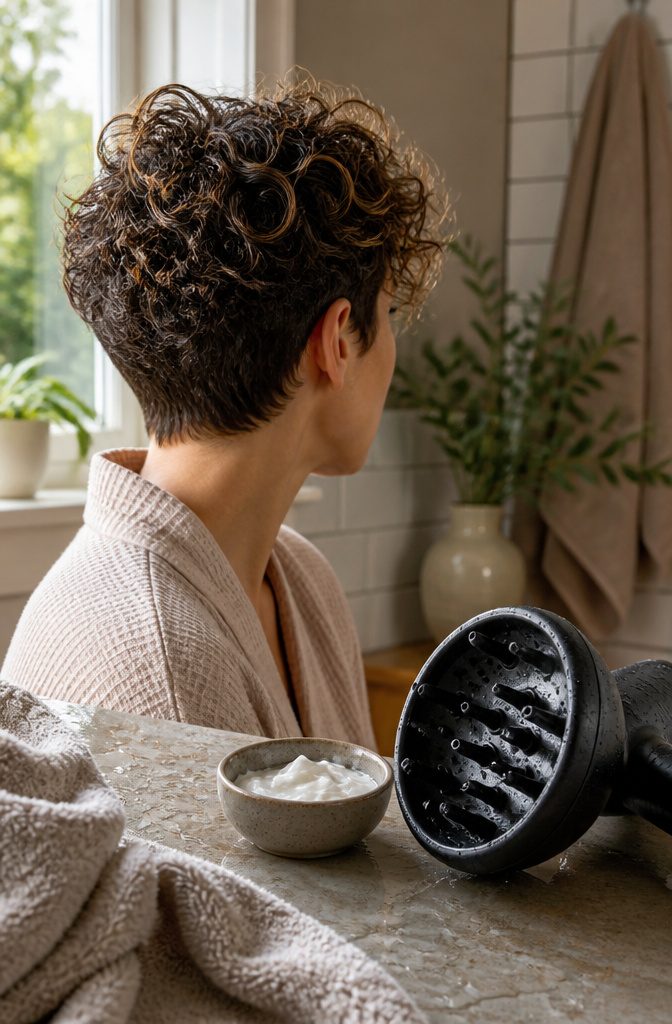
A curly pixie lives or dies on product, and the right one depends on your curl type: a looser wave wants something lighter than a tight coil does.
Apply a curl-defining cream or gel to damp hair, then leave the curls alone. Scrunching and re-touching while they dry is how frizz starts.
Dry with a diffuser, since it sets the natural pattern instead of blowing it apart. Work with the texture you have rather than fighting it; a grown-in, undone finish is exactly what the curly pixie looks best in right now.
A drop of anti-frizz serum on the front pieces controls flyaways without weighing the curls down, and that bouncing fringe is where the cut shows off.
9. Flipped-Out Ends
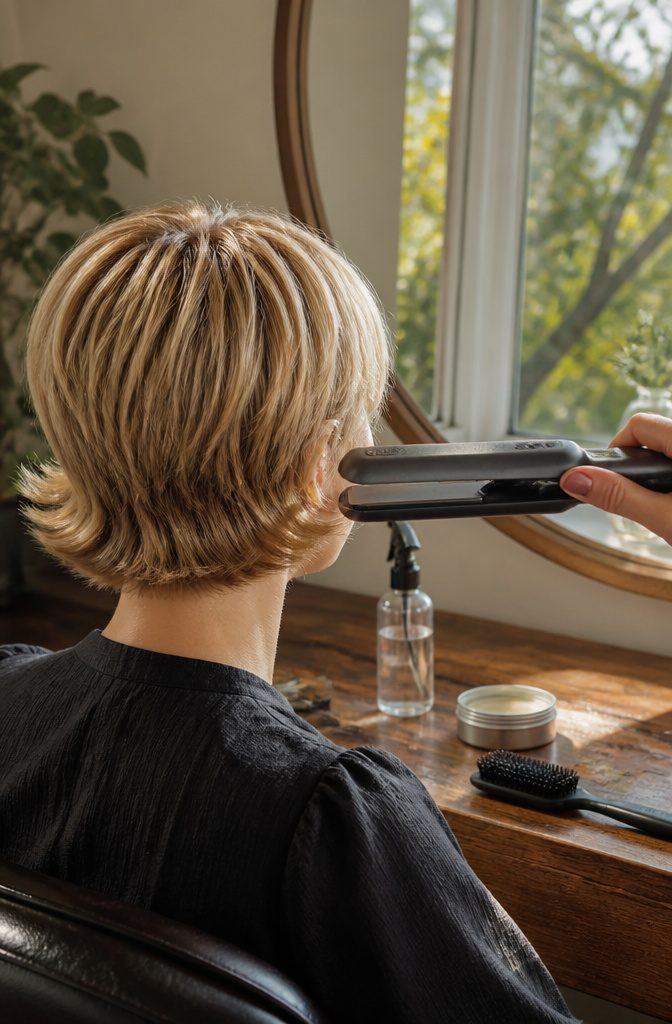
Flipped-out ends give a pixie a soft, retro flick, and a flat iron does it faster than a round brush. Spray heat protectant through dry hair first, then work in small sections so the plates reach every strand.
Clamp the iron near the ends, then rotate your wrist outward, away from the face, and glide down.
Start with a subtle turn on a single pass, check the mirror, and only repeat where the ends still hang straight. Overdone flips look stiff, like a costume.
I’d keep this to the lower inch or so and leave the roots flat, which keeps the shape light. A dab of pomade on the tips holds the flick without crunch.
10. Deep Part, Pinned and Curled
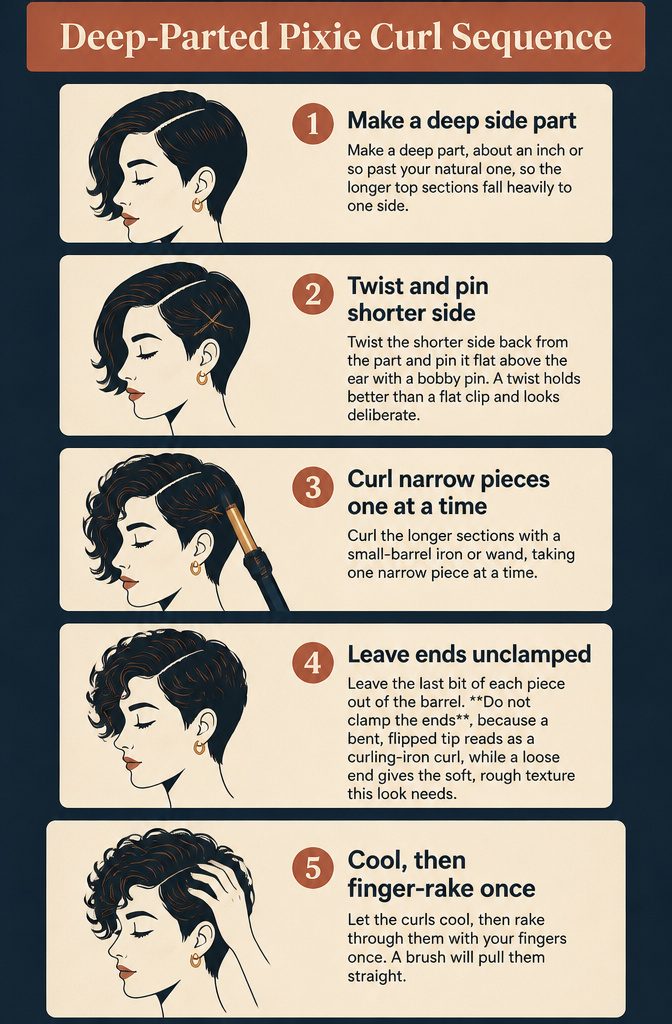
- Make a deep part, about an inch or so past your natural one, so the longer top sections fall heavily to one side.
- Twist the shorter side back from the part and pin it flat above the ear with a bobby pin. A twist holds better than a flat clip and looks deliberate.
- Curl the longer sections with a small-barrel iron or wand, taking one narrow piece at a time.
- Leave the last bit of each piece out of the barrel. Do not clamp the ends, because a bent, flipped tip reads as a curling-iron curl, while a loose end gives the soft, rough texture this look needs.
- Let the curls cool, then rake through them with your fingers once. A brush will pull them straight.
11. Pinned-Back Front Section
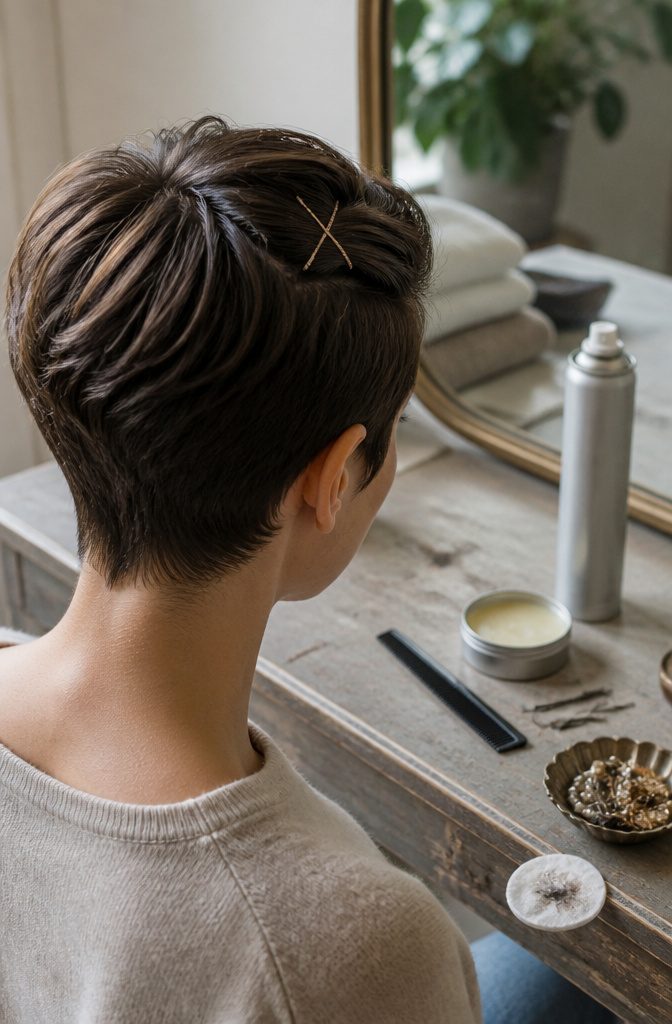
Work a little messy texture product through the whole top first, then rub wax between your fingers and apply it to the front section only. The wax gives the strands weight so they stay put instead of springing up.
Next, lift the front and backcomb its underside lightly. A few passes at the roots is enough to build a small cushion.
Dry shampoo helps more than people expect, because it gives clean, slippery hair some grip.
Spray it at the roots before you pin. Smooth the top layer back over the cushion with your palm, then slide in two bobby pins crossed in an X just behind the hairline.
Crossed pins hold better than a single pin, and I’d choose them over hairspray alone for fine hair.
Picking Products by Finish
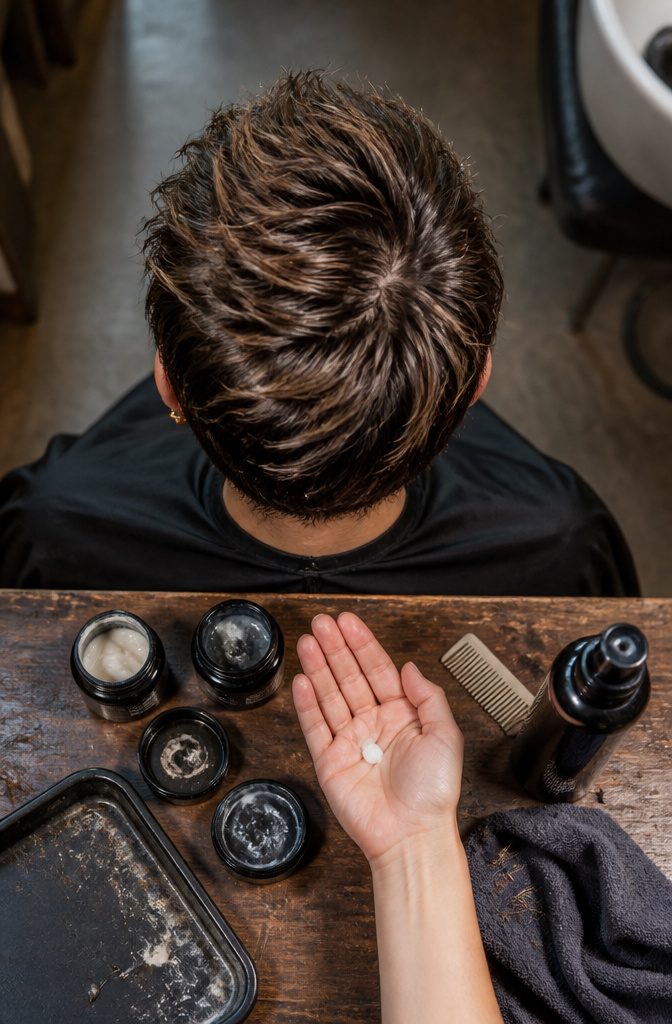
Match the product to the finish you want, then use less of it than the jar suggests. On a pixie, a pea-sized amount warmed between your palms covers the whole head, and extra shows up as grease at the roots.
| Finish | Product | Price |
|---|---|---|
| Texture | Garnier Pixie Play Crafting Cream | $6 |
| Texture, flexible hold | Living Proof Molding Clay | $23 |
| Texture, definition | Oribe Fiber Groom | $52 |
| Hold | Redken Fashion Work | $24 |
| Volume | Mousse on damp hair | n/a |
| Sleek | Smoothing serum | n/a |
For texture, Molding Clay at $23 wins: touchable hold without crunch.
Garnier is a fair $6 start. Work mousse into damp roots before blow-drying, and finish with serum only on the longer top.
Adapting to Your Hair Texture
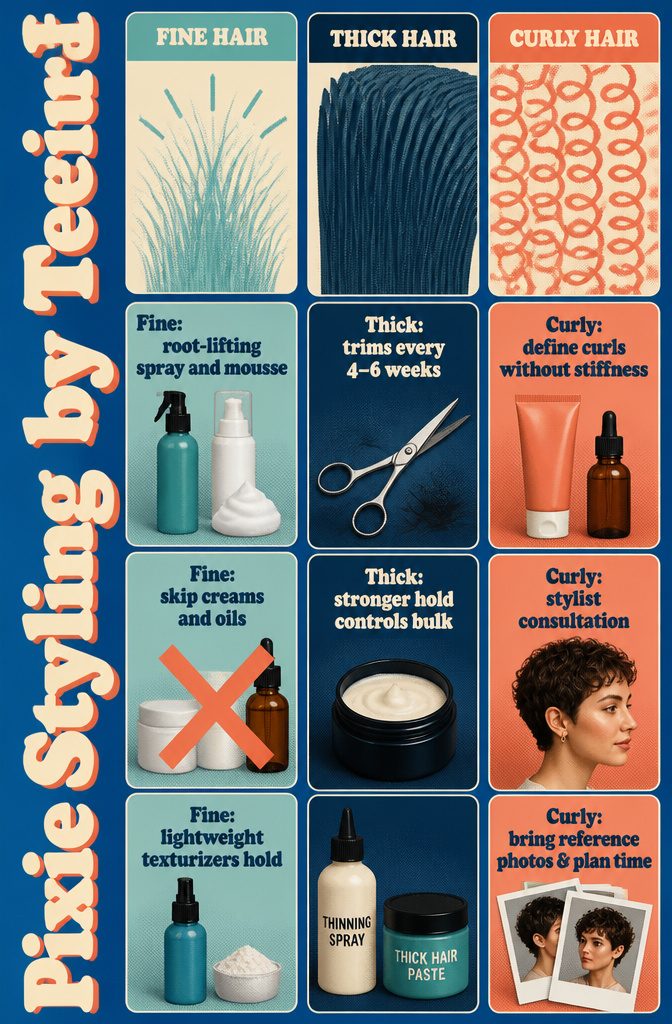
Fine hair needs root-lifting spray and volumizing mousse before you blow-dry with a small round brush, lifting at the roots to build height that lasts.
Skip heavy creams and oils entirely; they flatten fine strands and undo the lift you just worked for. Lightweight texturizers hold texture without weight.
Thick hair grows faster into the ears and neckline, so book trims every 4–6 weeks to keep the shape clean. Stronger-hold pastes and thinning products help control bulk without adding more product than the cut can carry.
Curly hair works best when you let the curl pattern do what it does rather than fighting it.
Curl-defining creams and anti-frizz serums keep the shape without stiffness. A stylist consultation matters here more than anywhere else: they can adjust crown height or add side bangs to balance your face shape, especially if your jawline is angular.
Bring reference photos and talk through how much time you have each morning.
Frequently Asked Questions
What is a pixie haircut?
A pixie is a short cut worn close to the head, with longer layers left on top and shorter sides and back.
Modern versions vary widely in length and texture, but all share that core shape: cropped at the nape and ears, with enough length at the crown to style.
Who can wear a pixie haircut?
Anyone can wear a pixie if the cut is adjusted for their face shape and hair texture.
A stylist can add side bangs to soften an angular jawline, adjust crown height for balance, or leave extra length in front for curly hair. Bring reference photos and talk through your face shape and morning routine before the cut.
Is a pixie cut high-maintenance?
Pixies need trims every 4 to 6 weeks to keep the shape clean, especially around the ears and neckline where hair grows fastest.
Daily styling is quick, though, often taking 2 minutes or less once you have the right products and know which finish you want.
Will a pixie cut suit my face shape?
A pixie can be cut to suit nearly any face shape through adjustments to crown height, fringe length, and side layers.
Side bangs soften an angular jawline, while a curtain crop with longer front pieces balances a rounder face. A consultation before the cut is the place to work through these details.
How do you make a pixie cut look good?
Start with the right product for the finish you want: mousse for volume, paste or clay for texture, pomade for sleek or slicked styles, and curl cream for curly hair.
Use a pea-sized amount, work it through damp or dry hair depending on the look, and style with your fingers or a comb. Match the product to your hair texture and keep the amount light.
How do I style my pixie to make it messy?
Work a pea-sized amount of paste or molding clay through dry or damp hair, then rake it upward and in different directions with your fingers so the layers separate into pieces.
Use less product than you think you need, since too much turns hair gummy instead of textured.