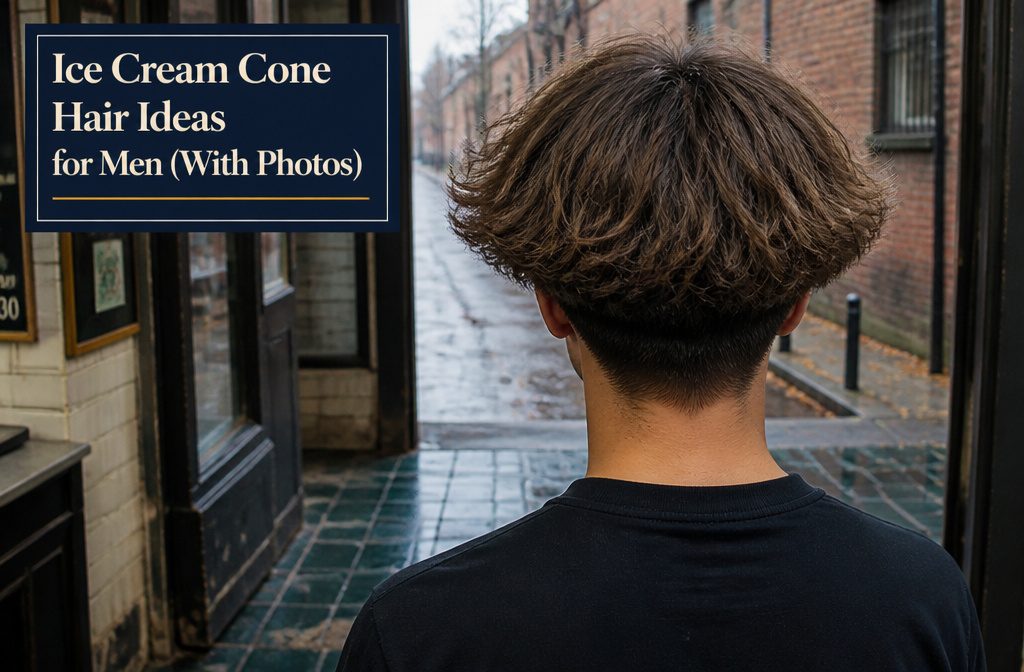
The style ranges from a clean taper fade with flipped ends to a full fluffy bowl cut with brushy texture, and your choice comes down to how much volume you want sitting on top versus how controlled you need the sides.
The rounded shape only holds if you start with at least 4 inches of length on top, which means most guys are growing it out for weeks before the cut makes sense.
The look went viral on TikTok in late 2022 and has pulled over 46 million views, though most of that attention comes from people poking fun at the exaggerated cartoonish silhouette rather than wearing it themselves.
What Ice Cream Cone Hair Actually Looks Like
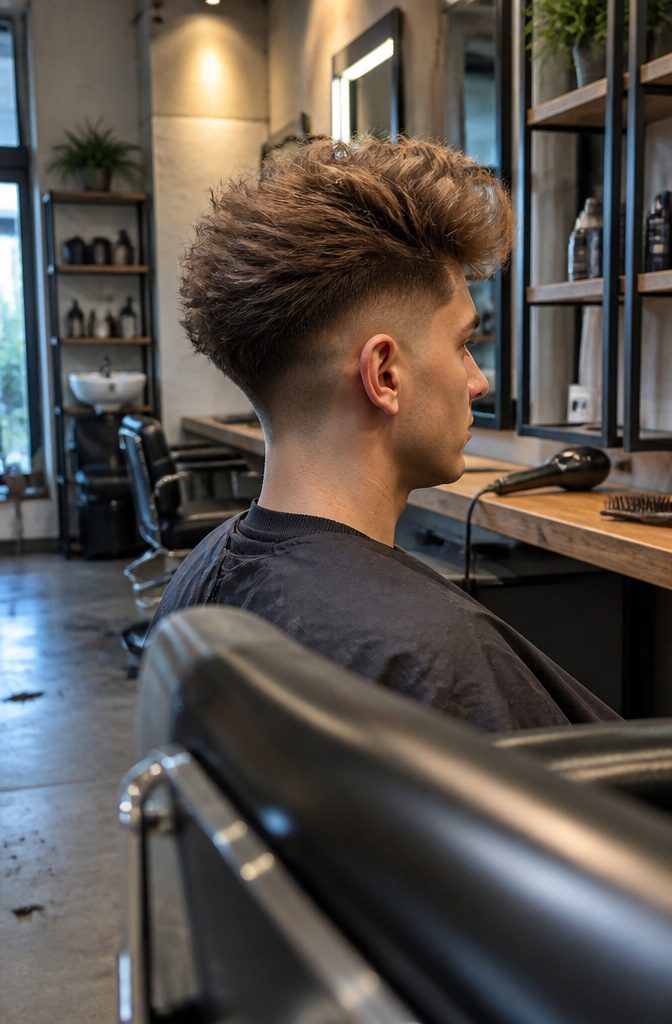
Ice cream cone hair is a fluffy, voluminous hairstyle with a rounded top that looks like a scoop of ice cream and edges that flip up and outward.
The style went viral on TikTok as a meme starting in late 2022, and the hashtag has pulled over 46 million views since then.
Most users aren’t particularly fond of the look, which gives it that exaggerated, slightly cartoonish quality that made it meme-worthy in the first place.
The cut itself follows the short sides, long top template. The sides and back are cropped shorter while the top stays longer toward the front and around the crown.
What sets it apart is how that top section gets styled: blown upward and outward so the rounded shape sits on top and the ends sweep away from the head instead of lying flat.
Some say it looks like the Shaggy haircut from Roblox, which tracks given the audience skews young.
1. Disheveled Taper Cut
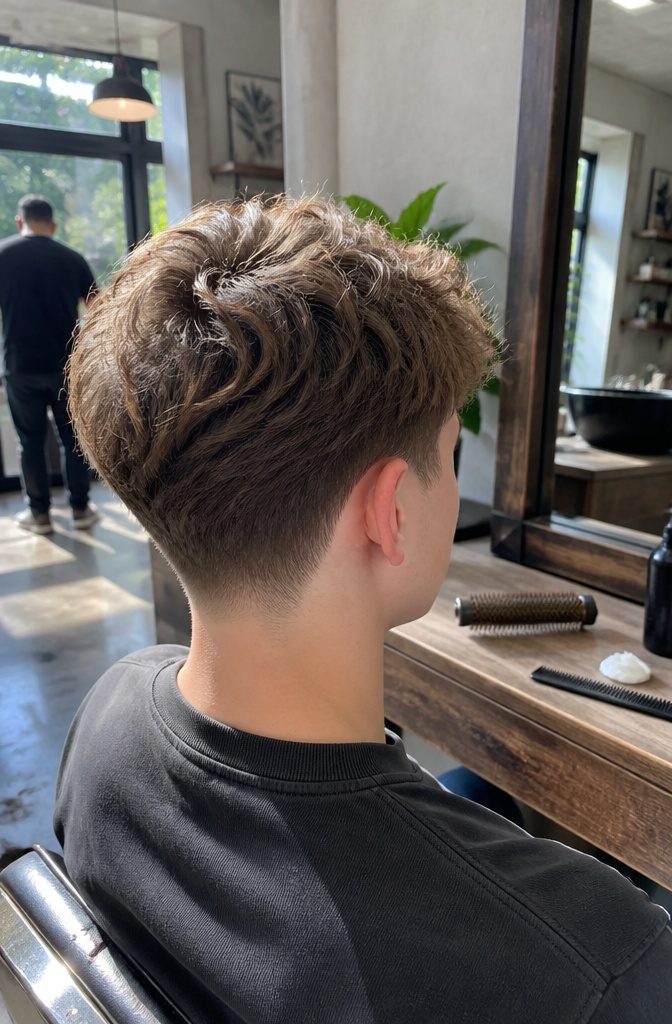
The back and sides are cut shorter just above the ear to keep things clean before the length merges into a longer top section. That contrast between short sides and a fuller crown is what gives the cut its structure.
Mousse scrunched through the strands creates the messy texture and volume that defines this version. Work it through by hand, fluffing the layers up as you scrunch to add air and separation.
The result reads more undone than styled, which is the point. It grows out well because the taper keeps things tidy while the top stays loose.
2. Taper Fade With Flipped Top
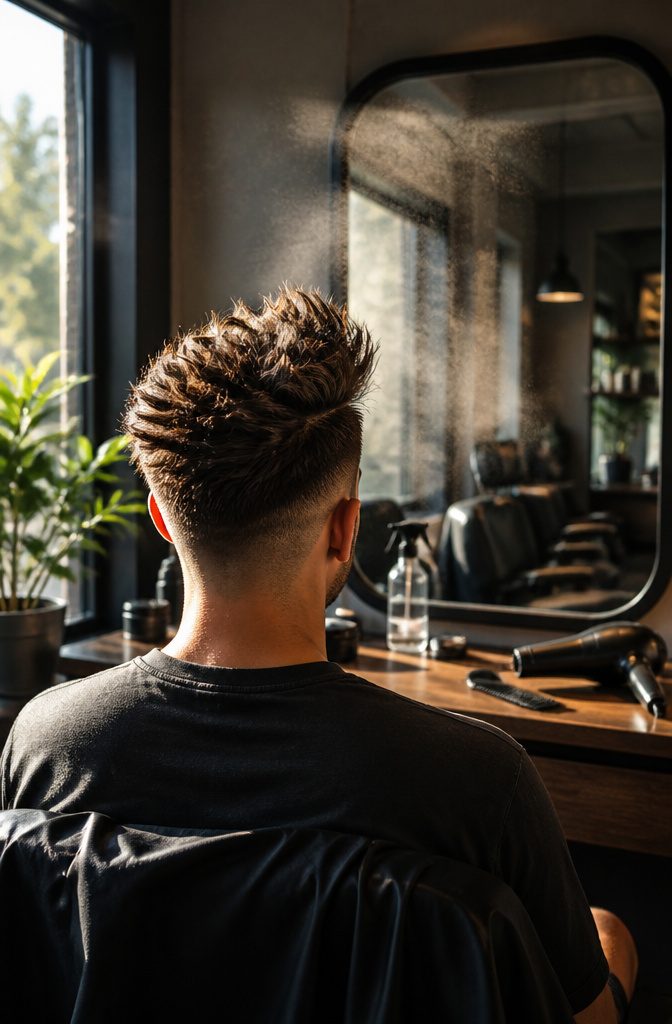
Thick hair gets reduced along the sides with a taper while the top section is layered and brushed upward, then locked in place with hairspray.
The layering creates different lengths at the crown and front, so when you brush those strands up, they form the rounded cone shape without looking blocky or blunt.
The taper keeps the back and sides clean, which makes the volume on top read even more dramatic.
You need enough length on top to stand the strands upright and hold the flip.
Hairspray is what keeps it from collapsing an hour later, so plan on a few seconds with the can each morning if you want the effect to last through your day.
3. Mid-Length Flowy Style
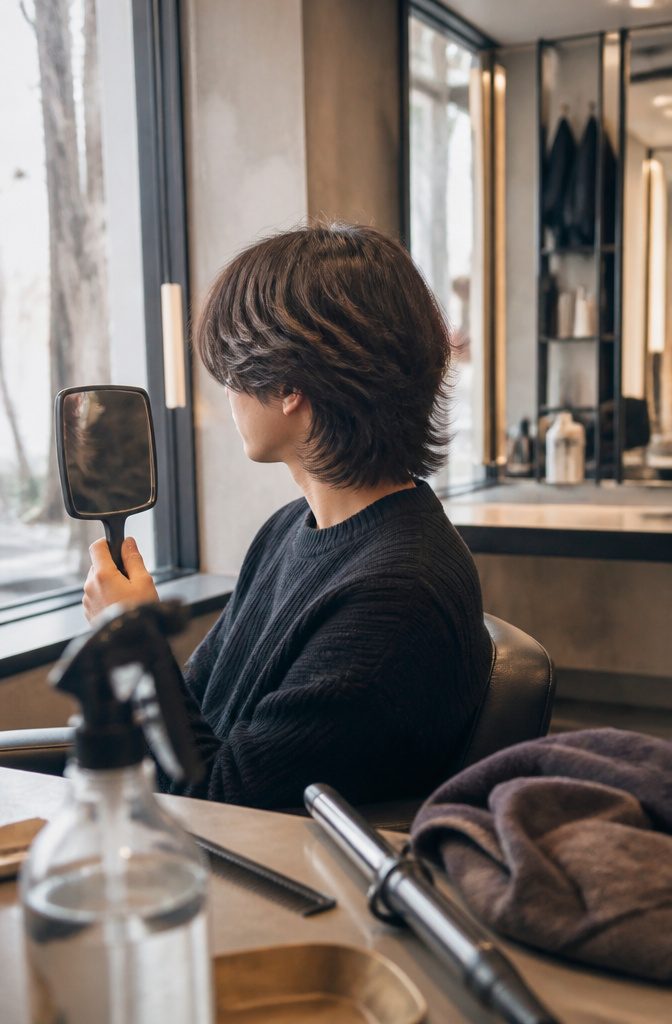
The medium-length version gives you enough canvas to curl the ends and brush the texture down into something smooth but still full.
Curl the ends with a curling iron to get the flip, then brush through gently to knock out the tight curl pattern without flattening the shape.
You want soft volume that reads as natural rather than stiff ringlets. Finish with a lightweight hairspray to hold the flip without weighing it down or turning the surface sticky.
The brushing step matters more than it looks like it should: skip it and the curls sit too defined, making the whole thing look coached instead of casual.
This approach works well if your hair sits somewhere between collar and chin length, where you have enough to shape but not so much that the flip disappears under its own weight.
4. Curly Tapered Style
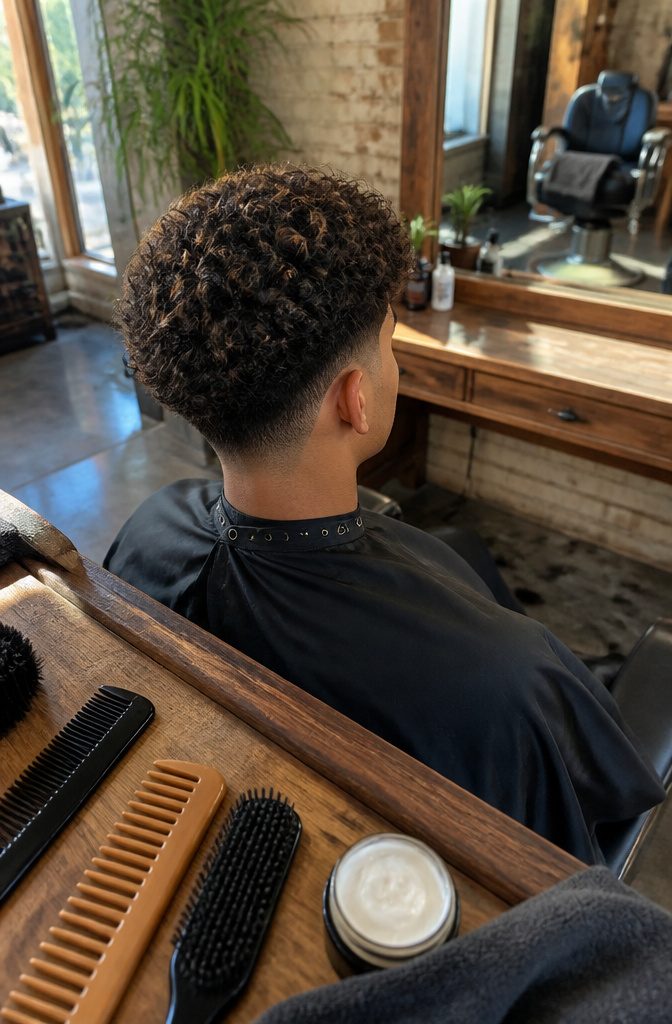
The taper blends both sides and the top into one smooth shape, which lets curly hair sit neatly around the head instead of flaring out unevenly.
The barber cuts shorter through the sides and back, then gradually transitions into longer curls at the crown. That graduation keeps the silhouette controlled without flattening the texture.
For ringlets that stay defined and touchable, use products built for curls: a leave-in cream or curl-defining gel while the hair is still damp.
Work it through with your fingers or a wide-tooth comb, then let it air dry or diffuse on low heat.
A denman brush or a pick can lift the roots without breaking up the curl pattern. The result reads polished but not stiff, and the taper grows out cleanly for four to six weeks before the shape needs a reset.
5. Textured Wings Cut
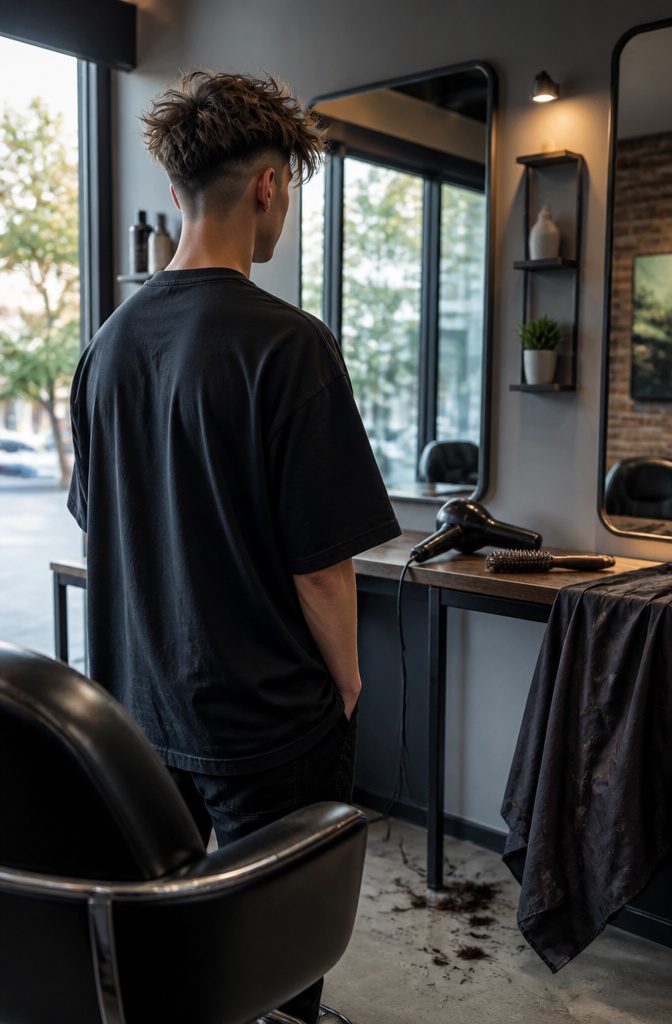
Scissors or clippers work through the top layers to add texture and movement, breaking up any flat or uniform appearance.
The barber lifts and chops into the hair rather than cutting it blunt, which gives the tousled, messy finish that makes this version work. The shaved sides keep the contrast sharp and pull attention straight to the crown.
Styling comes down to a round brush and a blow dryer. Lift the ends upward as you dry, rolling the brush away from the scalp to shape the hair like wings.
The heat sets the direction, and the gentle lift at the roots keeps the volume concentrated at the top. If your hair fights the shape, a light styling cream before drying helps it hold without looking stiff.
6. Blowout Taper Fade
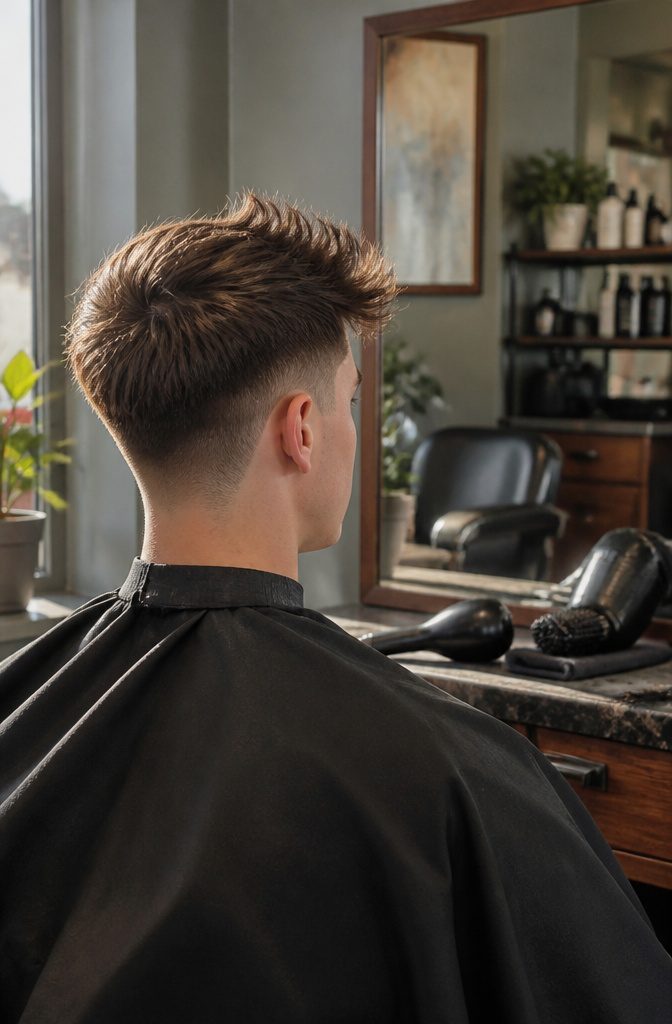
The top is left longer than usual so a round brush can create flipped ends and lift the roots during blow-drying.
That extra length gives the stylist room to introduce a gentle curve to the tips, which flips them outward and adds the wispiness that makes this version of the taper fade stand out.
Without those few extra inches on top, the round brush has nothing to work with and the style flattens.
I like this one for the movement it puts into what would otherwise be a standard fade.
The blowout takes a bit more time than air-drying or running product through damp hair, but you get visible lift at the crown and ends that catch light instead of lying flat.
7. Bowl Cut With Brushy Ends
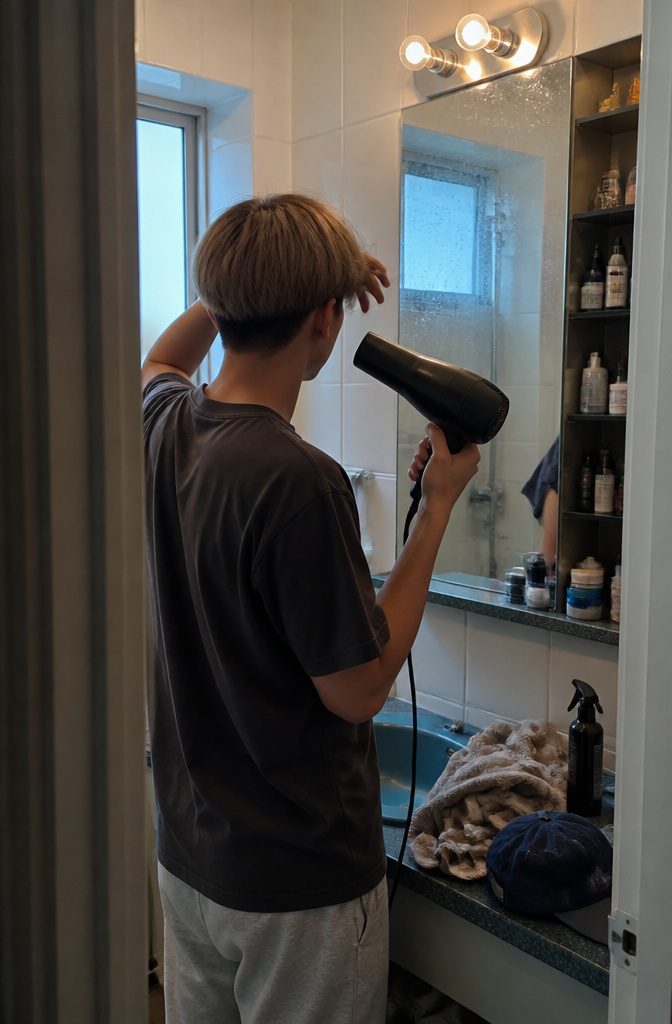
Straight hair holds the bowl shape well here, and that structure is half the work. The cut gives you clean sides and length on top, but the crown curled slightly upward is what turns it into the rounded silhouette.
Blow-dry the top while brushing or lifting the roots up and back, then work on getting the ends to flip out evenly all the way around.
If you don’t have a round brush or the flip isn’t landing where you want it, put on a baseball cap and blow-dry the hair sticking out from under the brim.
The cap holds everything in place while you direct heat upward on the exposed ends, and you get an even edge without needing to section and work around your whole head.
If you don’t have a round brush or can’t get the perfect bend in your hair, throw on a baseball cap and blow-dry the ends that are sticking out from the cap in an upward direction.
— wikiHow
That trick saves time and gives you more control if your hands aren’t steady with a brush mid-blow-dry. Heat protectant spray before you start keeps frizz down and stops damage from repeat styling.
8. Fluffy Taper
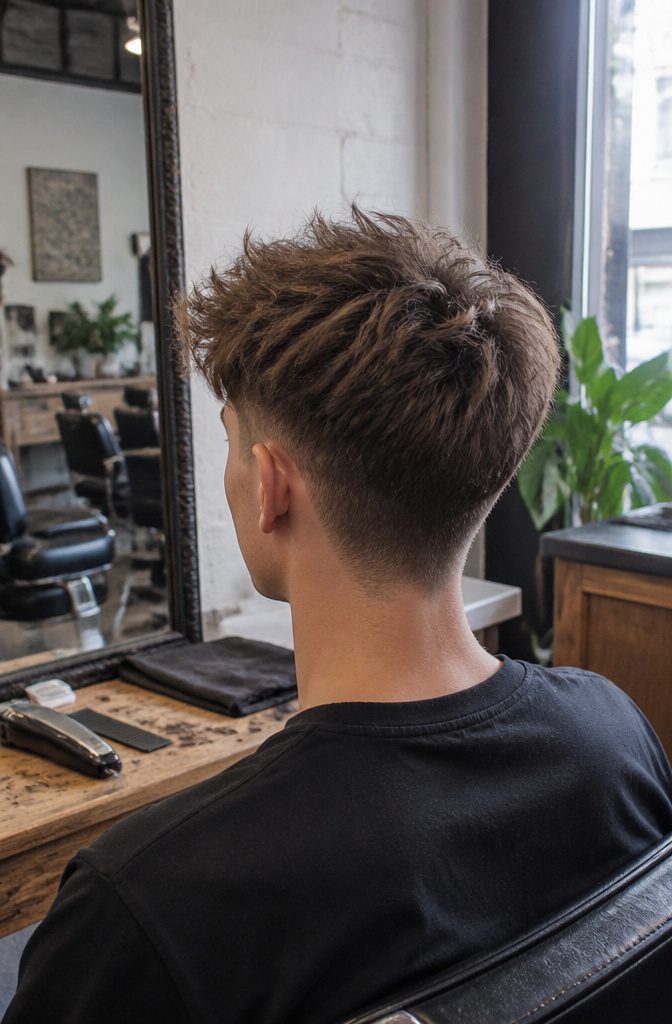
The messy, fluffy top sits against clean geometry: tapered hair running from the crown down to the nape, shaved sides framing the whole thing.
The contrast does the work. Where the ice cream cone shape asks for volume and texture up top, the taper keeps the rest controlled and tight to the head.
The look reads relaxed without sliding into unkempt, mostly because the sides and back are clipped short enough that the fluffy section becomes the only thing pulling focus.
I would keep the taper gradual rather than abrupt so the transition from textured top to bare skin feels deliberate. The shaved sides stay clean longer than a blended fade, which matters if you are stretching time between cuts.
9. Flared-Out Textured Crop
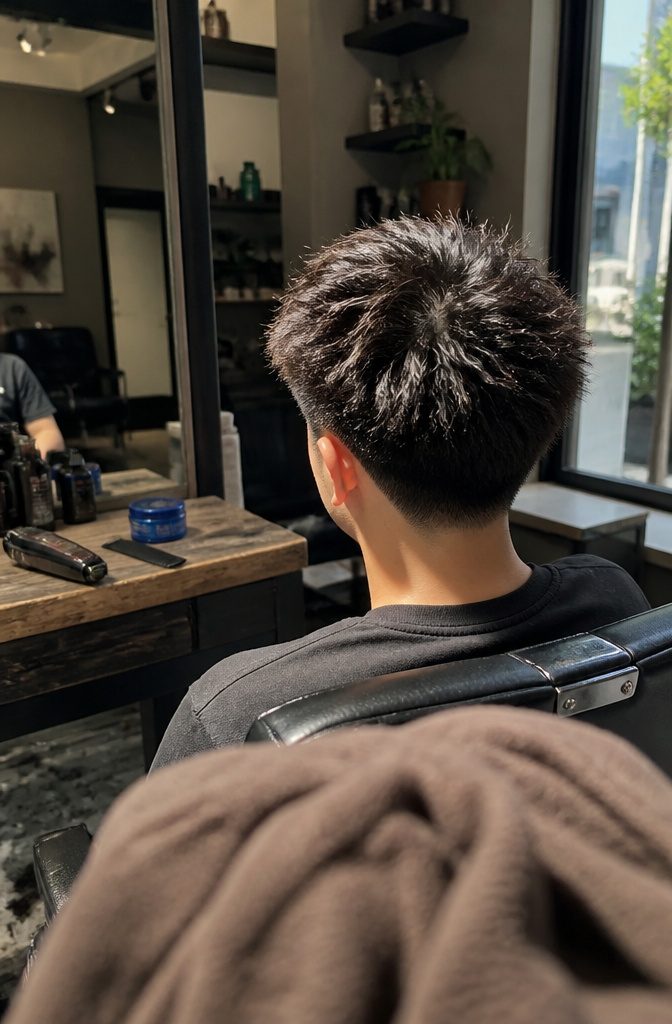
A low taper pulls bulk out of thick hair without flattening the texture you want to keep on top.
The taper sits low on the sides, so the contrast between cleaned-up perimeter and textured crown reads clearly. That contrast is what gives the flared-out effect: volume on top, control at the edges.
Thick hair benefits most from this approach because the low taper removes enough weight to let the top move without thinning the whole cut into something wispy. You keep density where it counts.
Styling powder or pomade provides the firm hold needed to lift and separate the texture on top.
Powder works well if your hair tends toward oily, pomade if it is dry or coarse. Either way, the product locks the flare in place for the day.
10. Wavy Fringe Haircut
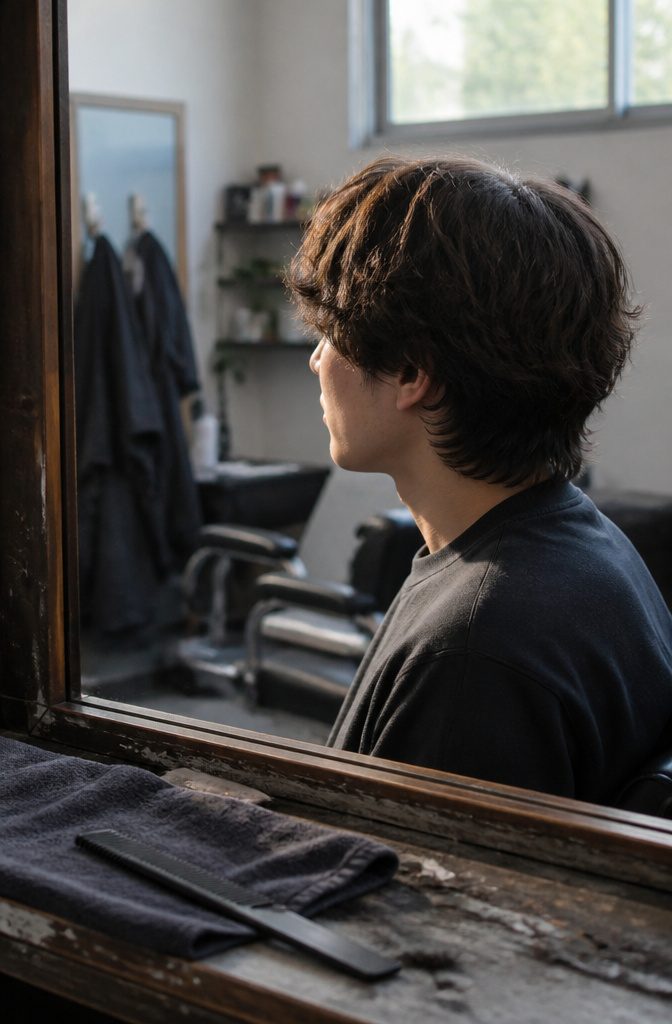
The long, textured fringe that defines this version of the cut sits at roughly the same length as the hair in back, and the flippy sections at the sides create a one-length illusion even when the top has slightly more bulk.
That visual continuity keeps the silhouette balanced without the hard contrast of an undercut or fade.
If you have a broad forehead, the fringe works as functional coverage.
It brings attention forward to the eyes rather than to the expanse above them, and the texture keeps it from reading as a blunt, heavy bang. The flip at the sides adds movement that softens the overall shape.
You will need length on top and at the sides before the barber can shape this. Growing out at least a few inches gives enough material to texturize and flip without the ends looking choppy or too short to move.
Bring a reference photo so the barber understands the balance you want between the fringe and the back.
11. Basic Rounded Ice Cream Hairstyle
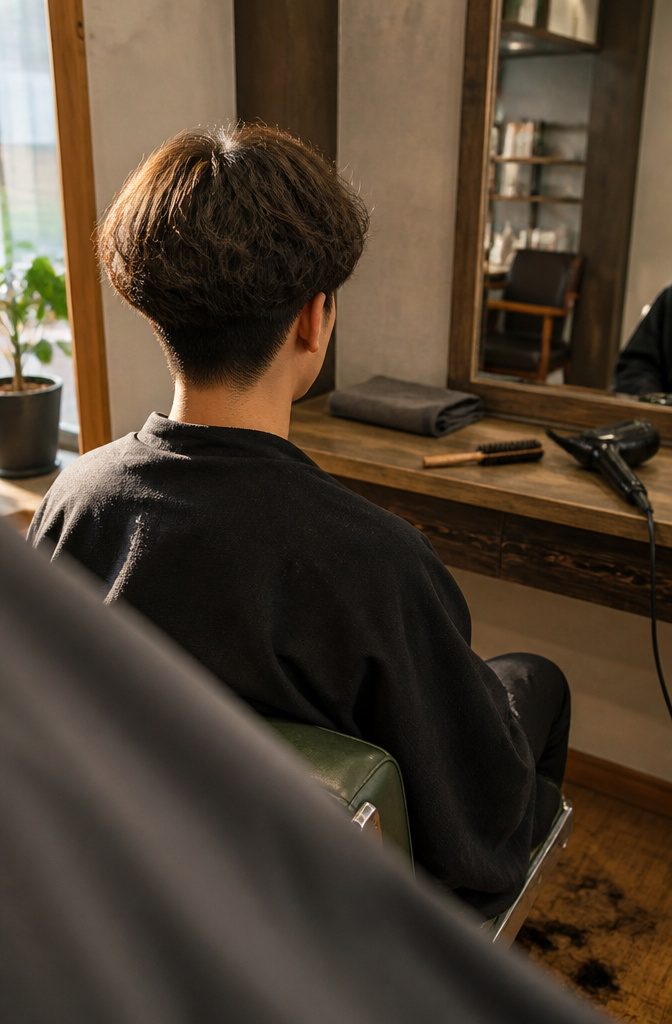
The top is smooth and rounded, the edges flip up and outward, and the whole thing sits like a scoop above shorter sides.
That’s the basic shape. It’s a modern version of short sides, long top, cropped close at the back and around the ears while the crown and front stay longer to hold the curve.
You need layered bangs to make it work. The layers give the hair enough movement to flip rather than just sit flat, and they let you build volume without adding weight that pulls the shape down.
Most versions start with at least 4 inches on top, though you can push it longer if you want more drama.
The styling is where the shape actually happens. Blow-drying with a round brush does most of the work, with the airflow angled from underneath so the hair lifts as it dries.
When you reach the middle section, you flick your wrist upward to set the curve. That final flick is what turns layered bangs into the flipped-out edges that give the cut its name.
Grow Your Hair to at Least 4 Inches
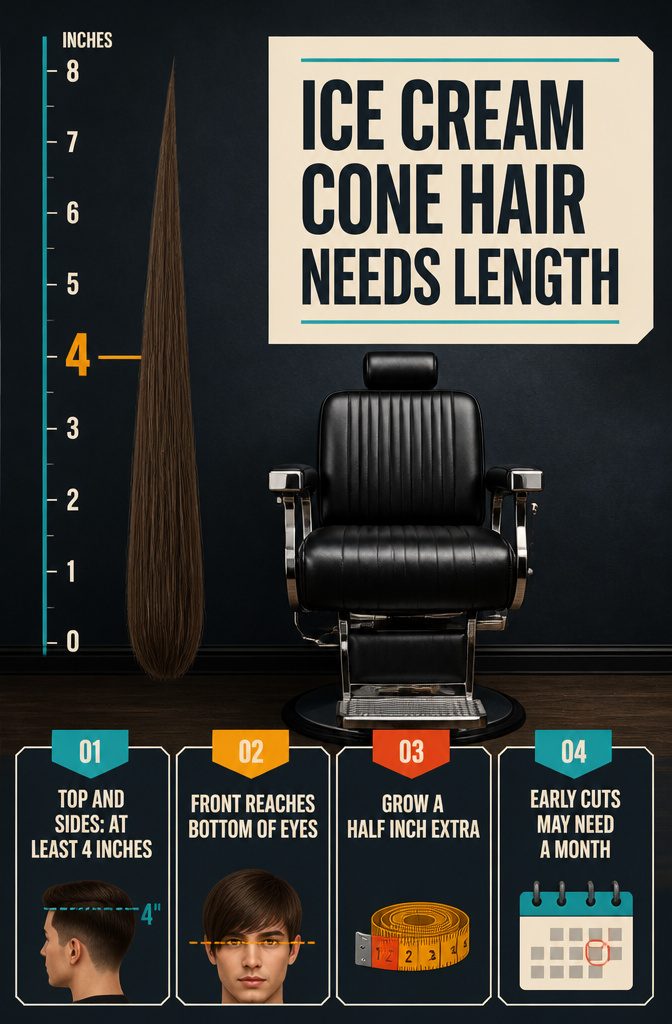
The top and sides need to hit at least 4 inches before you commit to the cut, or wait until the front reaches the bottom of your eyes.
Those lengthy strands on the top and sides form the base for everything that happens next, and without them the shape collapses before you get started.
Hair always looks shorter once you flip it upward and lock in the curve, so what feels long enough at rest won’t be long enough styled.
I’d rather have someone grow it a half inch longer than they think they need and trim back if the volume gets excessive.
Cutting too early means you’ll be back in a month trying to force a style out of hair that still isn’t cooperating, and the round brush can only do so much with short sections that don’t want to hold the bend.
How to Style It With a Round Brush and Blow Dryer
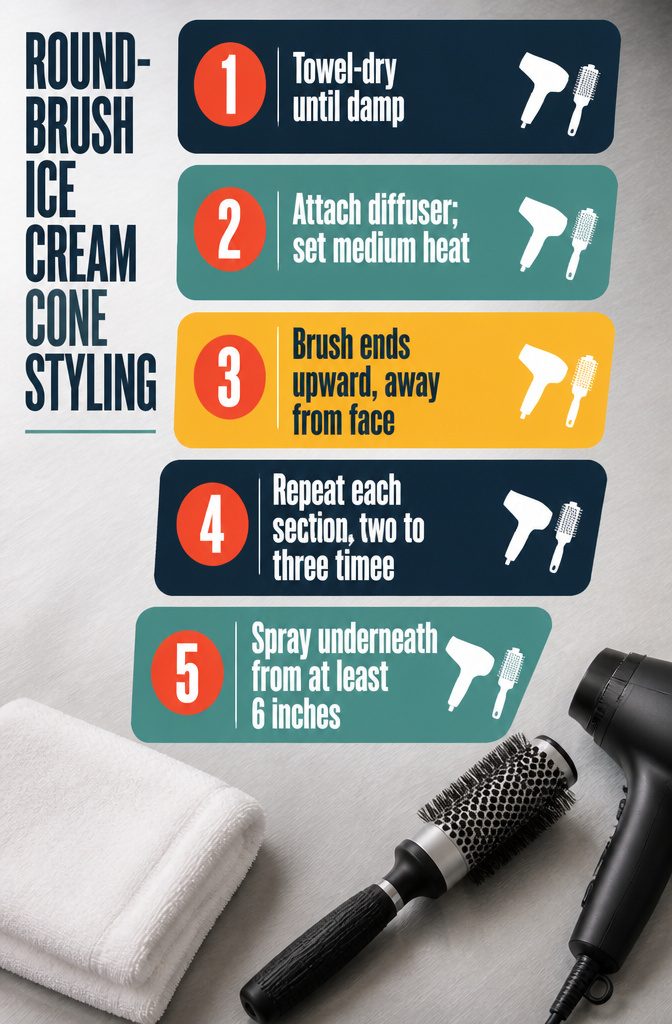
- Towel-dry your hair until it remains damp, not soaking wet and not fully dry.
- Attach a diffuser to your blow dryer and set the heat to medium.
- Work with a round brush to curl the longer ends upward and away from your face. This creates the signature flipped curve at the tips.
- Repeat each section two to three times if the first pass does not hold the bend you want.
- Finish with volumizing hairspray, holding the can at least 6 inches away. Spray from underneath to keep the strands from getting weighed down.
The round brush does most of the work here. If the curve does not set after one pass, go back over that section rather than settling for limp ends that will drop by midday.
The Baseball Cap Method When You Don’t Have a Round Brush
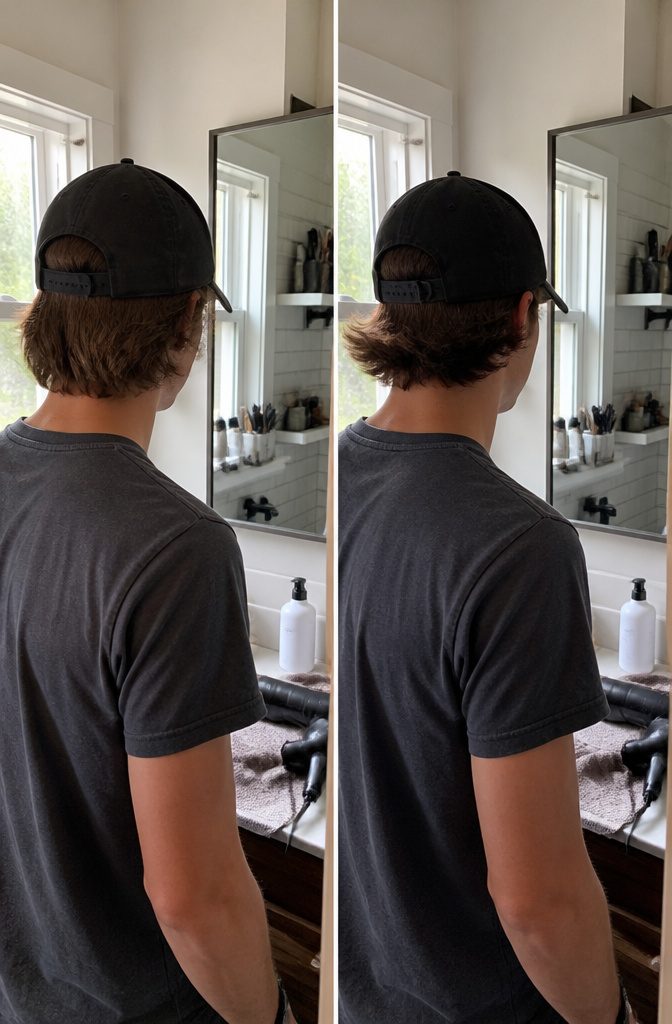
If you don’t have a round brush, wear a baseball cap and blow-dry the ends sticking out from the cap upward.
The rim holds everything in place while you direct the heat at the exposed hair, creating an even flippy edge without needing to curl each section by hand.
Apply a heat protectant spray first to minimize frizz and prevent damage from the concentrated airflow.
The method works because the cap acts like a guide, keeping the length flat while the blow dryer bends only the tips in the same direction.
Once the ends are dry and flipped, pull off the cap and check for evenness.
If one side needs more lift, tuck the hair back under the cap and hit it with another pass of warm air angled up from below.
Frequently Asked Questions
What is ice cream cone hair?
Ice cream cone hair is a fluffy, voluminous hairstyle with a rounded top that resembles a scoop of ice cream and edges that flip up and outward.
The style features shorter sides and back with longer hair on top, blown upward to create the signature rounded shape. It went viral on TikTok as a meme in late 2022, pulling over 46 million views since then.
How do I style ice cream cone hair?
Use a round brush and blow dryer to curl the longer ends upward and away from your face while the hair is damp, repeating each section 2 to 3 times if needed.
Finish with volumizing hairspray from at least 6 inches away, spraying from underneath to keep the strands lifted.
If you don’t have a round brush, wear a baseball cap and blow-dry the ends sticking out from the cap in an upward direction.
Why is the ice cream haircut so popular?
The ice cream haircut became popular as a viral meme on TikTok starting in late 2022, largely because most users find the exaggerated, cartoonish look amusing rather than attractive.
The style’s dramatic, fluffy appearance and resemblance to the Shaggy haircut from Roblox made it meme-worthy.
The most popular video features 2 boys with dramatic flipped-out hair followed by stock photos showing scoops of ice cream and waffle cones on top of their heads.
How long does my hair need to be for ice cream cone hair?
Your hair needs to reach at least 4 inches on top and sides, or wait until the front reaches the bottom of your eyes.
Hair always looks shorter once you flip it upward and lock in the curve, so what feels long enough at rest won’t be long enough when styled.
Growing it a half inch longer than you think you need gives you room to work with the round brush and hold the bend.