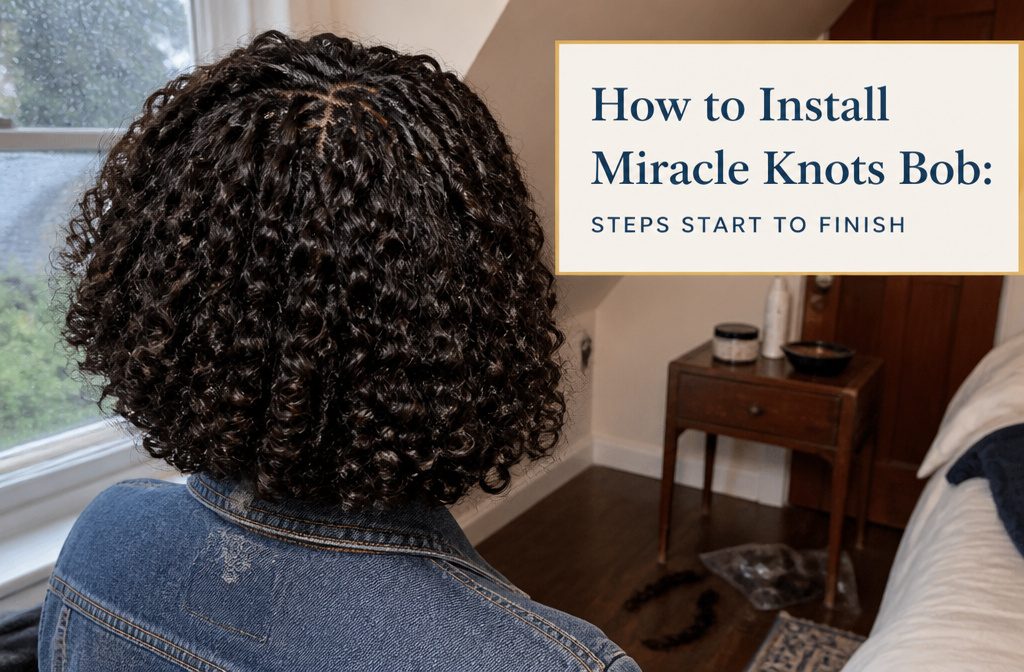
Miracle Knots is a crochet braid technique that attaches curly hair extensions to cornrowed base braids using pre-looped strands and a lark’s head knot at each anchor point.
The install lasts 4 to 6 weeks before tangling and buildup make takedown harder than it needs to be. A full head uses 200 to 300 strands depending on whether you want natural fullness or thick boho volume.
1. Choose and Prepare the Hair
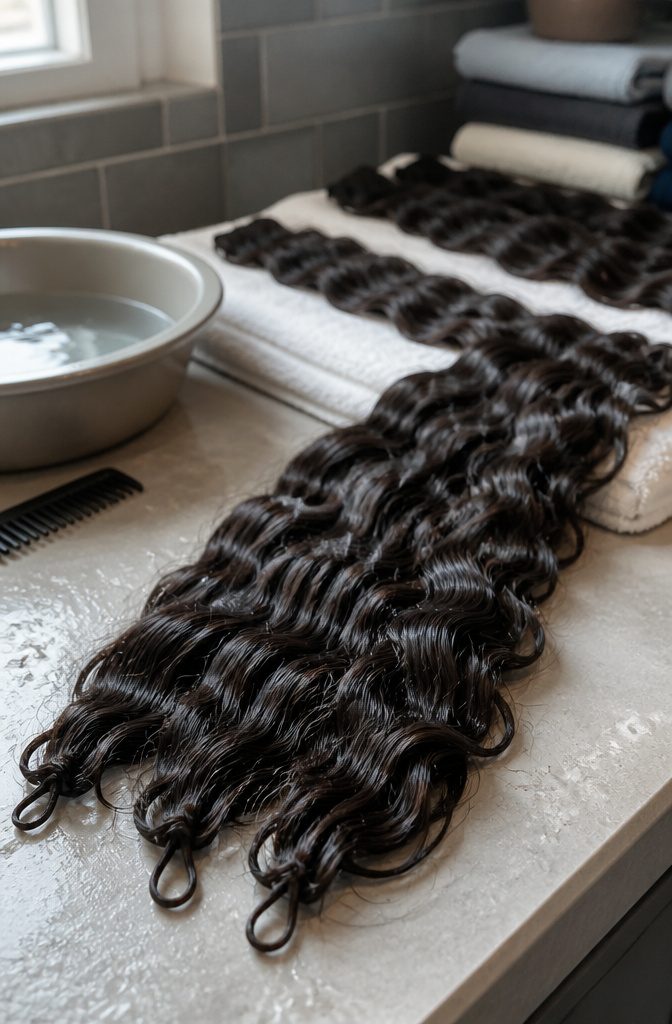
Pre-separated human crochet hair beats synthetic for Miracle Knots because it weighs less and moves the way hair growing from your scalp does.
The feather crochet style comes with a small string attachment already looped, so you skip the bulk of tying knots yourself and the attachment stays nearly invisible once the braid is finished.
That pre-looped design matters for beginners who want clean results without wrestling with knot technique.
I washed the YWigs Official Feather Crochet Boho Human Hair 120 Strands Loose Deep Wave in 16 inches, 3 packs before installing and let the hair dry while I braided my natural hair.
Washing first removes any residue from packaging and lets you see how the texture behaves when wet, which is how you’ll treat it later. The 16-inch length feels longer than you expect once it’s in.
2. Section and Braid Your Natural Hair
Section and Braid Your Natural Hair
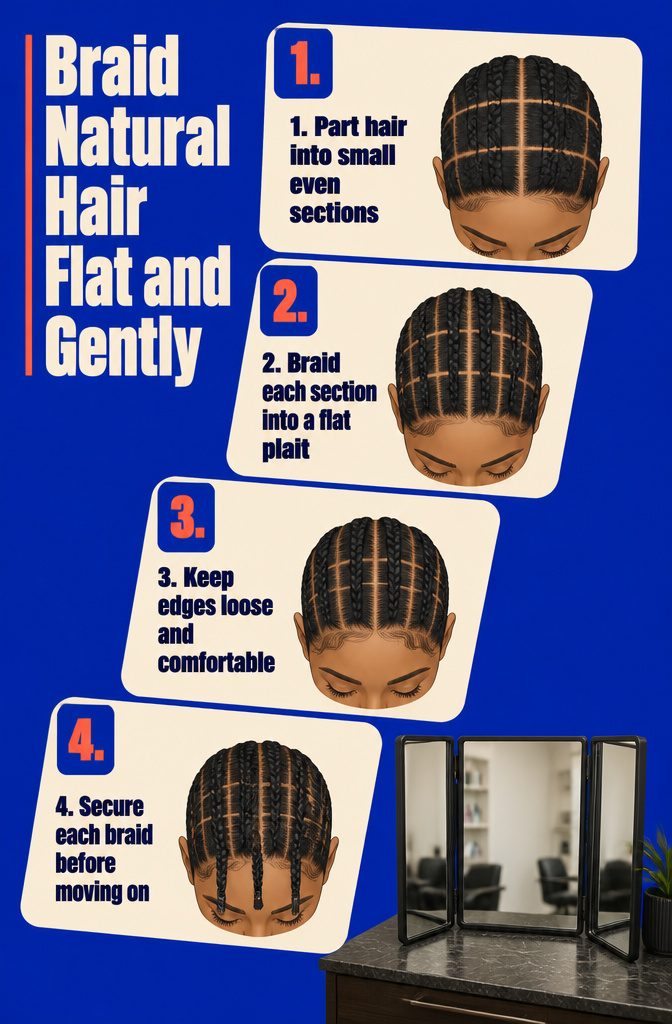
- Part your hair into clean, even, small sections. A three-sided mirror helps you see the back while working, so you catch crooked parts before you braid.
- Braid each section into a flat individual plait. Keep the tension snug but comfortable. If the braid feels tight while you’re working, it will ache by evening.
- Avoid overtightening around your edges. Loose braiding at the hairline means you can pull the finished style into a ponytail the same day without soreness.
- Secure each braid temporarily as you finish it, then move to the next section. The base braids hold the crochet hair, so each one needs to lie flat and stay put.
3. Extend Each Braid With Crochet Hair
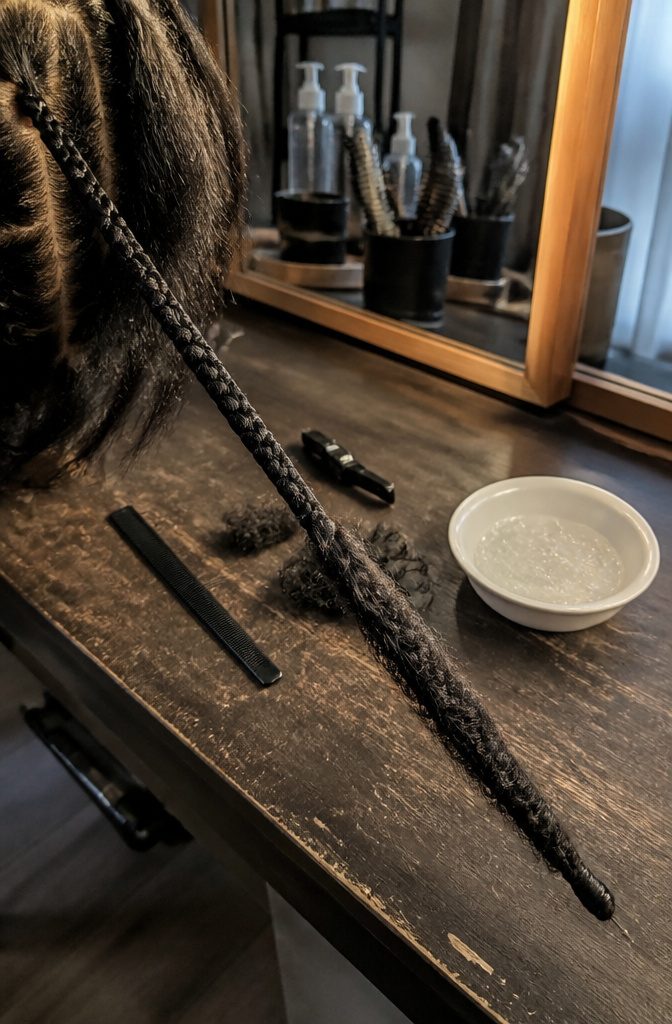
Once the natural braid reaches the point where your own hair is about to run out, slide one piece of feather crochet hair into the plait and continue braiding all three sections together.
The crochet hair extends the braid to whatever finished length you want without leaving a visible join or a thin tip that gives away where your hair stops and the extension starts.
The end of each extended braid needs to stay closed.
Braiding gel works if you have it on hand, or you can peel a very thin strand from the braid itself and wind it tightly around the tip until it locks.
Both methods hold through washing and styling. I prefer the wrapped-strand approach because it uses what is already there and skips an extra product step, though gel dries faster if you are working through a full head in one sitting.
4. Attach the Curly Hair With a Crochet Hook
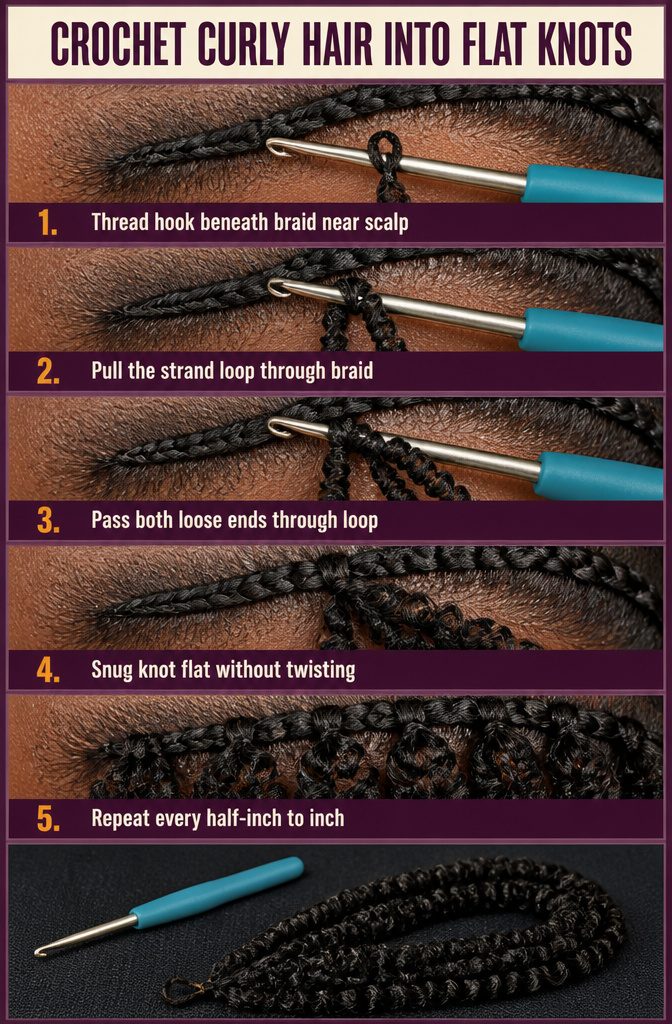
- Thread the crochet hook through the base braid from underneath, catching it about a quarter-inch from the scalp where the braid starts to firm up.
- Hook the loop at the top of your pre-looped curly strand and pull it back through the braid, leaving the loop on one side and the two loose ends on the other.
- Pass both ends of the curly hair through the loop you just pulled through, forming a lark’s head knot around the base braid.
- Tug gently but firmly on the ends to snug the knot against the braid, checking that it sits flat and does not twist.
- The finished knot sits nearly flush with the scalp and disappears under the curls once you move on to the next section.
- Repeat along each base braid, spacing knots every half-inch to an inch depending on how much volume you want.
5. Choose Your Fullness Method
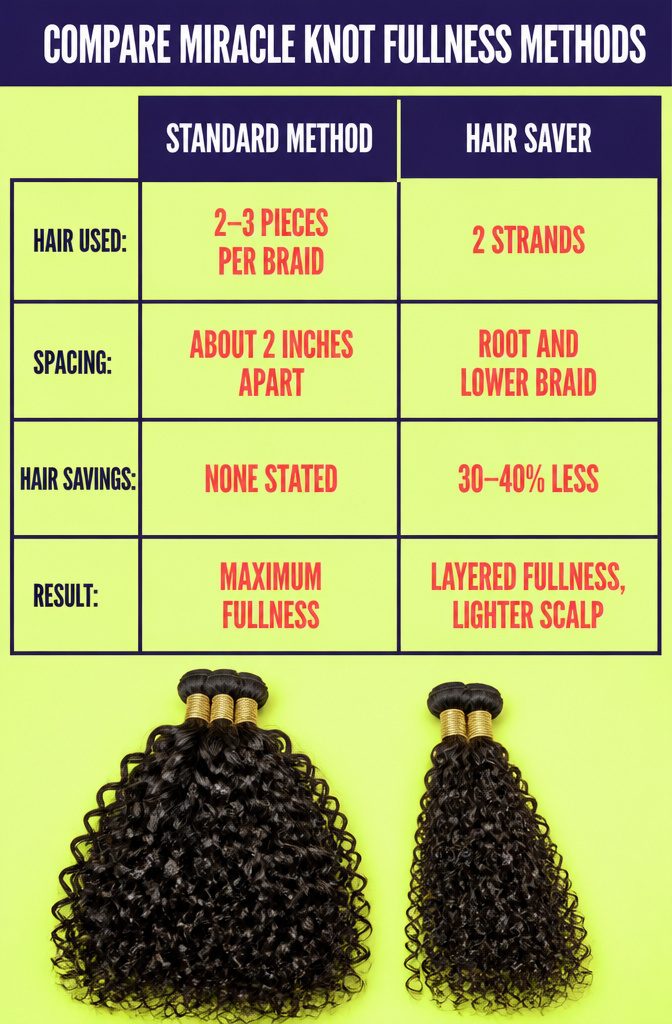
The standard approach spaces 2 to 3 pieces per braid about 2 inches apart, with 3 pieces giving you maximum fullness.
Each piece gets its own miracle knot at a different height, so the curls layer as the braid lengthens. That works when you want serious volume or bought hair specifically for a dense result.
The Hair Saver method cuts hair use by 30 to 40 percent by anchoring one piece near the root, then pulling half of that same strand out through the side of the braid halfway down before knotting a second piece near the bottom.
You get the layered effect of 3 pieces with only 2 strands. Lighter on the scalp, lighter on the budget, and the look still reads as full once you fluff the curls.
Some prefer the opposite: one piece placed somewhere along the length of each braid, giving a looser, more textured result without the super-full effect. I prefer that approach when you want movement over density.
6. Finish and Blend the Curls
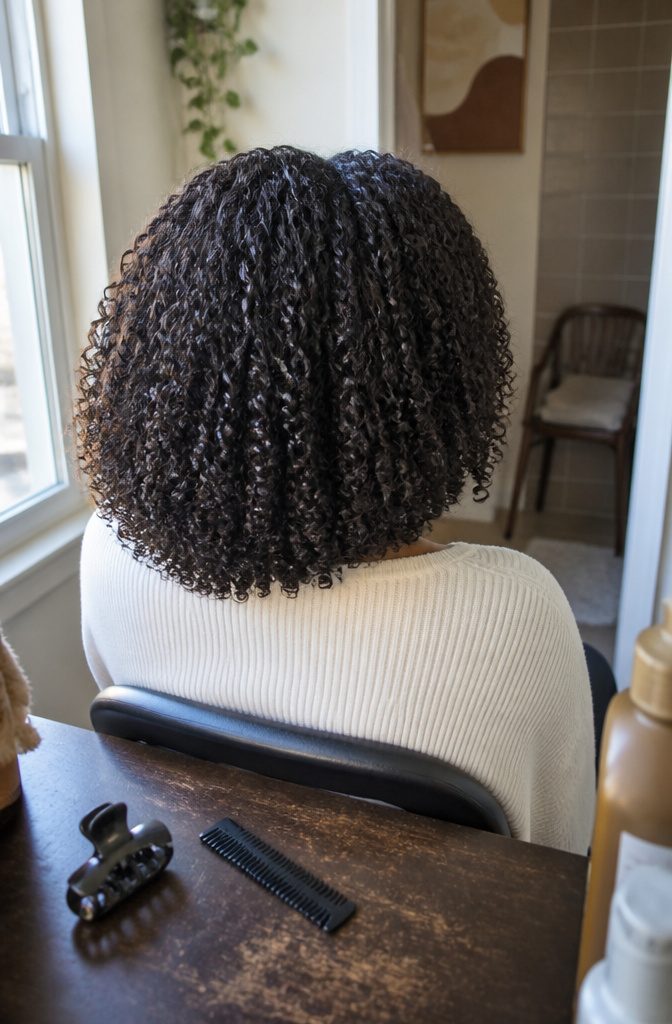
Once every curl is crocheted through, the bob needs one more pass to look finished rather than freshly installed.
Finger-coiling each curl brings back definition if any pieces flattened during the crochet process. Wrap a small section around your finger from root to tip, hold for a second, then release.
The curl springs into a tighter, more uniform shape. For volume without quite so much definition, finger-fluffing works instead: lift curls at the root and separate any clumped sections with your fingertips.
A light leave-in conditioner keeps the synthetic curls soft and cuts down on frizz.
Work a small amount through the lengths, avoiding the roots where your natural hair meets the crochet base. Too much product weighs the style down.
If you braided your natural hair loosely enough, the bob sits comfortably from the first hour.
You can pull it into a low ponytail or clip the sides back without tension pulling at your scalp, which matters most on the first night when tighter styles still ache.
Nighttime Protection and Scalp Care
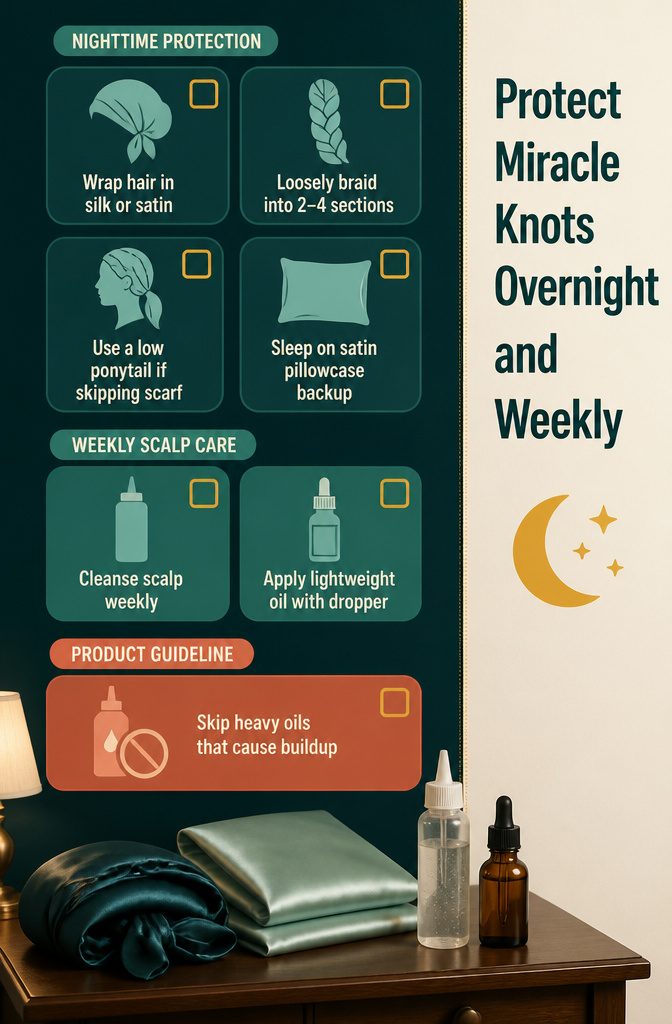
Nighttime protection comes down to reducing friction while you sleep.
- Wrap your hair in a silk or satin scarf before bed. For extra protection, loosely braid or twist the braids into 2–4 large sections before wrapping to prevent frizz.
- If you skip the scarf, put the braids in a low ponytail or loose braids. The knots hold up well overnight without tangling or matting, but some containment helps.
- Sleep on a satin pillowcase as backup protection if the scarf slips.
- Cleanse your scalp weekly with dry shampoo or diluted shampoo in a nozzle bottle. Your scalp still needs attention even though the hair is braided.
- Apply a lightweight oil to your scalp using a dropper. Jojoba or tea tree mixed with a carrier oil work well. Skip heavy oils that attract buildup and weigh the style down.
How Long Miracle Knots Last
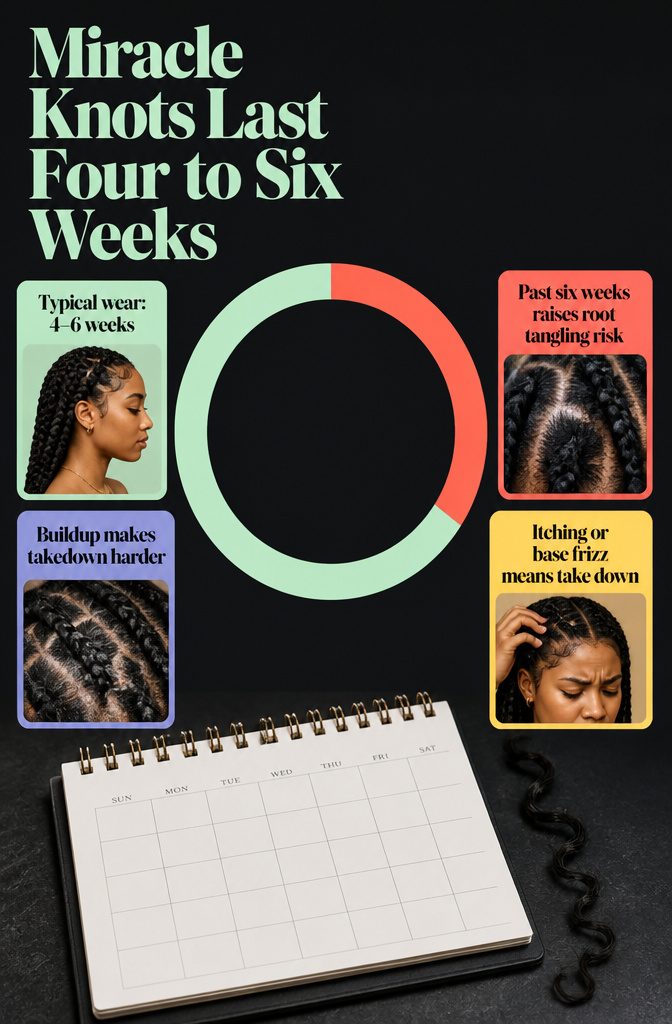
Miracle Knots typically last 4–6 weeks. That window gives you plenty of time to enjoy the style without inviting trouble at the roots.
Pushing past 6 weeks raises the risk of tangling where the braid meets your scalp and buildup that makes takedown harder than it needs to be.
Watch for the signs: itching, frizz creeping up from the base, or a fuzzy halo around the braids. Any of those means it’s time to take them down, even if you haven’t hit the six-week mark.
One blogger wore the style for over a week and found it easy to maintain, which tracks with what most people report during the first few weeks.
The style holds its shape well early on, and daily care stays light if you’re wrapping at night or tying the braids loosely before bed.
How Many Strands You Need for a Full Head
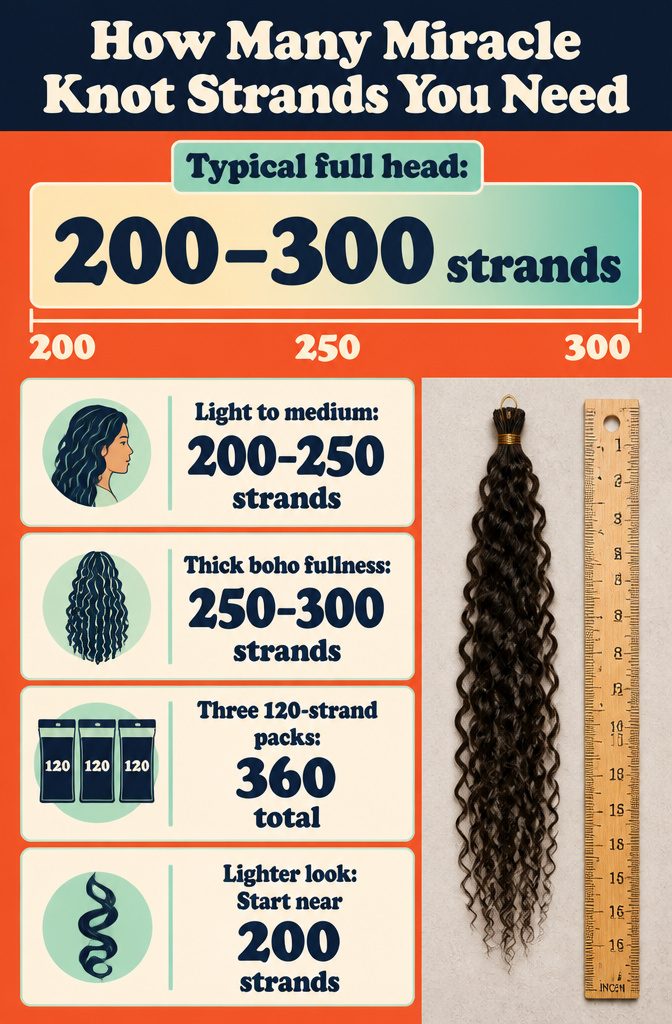
A full head asks for 200–300 strands to land somewhere between natural and thick.
The lower end of that range, 200–250 strands, gets you light to medium fullness without looking heavy. Push toward 250–300 strands if you want a thick, full boho look with volume that reads intentional rather than cautious.
One install I looked at used three packs of 120 strands each, all cut to 16 inches, and the result was thick hair that sat a little past the shoulders.
That puts her at 360 strands total, which is over the typical range and confirms that more strands tilt the style toward density rather than delicate.
If you prefer a lighter hand, stay closer to 200 strands and add more later if it feels sparse once the curls settle.
Frequently Asked Questions
How long do Miracle Knots boho braids last?
Miracle Knots last 4 to 6 weeks.
Going past 6 weeks increases the chance of tangling at the roots and buildup on your scalp. Take them down sooner if you notice itching, frizz near the base, or a fuzzy halo around the braids.
How many strands do you need for a full head of Miracle Knots?
A full head needs 200 to 300 strands.
Use 200 to 250 strands for light to medium fullness, or 250 to 300 strands for a thick, voluminous boho look. One install with 360 strands landed on the dense side, so stay closer to 200 if you prefer a lighter result.